


4
Symbols
V volts
A amperes
Hz hertz
W watt
~ alternating current
n
0
no load speed
Class II Construction
rpm revolutions per minute
Intended use
Cordless drills are suitable for drilling metal, wood,
plastics and similar materials, as well as tighten-
ing and screwing in screws (into wood, up to a
diameter of 6 mm).
The LC 45 battery charger is designed for recharg-
ing the battery pack listed.
The user will be liable for damage
due to improper use.
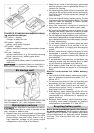
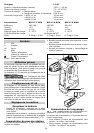
Wall mounting LC 45
The charger LC 45 has two longitudinal slots on its
rear by which it can be suspended on walls using
two screws (e.g. button-headed or fl at head screw
with a shaft diameter of 5 mm). Screw both screws
into the wall 96 mm apart until the screwhead is
protruding from the wall by approx. 4 mm.
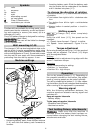
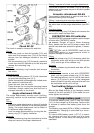
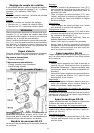
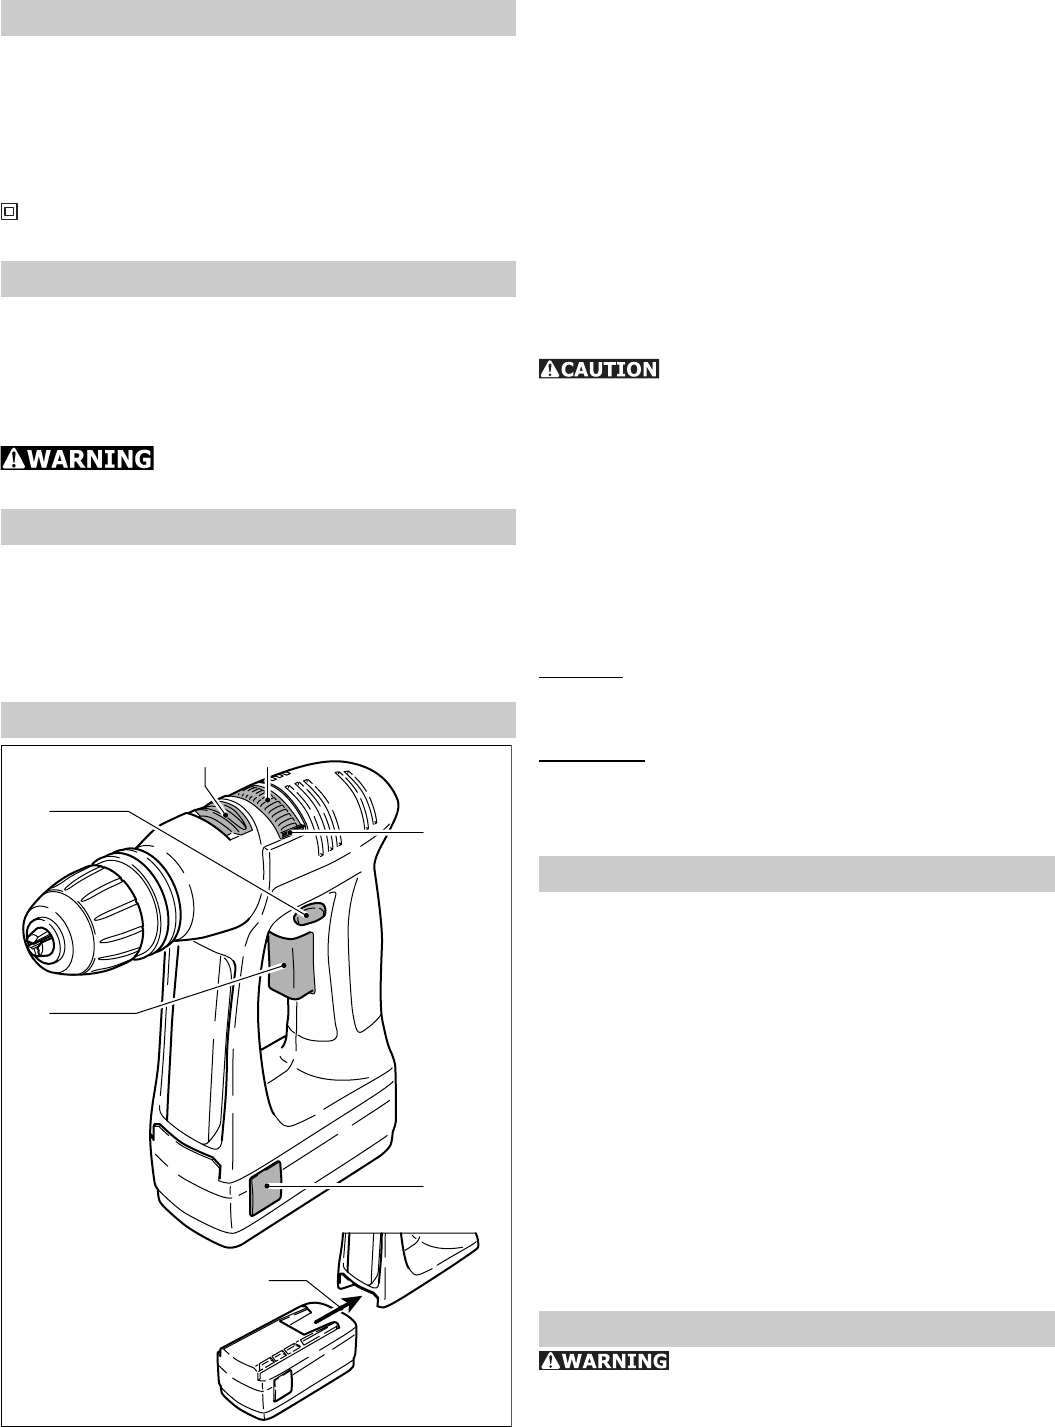
Machine settings
1.3 1.4
1.2
1.1
1.7
1.5
1.6
Exchanging the battery pack
- Removing battery pack: Press the two buttons
(1.6) and slide the battery pack forwards to
remove.
- Inserting battery pack: Slide the battery pack
into the holder on the underside of the handle
until it latches into place (1.7).
To change the direction of rotation
The selector button (1.2) determines the direction
of rotation.
• Turn button from right to left = clockwise rota-
tion.
• Turn button from left to right = anticlockwise
rotation.
• Selector button in central position = circuit in-
terlock.
Shifting speeds
Change only when completely
stopped!
Using the shift lever (1.3), the speed can be
changed.
• 1. Speed: Lever forward - Figure 1 is visible.
• 2. Speed: Lever backwards - Figure 2 is vis-
ible.
Torque adjustment
By turning the adjustment ring (1.4) the required
torque can be adjusted. The arrow (1.5) aligns
with the adjusted state.
Drilling:
Drilling symbol on adjustment ring aligns with the
arrow = maximum torque.
Screwing:
Torque corresponding to setting:
• Position 1 = low torque
• Position 20 = high torque
Operation
Turn on by pressing button (1.1). Depending on
the pressure exerted on the button, the adjust-
ment of running speed can be varied infi nitely.
Turn off by releasing the button (1.1). After releas-
ing the button, the chuck is stopped and therefore,
after-running of the equipment is prevented.
Warning signal
With the following operational statuses, the
machine sounds an acoustic warning signal and
switches off:
Peep at regular intervals
- Battery empty
Triple peep at regular intervals
- Excessive load (torque)
- Machine too warm.
Tool holding fi xture, attachments
Make sure that the machine is
switched of and the battery block has been re-
moved before changing the tool holding fi xture,
attachments and tools.