


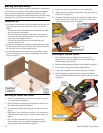
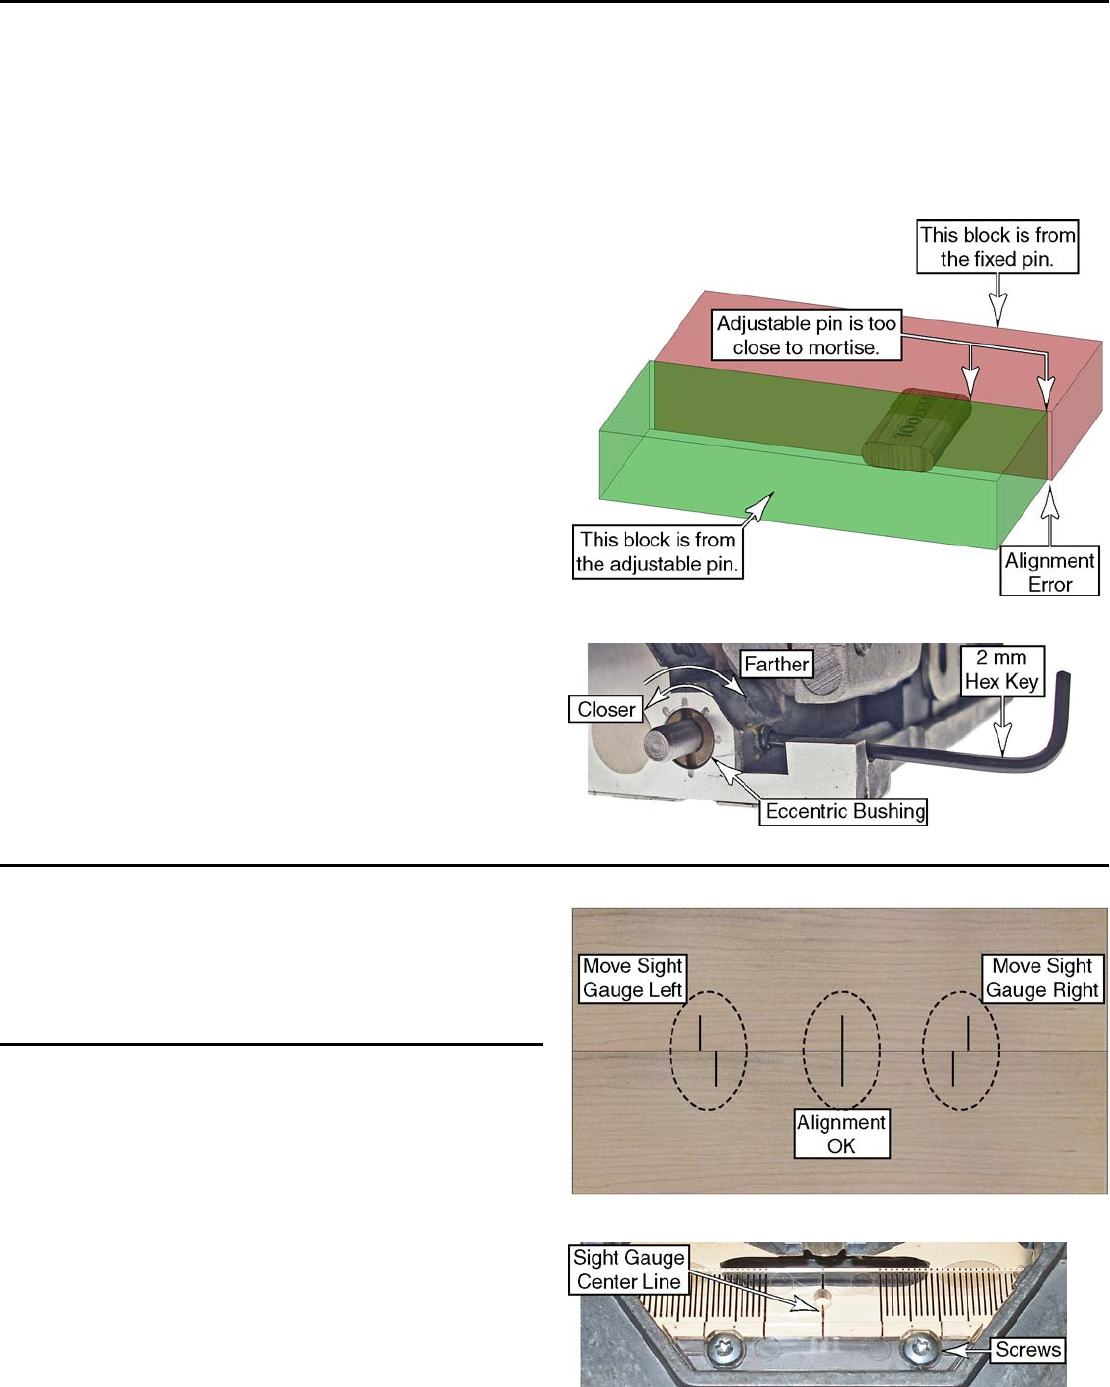
Calibrating the Locating Pins
It is important that the two locating pins are perfectly
spaced from the center of the mortise hole for properly
aligned mortises. The factory default setting is in the neutral
position.
1. Using the procedure described in “Using the Locating
Pins” on page 11, plunge a left-hand and right-hand
mortise into two blocks of scrap wood. Make sure the
mortise width dial (see page 8) is set to the smallest
setting.
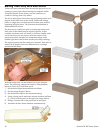
2. Insert a Domino tenon into the resulting mortise and fit
the two pieces together without glue.
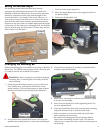
3. Examine the alignment of the ends of the two blocks of
wood. Note that you are only concerned about the ends
where the locating pins were used.
► If the two ends are flush, no adjustment is necessary.
► In the example shown to the right, the adjustable pin is
too close to the mortise; increase the distance of the pin
as described below.
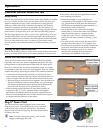
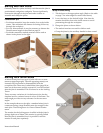
4. If an adjustment is necessary:
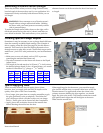
a. Loosen the bushing’s setscrew using a 2 mm hex
key.
b. Using a large screwdriver, rotate the eccentric
bushing to move the adjustable pin closer to or
farther from the mortise slot.
► The factory default (neutral) setting is shown in the
lower right photograph. The screwdriver slot is in
the vertical position.
► Each hash mark represents 0.25mm (0.010 inch).
► Don’t turn the bushing any farther than ¼-turn to
the left or ¼-turn to the right from the neutral
position.
c. Retighten the setscrew.
5. Repeat the process to verify that the adjustment is
correct.
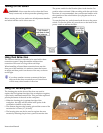
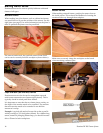
Calibrating the Horizontal Position Gauge
The horizontal position gauge (also called the sight gauge) is
used for aligning Domino tenons to a pencil mark on the
workpiece. If the gauge is not perfectly centered over the
mortising slot, the two workpieces will not be aligned when
the joint is assembled.
Instruction Manual 21
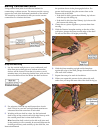
Calibration Procedure
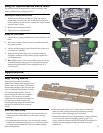
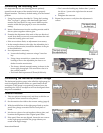
1. Take two pieces of scrap wood, and draw a thin line on
each piece where a tenon is to be placed.
2. Set the mortise slot width to the narrow setting (page 8).
3. With the middle line of the sight gauge lined up on the
pencil line, plunge a mortise slot into each piece of
wood.
4. Join the two pieces of wood together without glue, and
examine the alignment of the original pencil lines.
5. If the pencil lines are not aligned, loosen the two screws
on the sight gauge and slide the gauge sideways as
noted in the upper image.