


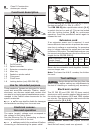
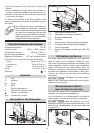
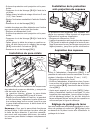

7
Place the saw on the front edge of the runner.
Set saw to maximum stroke rate and pendulum
stroke setting 3, and start the plunge cut into the
workpiece [illustration 12].
12
Accessories, tools
For safety reasons, only use original
Festool accessories and tools!
Festool offers sawblades which are ideally matched
to your Festool jigsaw and application, to ensure
quick and clean cuts in a variety of materials.
The accessory and tool order number can be found
in the Festool catalogue or on the Internet under
www.festool-usa.com.
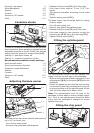
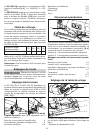
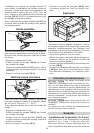
Festool guide system FS
13.2
13.1
The use of the Festool guide system FS facilitates
the production of straight and precise cuts, par-
ticularly with material thicknesses up to 20 mm
(1/4"). To do this, the jigsaw is placed in a guide
stop [13.1] (490031) and guided along the guide
rail.
The guide stop has two adjustable limit stops
[13.2] for a setting free from play.
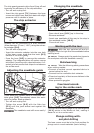
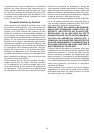
Parallel guide
14.1
14.2
14.3
Use the parallel guide (486719) to guide the jig-
saw parallel to the workpiece edge.
The parallel guide can be fi tted on both sides of
the base runner:
- Turn off and unplug tool.
- Slide clamping clip [14.2] onto the base runner
from the front.
- Insert parallel guide [14.3] through the clamp-
ing clip from the side to the desired position.
- Tighten rotary knob [14.1].
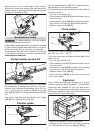
Circle cutter
15.1
15.2
15.4
15.3
circular cuts with a diameter between 120 mm
and 720 mm (4.7” - 28.3”).
The circle cutter can be fi tted to either side of the
base runner:
- Turn off and unplug tool.
- Slide clamping clip [15.2] onto the base runner
from the front.
- Insert circle cutter [15.3] through the clamping
clip from the side to the desired position.
- Tighten rotary knob [15.1].
- Insert circle tip [15.4] in the rear bore hole of
the circle cutter.
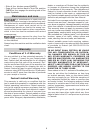
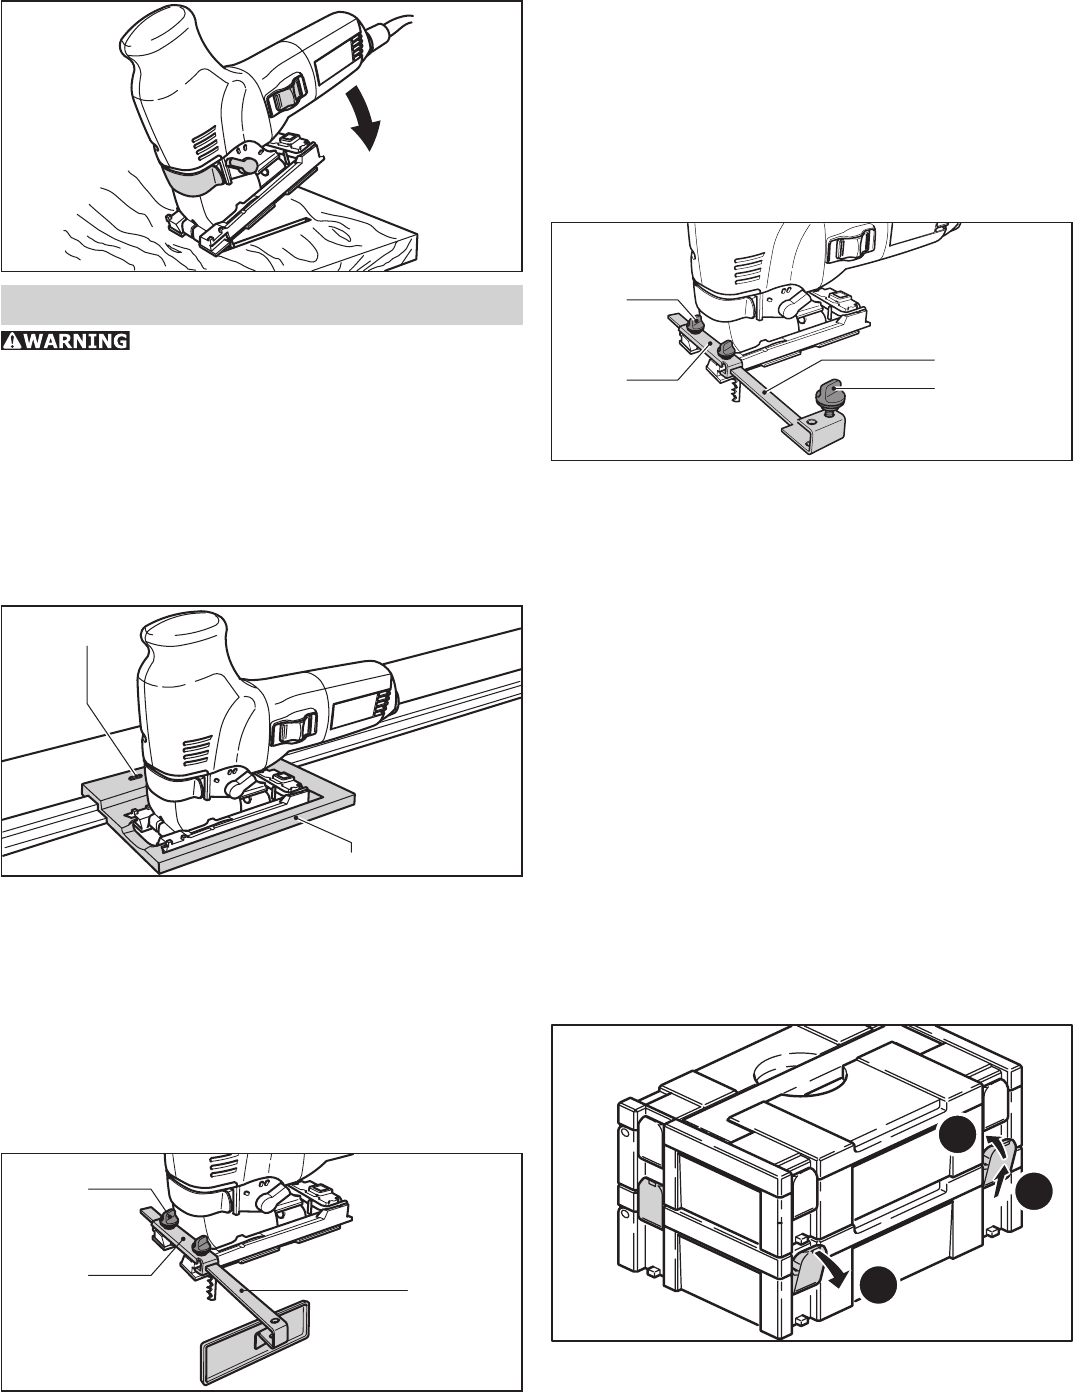
Systainer
Many Festool products are shipped in a unique
system container, called "Systainer". This provides
protection and storage for the tool and acces-
sories. The Systainers are stackable and can be
interlocked together. They also can be interlocked
atop Festool CT dust extractors.
16.1
16.2
16.3
- Place one systainer on top of the other.
- Release all four latches on the lower systainer
by pulling back at their top edges [16.1].