


4
Electrical connec-
tion and operation
The mains voltage must correspond to the voltage
on the rating plate!
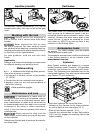
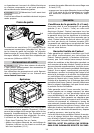
See the following fi gure for connection and dis-
connection of the power cord.
Always switch the tool off before con-
necting or disconnecting the power cord!
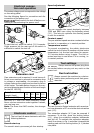
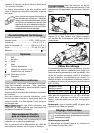
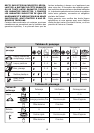
To start the tool, push the switch (2.1) forwards.
Slight pressure on the rear end of the switch is
suffi cient to switch the tool off.
2.1
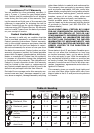
Extension cord
If an extension cord is required, it must have suf-
fi cient cross-section to prevent an excessive drop
in voltage or overheating. An excessive drop in
voltage reduces the output and can lead to failure
of the motor. The table below shows you the cor-
rect cord diameter as a function of the cord length
for the RO 150 FEQ.
Total Extension Cord
Lenght (feed)
25 50 100 150
Cord size (AWG) 18 16 16 14
Use only U.L. and CSA listed extension cords.
Never use two extension cords together. Instead,
use one long one.
Note: The lower the AWG number, the stronger
the cord.
Electronic control
The tool has full-wave electronics with the
following features:
Smooth start-up
The smooth start-up ensures jolt-free startup.
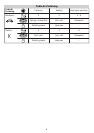
Speed adjustment
3.1
You can regulate the speed steplessly between
3300 and 6800 rpm using the adjusting wheel
(3.1). This lets you optimize the sanding speed
to suit the material.
Constant speed
The pre-selected speed remains constant whether
the tool is in operation or in neutral position.
Temperature control
To prevent overheating, the safety electronics
switch the tool off when it reaches a critical motor
temperature. Let the tool cool down for approx.
3-5 minutes before using it again. The tool re-
quires less time to cool down if it is running, i.e.
in neutral position.
Tool settings
Always remove the power plug from
the socket before carrying out any work on the
power tool.
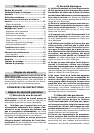
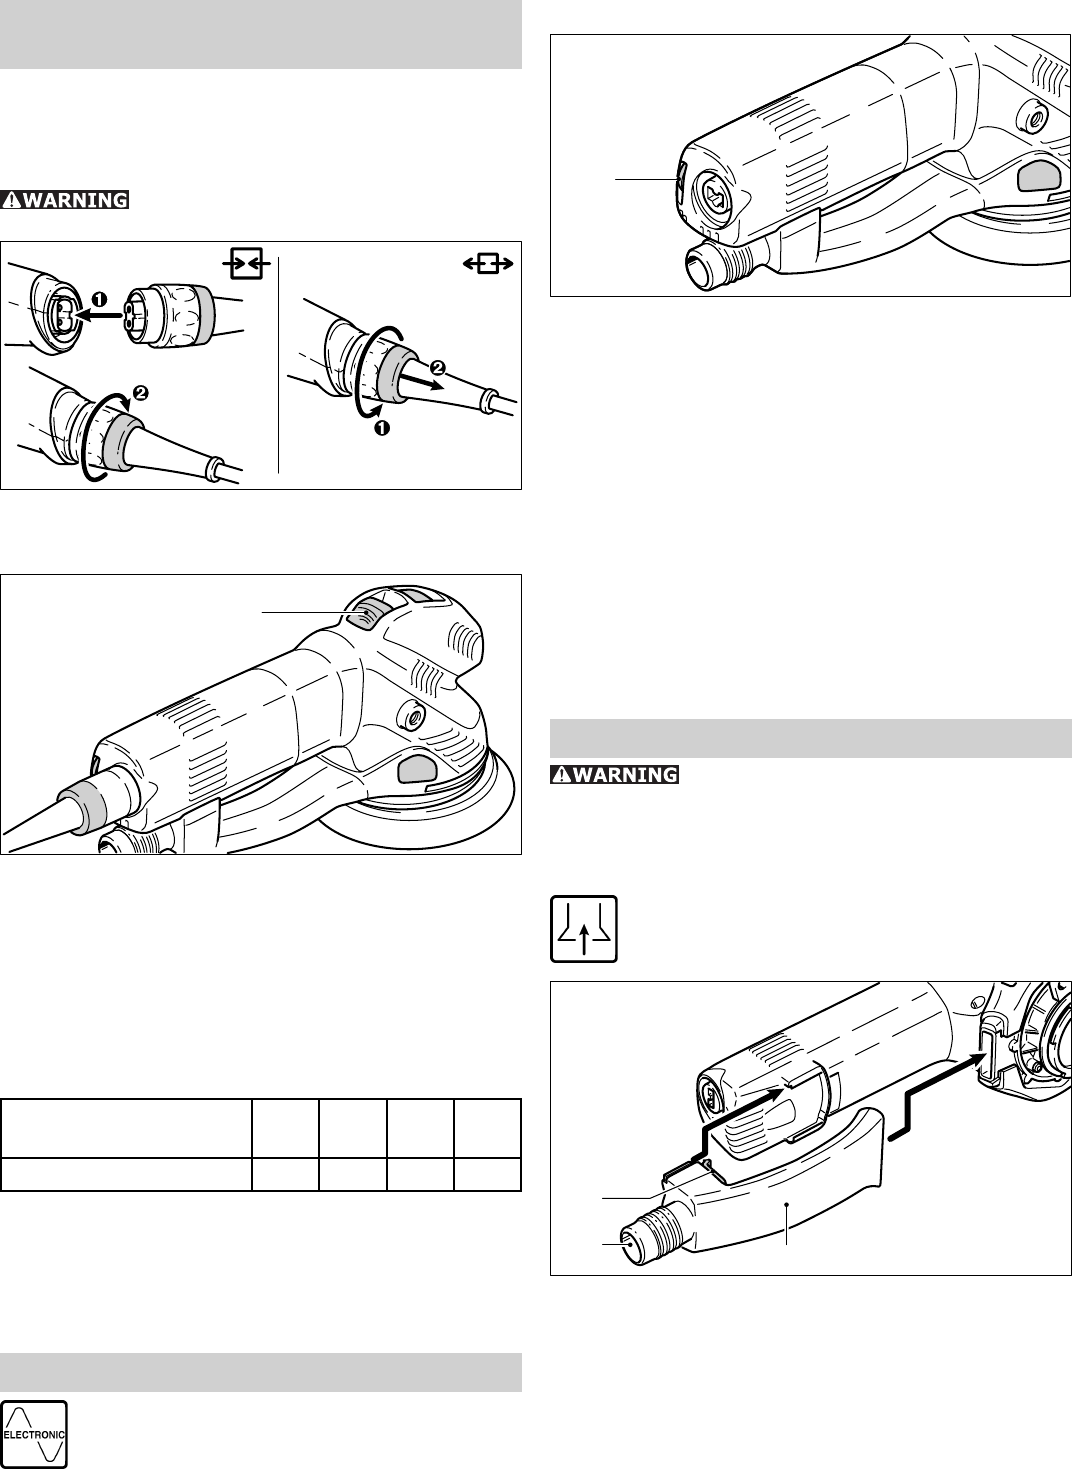
Dust extraction
Always connect the machine to a dust ex-
tractor when performing work that gener-
ates dust.
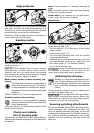
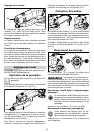
4.2
4.3
4.1
You can connect a Festool extractor with an extrac-
tor hose diameter of 27 mm to the dust extraction
port (4.2).
The extraction adapter (4.3) can be removed if
necessary. To do this, press the locking button
(4.1), draw the extraction adapter backwards
and pull off. To reattach the extraction adapter,
insert it as shown in Fig. 4 and slide it towards the
sanding pad until the locking button (4.1) latches
into place.