


12
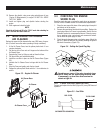
2.8.5 OPERATION IN HIGH GRASS OR BRUSH
Never operate the generator while the vehicle
is parked over high grass, weeds, brush,
leaves or any other combustible substance.
Such materials can ignite and burn from the
heat of the exhaust system. The generator
exhaust system becomes extremely hot dur-
ing operation and remains hot for a long time
after it has shut down.
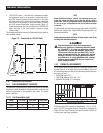
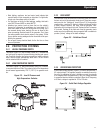
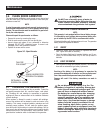
3.1 CHECKING THE ENGINE OIL
LEVEL
For oil capacities and requirements, see the “Engine Oil
Requirements” section. Check the engine crankcase oil level at
least every eight hours of operation, or before it is used. To check
the engine oil level, proceed as follows (see Figure 3.1):
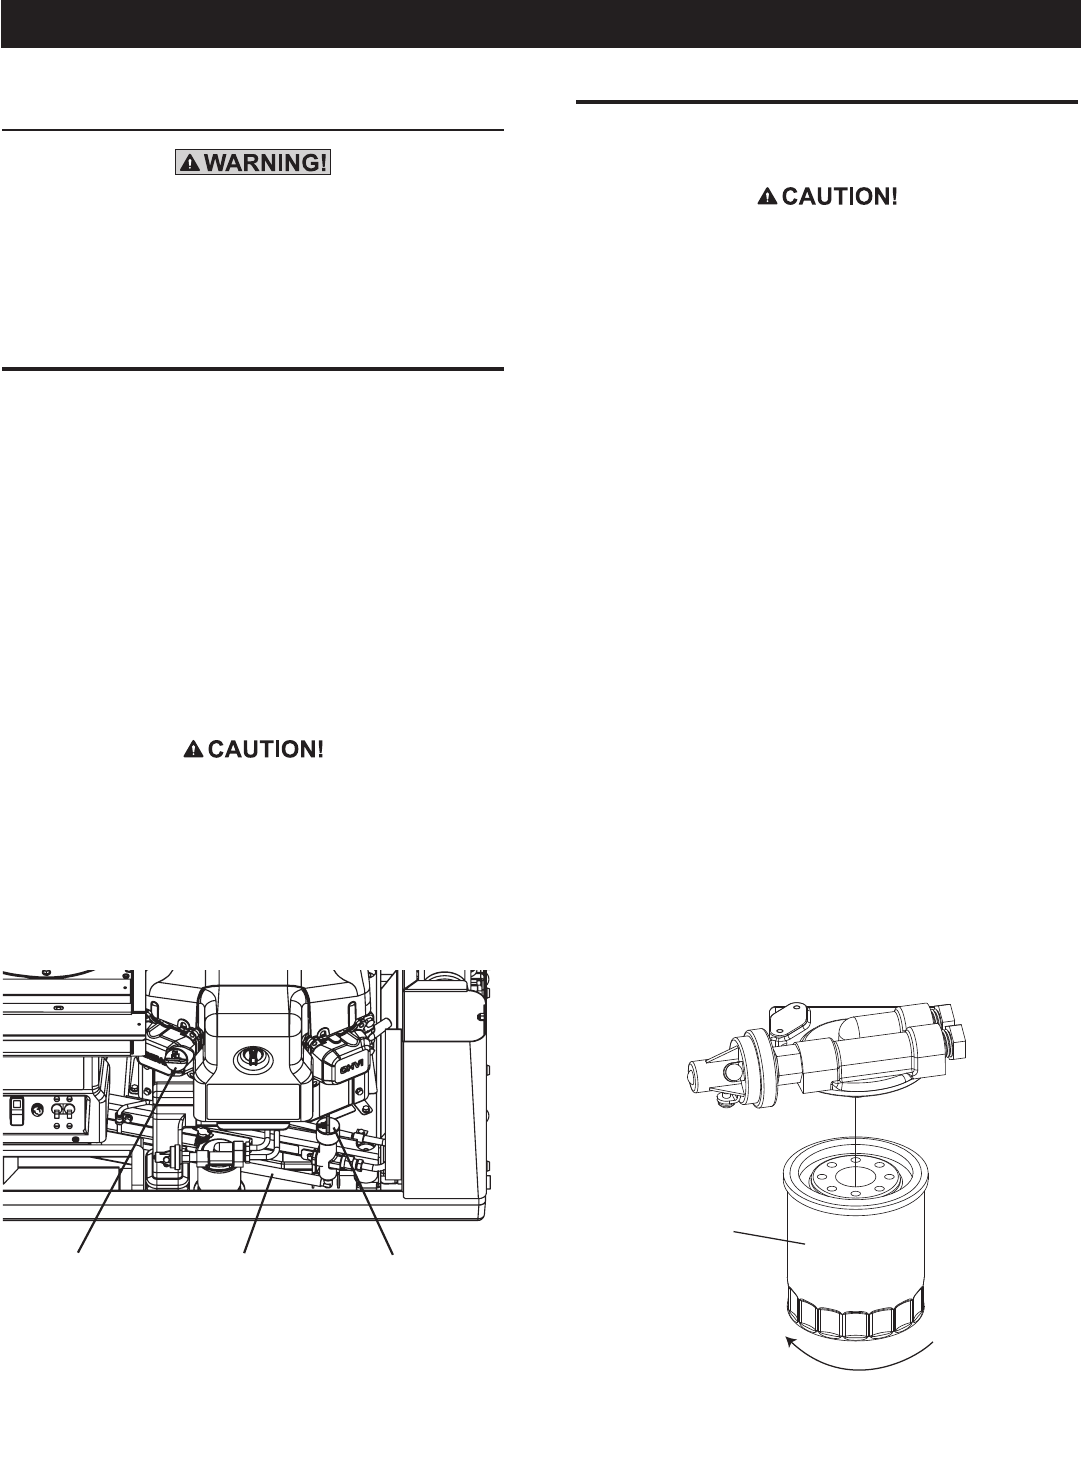
1. Be sure the generator is as level as possible.
2. Remove the dipstick and wipe it dry with a clean, lint-free
cloth.
3. Install and tighten the dipstick cap; then, remove it again. The
oil level should be at the dipstick “Full” mark.
4. If necessary, remove the oil fill cap on the rocker cover and
slowly add oil until it reaches the dipstick “Full” mark. DO NOT
FILL ABOVE THE “FULL” MARK.
n
Never operate the engine with the oil level
below the “Add” mark on the dipstick. Doing
this could damage the engine.
5. Install and tighten the oil fill cap and the dipstick before oper-
ating the engine.
Figure 3.1 — Oil Dipstick/Fill Tube and
Location of Oil Drain Plug
Oil DipstickOil Drain HoseOil Fill
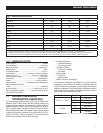
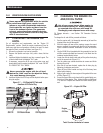
3.2 CHANGING THE ENGINE OIL
AND/OR OIL FILTER
n
Hot oil may cause burns. Allow engine to
cool before draining oil. Avoid prolonged
or repeated skin exposure with used oil.
Thoroughly wash exposed areas with soap.
Oil Change Intervals – see Section “RV Generator Service
Interval”.
To change the oil and oil filter, proceed as follows:
1. Run the engine until it is thoroughly warmed up (at least five
minutes) then shut off the engine.
2. With the engine still warm from running, remove the round
access grommet from underneath the front of the generator.
Place a suitable container underneath to catch all the drain
oil.
3. Use the 0G4818 tool (supplied with the generator) to turn the
old filter counter-clockwise and remove. Let oil drain into the
container located directly below.
4. Locate the oil drain hose inside and pull the yellow drain plug
out of the access hole (Figure 3.1).
5. Turn the yellow cap counter-clockwise to remove and finish
draining the old oil.
6. After the oil has been drained, replace the oil drain plug by
tightening it clockwise and return.
7. Clean off the oil filter bracket and any old oil that may have
spilled while draining.
8. Apply a light coating of clean engine oil the gasket of the new
oil filter (Figure 3.2).
9. Screw the new oil filter on by hand until its gasket lightly con-
tacts the oil filter adapter. Then, tighten the filter an additional
¾ to one turn. Replace and secure the round access grom-
met.
Figure 3.2 — Engine Oil Filter
Engine
Oil Filter
Twist Counter-clockwise to Loosen
Maintenance