


9
CAUTION. Take care to regularly clean out the build up of
dust on the base underneath the sandpaper and not to let
the sandpaper wear completely down before replacing it.
Failure to observe these two precautionary measures can
lead to damage to the hooks and loops on the platen and
the sandpaper will not attach properly.
WARNING. Never use the sander unless the entire base is
fitted with sandpaper or another type of pad.
Selecting the right grade of sandpaper
WARNING. Always ensure that the tool is switched
off and the plug is removed from the power point before
making any adjustments or maintenance procedures.
1. Different grades of sanding paper can be purchased
from your local hardware store. Available grades are:
Coarse, Medium and Fine.
2. Use a coarse grit to sand down rough finishes, medium
grit to smooth the work and fine grit to finish off.
3. It is best to make a trial run on a scrap piece
of material to determine the optimum grades of
sandpaper for a particular job. If there are still marks
on your work after sanding, try either going back to
a coarser grade and sanding the marks out before
recommencing with the original choice of grit, or
try using a new piece of sandpaper to eliminate the
unwanted marks before going on to a finer grit and
finishing the job.
WARNING. Do not use the same sanding sheet for wood
and metal. Metal particles become embedded in the
sandpaper and will scour a wooden surface.
Dust extraction
WARNING. Always ensure that the tool is switched
off and the plug is removed from the power point before
making any adjustments or maintenance procedures.
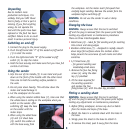
1. Attach the dust extraction canister (3) to the sander
by pushing and twisting the bayonet fitting in a similar
action to inserting a light globe into a lamp.
WARNING. For optimum dust extraction, remove and
empty the canister when it is no more than half full. Do
not use the canister when sanding metal. The hot metal
particles could cause residual wood dust or the internal
bag itself to catch fire.
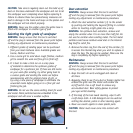
2. Remove the silver cap from the end of the canister (3)
to access the internal bag when you wish to replace or
clean the bag. The bag can be washed. Make sure the
bag is completely dry before replacing it.
Maintenance
WARNING. Always ensure that the tool is switched
off and the plug is removed from the power point before
making any adjustments or maintenance procedures.
1. Keep the tool’s air vents unclogged and clean at
all times.
2. Regularly check to see if any dust or foreign matter has
entered the grills near the motor and around the
on/off switch. Use a soft brush to remove any
accumulated dust. Wear safety glasses to protect
your eyes whilst cleaning.
3. If the body of the tool needs cleaning, wipe it with
a soft damp cloth. A mild detergent can be used but
nothing like alcohol, petrol or other cleaning agent.
4. Never use caustic agents to clean plastic parts.
CAUTION. Water must never come into contact with
the tool.