


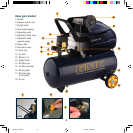
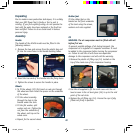

Air filter
WARNING. The air filter must be added before first use.
Failure to fit the air filter will damage the compressor and
will void the warranty.
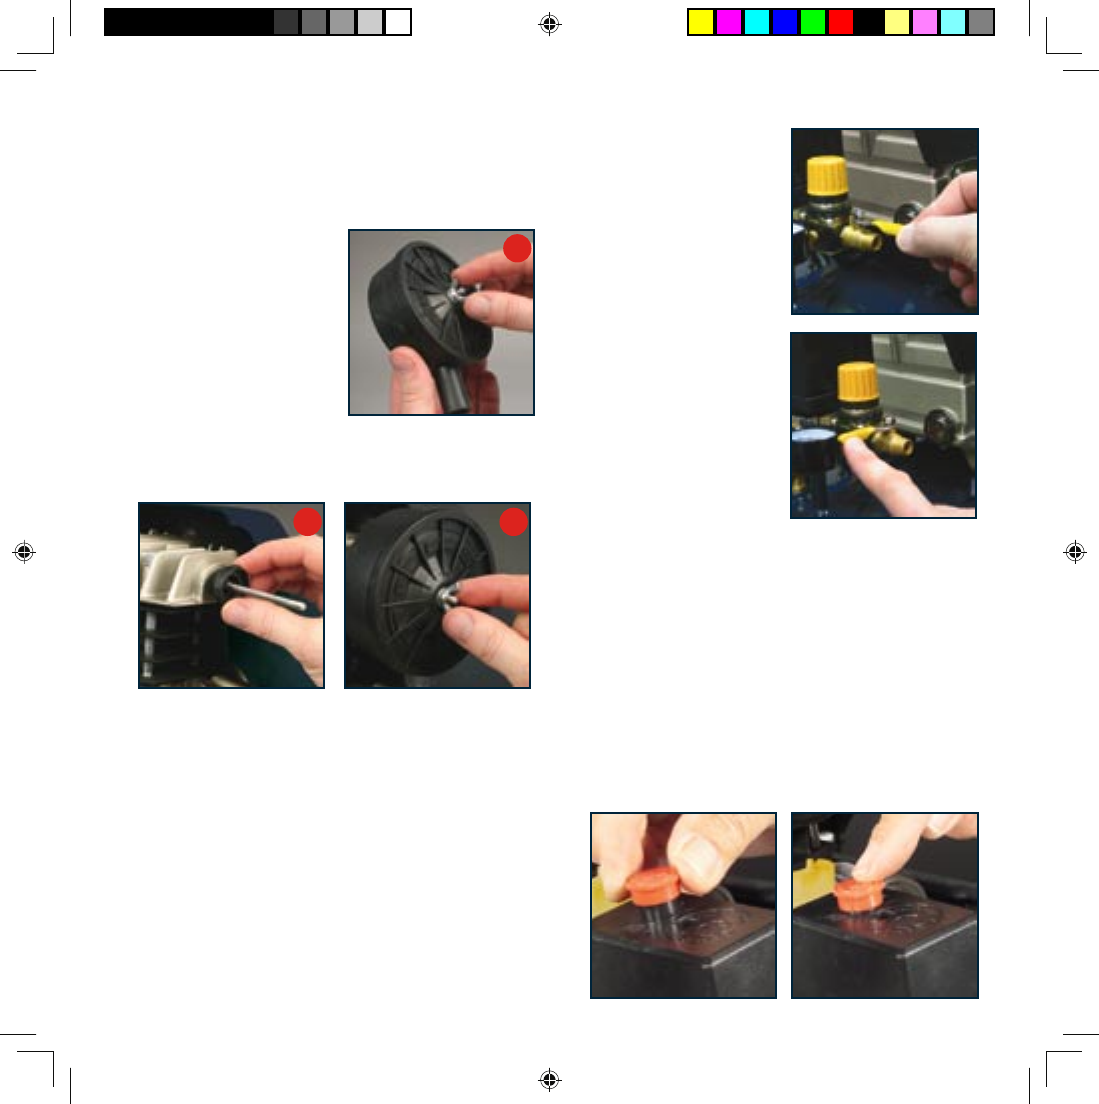
1. Remove the plastic air
filter plug from the head of
the compressor.
2. To fit the air filter you
need to take it apart first.
Undo the wing nut, and
remove it along with the
washer from the air filter.
3. Remove the cover and the
air filter.
4. Push out the centre mounting piece and screw this into
the air inlet as firmly as possible with your fingers.
5. Replace the air filter holder, then the air filter, cover
and washer and wing nut.
Pre-start routine
1. Ensure that the location for the compressor is clean,
dry and well ventilated.
2. Ensure the crank case has been filled with oil and is at
the correct level, and the air filter has been fitted.
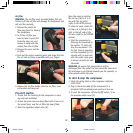
3. Open the regulated output valve (6).
Open the valve by rotating
the air tap (18) so it is in
line with the air outlet
(refer to the OPEN picture).
To close the valve, rotate the
air tap so it is facing to the
right or the left side of the
air valve (refer to the CLOSED
picture).
4. Start the compressor by
following the procedure in
the section “To start and
stop the compressor”. For
the first time of operation,
run the compressor for 10
minutes with no load and
with the outlet valve open
to ensure all parts are well
lubricated.
WARNING. Be aware that pressurised air will be
discharged from the outlet and care should be taken that
this discharge is not directed towards you the operator, or
other persons within the area.
To start & stop the compressor
1. Check the rating label on the compressor indicates
230V–240V.
2. Plug in the mains cable of the compressor to a
standard 240V household power point and turn on.
3. To start the compressor, lift the On/Off switch (3) on
the pressure switch cover (2).
11
54
OFF
ON
OPEN
CLOSED
2
AC30G_AC40G 12/8/05, 4:49 PM11