


10
WARNING. Do not use a disc marked with a lower RPM than
that of the Max no load speed shown on the rating plate.
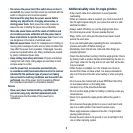
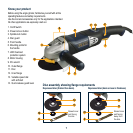
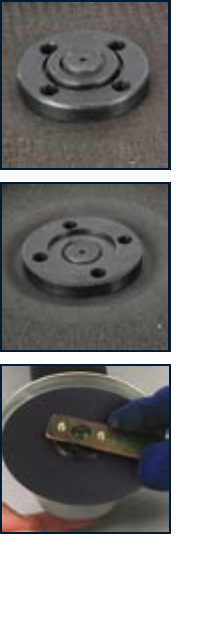
3. Clean the flanges and check the new disc.
4. Holding the angle grinder with the spindle facing upwards,
check that the inner flange is on the spindle and correctly
located. The two machined flat sections must face the angle
grinder and locate in the appropriate position on the spindle.
5. Place the disc onto the spindle with the label facing the angle
grinder. The hole in the disc should locate onto the spindle and
fit firmly into the spigot section of the inner flange.
NOTE. Depending on whether the disc has a flat inner section or
a depressed inner section, proceed as follows.
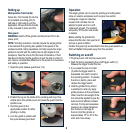
6. For discs with a flat inner section,
screw on the outer flange (10)
with the protruding spigot section
facing away from the disc.
7. For discs with a depressed inner
section, screw on the outer flange
with the protruding spigot section
facing the disc so that it locates in
the hole in the disc.
8. Hand tighten the outer flange until
the disc is secure.
9. Press the spindle lock button and
tighten the flange with the wrench.
10. Turn the new disc by hand,
ensuring that it is tightly secured
and that it rotates fully and does
not wobble unduly.
11. Run the angle grinder
under no load for at least one
minute to ensure the new disc
is in good condition. Make sure
you are wearing all the safety
gear and that you face the
grinder away from you.
CAUTION. Do not use excessive force to clamp the disc. It could
crack it and cause failure during use.
WARNING. Do not immerse the disc into any type of lubricant
including water. This angle grinder is designed as a dry grinder/
cutter. Failure to observe this warning could result in a fatal
shock.
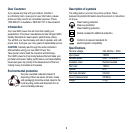
Lubrication
The grease in the gearbox will require replacement after
extensive use of the tool. Please go to a qualified service agent
to perform this service.
Power cord maintenance
If the supply cord needs replacing, the task must be carried out
by the manufacturer, the manufacturer’s agent, or an authorised
service centre in order to avoid a safety hazard.
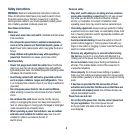
Cleaning
1. Keep the tool’s air vents unclogged and clean at all times.
2. Remove dust and dirt regularly. Cleaning is best done with a
rag. Wear safety goggles or an eye shield and gloves whist
cleaning.
3. Re-lubricate all moving parts at regular intervals.
4. Never use caustic agents to clean plastic parts.
CAUTION. Do not use cleaning agents to clean the plastic parts
of the tool. A mild detergent on a damp cloth is recommended.
Water must never come into contact with the tool.
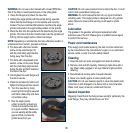
General inspection
Regularly check that all the fixing screws are tight, particularly the
outer flange. They may vibrate loose over time.