


10
Note.
Always make a trial cut in a scrap piece of material
along a guideline to determine how much you should offset
the blade from the guideline to make an accurate cut.
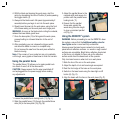
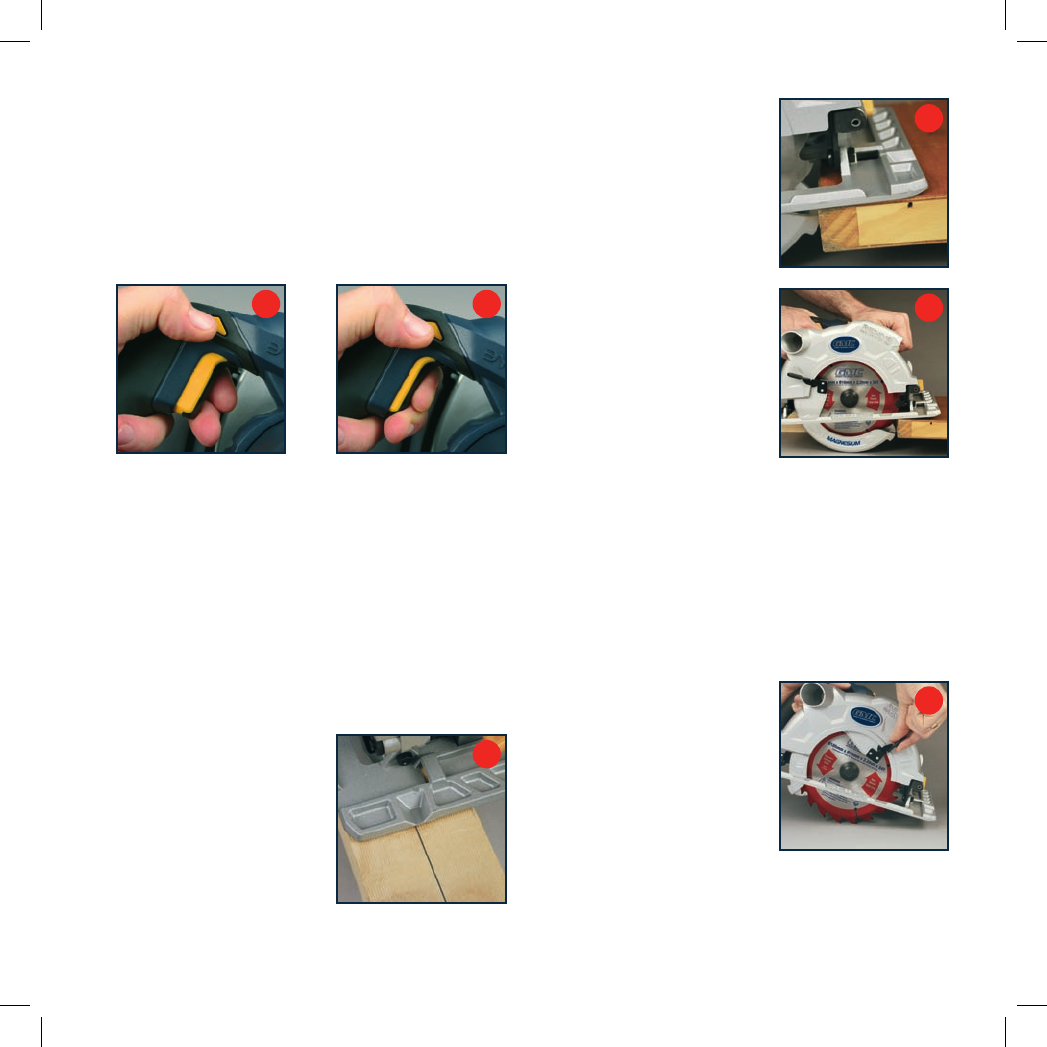
Switching on and off
1. Connect the plug to the power supply.
2. Depress the lock-off button (5) (Fig. F) and squeeze the
trigger switch (4) (Fig. G).
3. The blade will take approximately 2 seconds to reach
full speed.
4. When you release the trigger, the machine turns off
and the lock-off button re-engages to prevent
accidental operation.
CAUTION. Allow the blade to come to a complete standstill
before setting the saw down.
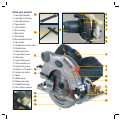
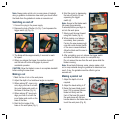
Making a cut
1. Mark the line of cut on the work piece.
2. Adjust the depth of cut and bevel angle as required.
3. When making 90° cross or rip
cuts, align your line of cut with
the outer blade guide notch on
the base of the saw (Fig. H).
4. When making 45° bevel cuts,
align your line of cut with the
inner blade guide notch on the
base of the saw.
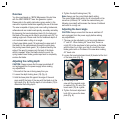
5. Rest the front edge of the
base on the work piece (Fig. I).
6. Start the motor by depressing
the lock-off button (5) and
squeezing the trigger
switch (4).
Note. Always let the blade reach
full speed (approximately
2 seconds) before you begin to
cut into the work piece.
7. Slowly push the saw forward
using both hands (Fig. J).
8. When making a cut always
use steady, even pressure.
Forcing the saw causes rough
cuts and could shorten the life
of the saw or cause kickback.
Allow the blade and the saw to
do the work.
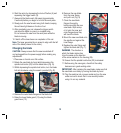
9. After completing your cut, release the trigger switch
and allow the blade to come to a complete stop.
Do not remove the saw from the work piece while the
blade is moving.
Note. Since blade thickness varies, always make a trial
cut in scrap material along the guideline to determine how
much, if any, the guideline must be offset to get an
accurate cut.
Making a pocket cut
1. Adjust the depth of cut as
required.
2. Adjust the bevel setting to 0°.
3. Raise the lower blade guard
lever (13) to expose the saw
blade and firmly rest the
front of the base flat against
the work piece with the rear
handle raised so the blade does not
touch the work piece (Fig. K).
G
F
H
I
J
K
Blade guide notch