


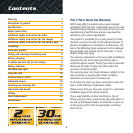
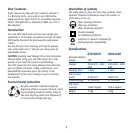


10
Always unplug the charger when not in use and store in
a dry secure place.
Avoid charging or storing your battery in temperatures
below 0ºC and above 40ºC.
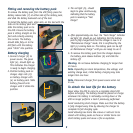
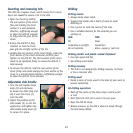
Battery indicator
To activate the battery
indicator feature first pull the
trigger switch (3) then press
the battery indicator button
(11), this will display the level
of charge remaining in the
battery. There are 3 levels of
charge low, medium and high.
When the battery indicator is
showing only 1 LED (low) the
battery should be removed and
put on the charger.
LED Work area light
The drill has 3 LED lights (10)
to illuminate the work area and
improve vision when drilling in
areas with insufficient light.
To turn the LED lights on and
off depress the LED light
switch (12).
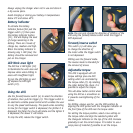
Using the drill
Use the forward/reverse switch (4) to select the direction
of rotation, then pull the trigger (3). This trigger switch is
an electronic variable speed control which enables the user
to vary the speed continuously. The speed varies according
to how far the trigger switch is depressed, the further it is
depressed the faster the chuck will rotate and the lighter it
is depressed, the slower it will rotate.
To stop the drill, release the trigger switch.
Note. You can only change the direction of rotation of the
drill using the forward/reverse switch when the trigger is
NOT depressed.
Forward/reverse switch
This switch (4) will allow you
to change the direction of
the motor while the trigger switch
is not depressed.
Drilling uses the forward mode.
The reverse mode is intended for
the removal of screws.
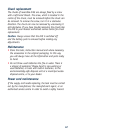
Adjustable torque
This drill is equipped with 20
torque settings plus one drill
setting which are controlled by
the torque collar (2). By rotating
the collar behind the chuck, it is
possible to adjust the torque.
This will allow better control when
using the drill as a screwdriver as
it prevents over-tightening of the
screws.
For drilling, always use the use the Drill position by
aligning the Drill symbol with the triangular indicator on
the front face of the drill near the torque collar.
For setting the torque position, select a low setting on
the torque collar and align the selected symbol with
the triangular indicator on the top of the drill. Increase
gradually to set the correct torque. It is better to use a
scrap piece of material if possible to set the torque.