


11
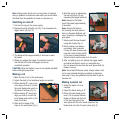
4. With the blade just clearing the work piece, start the
motor by depressing the lock-off button (5) and squeezing
the trigger switch (4).
5. Always let the blade reach full speed (approximately 2
seconds) before you begin to cut into the work piece.
6. Slowly lower the saw into the work piece, using the front
of the base resting on the work piece as a hinge point.
WARNING. As soon as the blade starts cutting the material,
release the lower blade guard lever.
7. Once the base plate (15) is flat against the work piece,
proceed cutting in a forward direction to the end of the cut.
8. After completing your cut, release the trigger switch
and allow the blade to come to a complete stop.
Do not remove the saw from the work piece while the
blade is moving.
Note. If the corners of your pocket cut are not completely
cut through, use a jigsaw or hand saw to finish the corners.
Note. This can be a dangerous cut and is recommended for
experienced operators only.
Using the parallel fence
The parallel fence (12) allows you to make parallel cuts
in a sheet of wood, all at the same width.
CAUTION. Always ensure that the saw is switched off
and unplugged from the power supply before making
any adjustments.
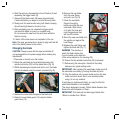
1. Loosen the parallel fence locking knob (11) (Fig. L).
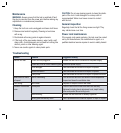
2. Slide the parallel fence (12) through the parallel fence
slots (24) in the base plate (15) (Fig. M).
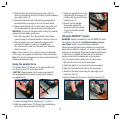
3. Adjust the parallel fence to the
required width and secure it in
position with the parallel fence
locking knob (11).
4. Ensure that the parallel
fence rests against the
wood along its entire length
to give a consistent parallel
cut (Fig. N).
Using the REDEYE
®
system
WARNING. Before proceeding to use the REDEYE
®
laser
line system, ensure that the Additional safety rules for
laser lights section is read and fully understood.
Always ensure the laser beam is aimed at a sturdy work
piece without reflective surfaces. i.e. wood or rough coated
surfaces are acceptable. Bright shiny reflective sheet steel
or the like is not suitable for laser use as the reflective
surface could direct the beam back at the operator.
Only turn laser beam on when tool is on work piece.
1. Mark the line of the cut on the work piece.
2. Adjust the depth of cut and bevel angle as required.
3. Rest the front edge of the base on the work piece.
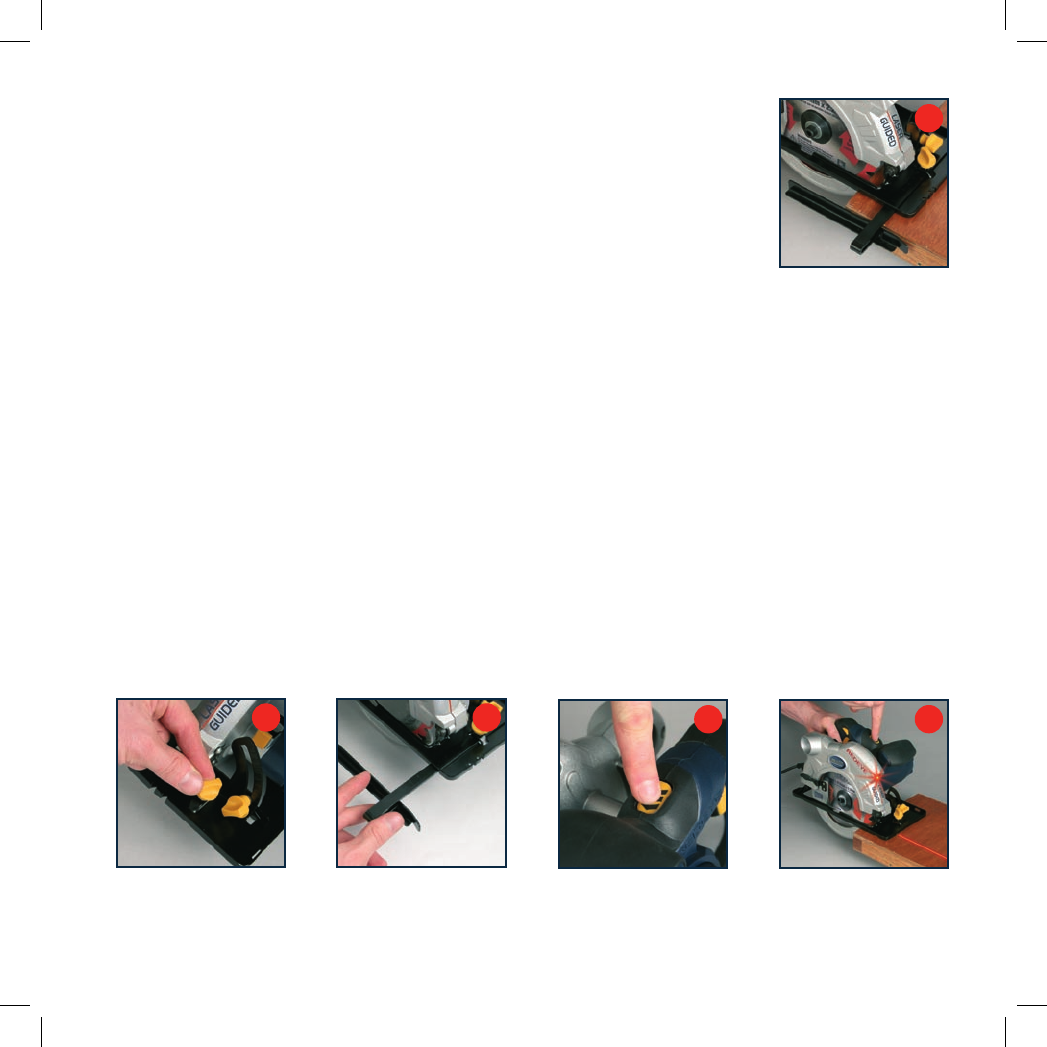
4. Switch on the laser beam using the laser light on/off
button (2) (Fig. O).
5. Align the beam with the line on the work piece (Fig. P).
M
L
N
P
O