


8
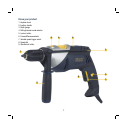
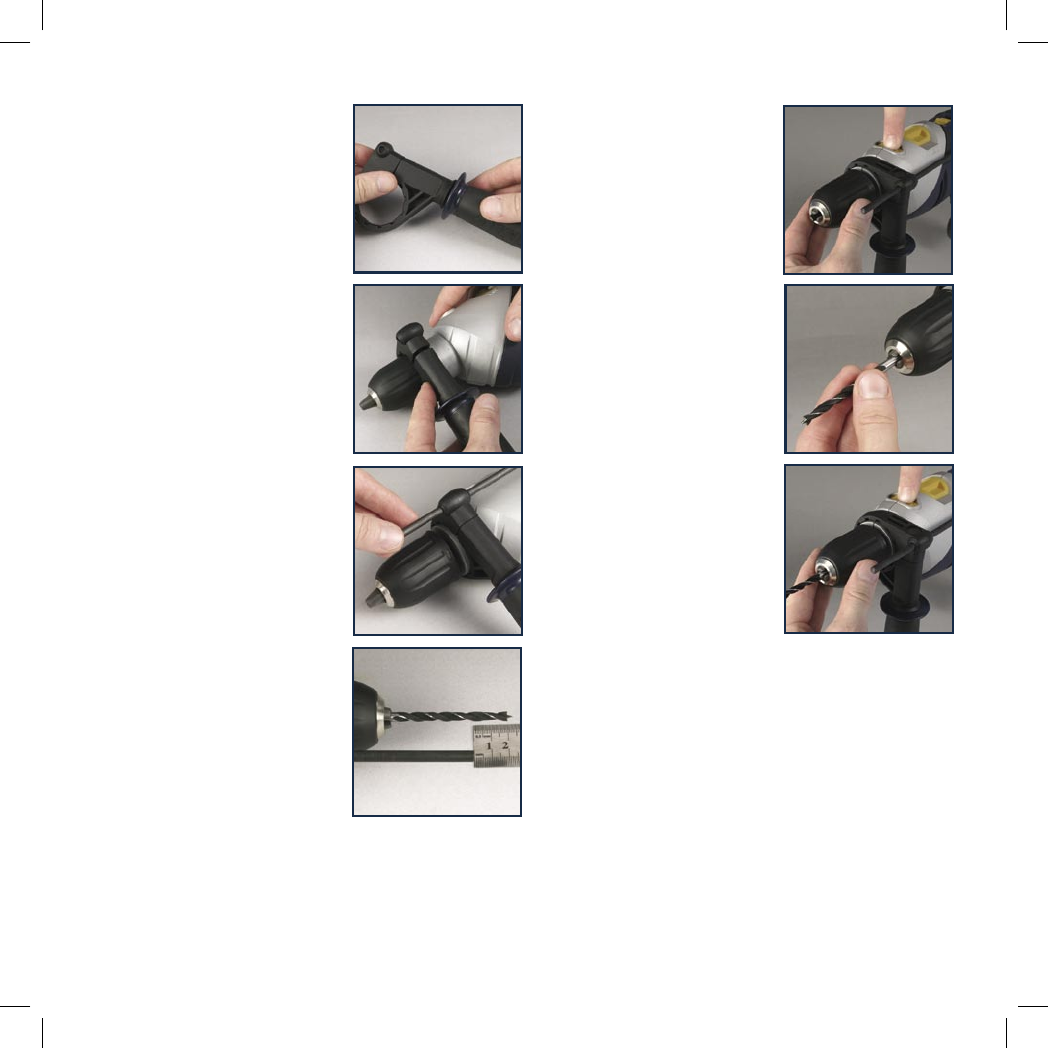
Auxiliary handle and
depth gauge
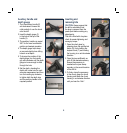
1. Turn the auxiliary handle (2)
anti-clockwise to loosen the
collar and slip it over the chuck
onto the drill.
2. Insert the depth gauge (3)
in the hole at the top of the
handle (2).
3. The auxiliary handle can swivel
360° for the most comfortable
position and easiest operation.
4. The depth gauge helps keep
an accurate depth when drilling
holes to a set depth.
5. To change the position of the
depth gauge, turn the handle
grip anti-clockwise until the depth
gauge is loose enough to slide
through the hole.
6. Set the depth, checking the
depth with a steel rule for most
accurate measurement and then
turn the handle grip clockwise
to tighten both the depth stop
and the auxiliary handle in the
required position.
Inserting and
removing bits
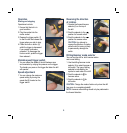
CAUTION. Always ensure that
the drill is switched off and
the plug is removed from the
power point before making any
adjustments.
The drill is fitted with a keyless
chuck for easier tightening and
more grip torque.
1. Open the chuck jaws by
pressing down the spindle lock
button (9), firmly holding the
keyless chuck (1) and rotating
the housing in an anti-clockwise
direction.
2. Open the jaws sufficiently so
as to fit the desired accessory.
Ensure the accessory is
inserted so the jaws clamp
securely on the smooth section
of the drill bit.
3. To firmly clamp the accessory
in the chuck, grasp the chuck
housing and rotate the chuck
housing in a clockwise direction
until you hear the “click”.