


Operation
WARNING. Before connecting a tool to a power source (power
point receptacle, outlet, etc.) be sure that the voltage supply is
the same as that specified on the nameplate of the tool. A power
source with a voltage greater than that specified for the tool can
result in serious injury to the user, as well as damage to the tool.
If in doubt, do not plug in the tool. Using a power source with a
voltage less than the nameplate rating is harmful to the motor.
Switch on
1. Set the variable speed dial to 1 and push the on/off switch (3)
to “I”, the machine is in continuous operation, and will start
at minimum speed.
Switch off
1. Reset the variable speed dial (4) to 1 and push the on/off
switch to position “0”.
Varying the speed
1. You can use the variable speed dial to alter the speed of the
collet, as follows:
• Position 1-Slow
• Position 3-Medium
• Position 6-Fast
2. Select the correct speed for the work and type of bit you are
using. In general, lower speeds are best suited for large tools
and higher speed for smaller tools.
Holding the tool
• Small milling cutters/grinders pencils - high speed
• Large milling cutters/grinders pencils - low speed
1. For jobs such as milling or engraving where precision is required,
hold the mini-drill like a pen.
2. For heavier work like cutting or grinding hold the machine in
the palm of your hand.
Changing accessories
1. Make sure that the machine is switched off and the plug
removed from the power before you commence changeover.
2. Loosen and tighten collet fully using the 2 in 1 Wrench provided. (always
ensure bits are tight before commencing any work with your tool).
3. Press and hold down the spindle lock button (5) and unscrew
the Collet nut (6).
4. Select a suitable Collet for the accessory to be used and insert it
in the collet nut shaft.
5. Turn the Collet nut in an anti-clockwise direction to loosen
and, when the bit is in place, turn the Collet nut in clockwise
direction to lock it in place, whilst depressing the spindle lock.
6. Make sure that the bit is inserted as far as possible. Having too
much shaft exposed could cause it to damage or bend.
Locating a cutting/sanding disc
1. Locate the disc holder in the Collet nut.
2. Remove the screw from the end with the 2 in one wrench
provided, and insert the screw through the cutting disc.
3. Replace the screw and tighten, attaching the cutting disc onto
the holder. (Do not over-tighten)
Locating a sanding drum
1. Loosen the small screw in the top of the holder.
2. This allows the rubber to slacken.
3. Slide the sanding drum onto the holder.
4. Secure the sanding drum in place by tightening the screw causing
the rubber drum to bulge and grip the drum. (Do not over-tighten)
Maintenance
1. Store the machine, instruction manual and, where necessary,
the accessories in the original packaging. In this way you will
always have all the information and parts ready to hand.
Cleaning
1. Keep the tool’s air vents unclogged and clean at all times.
2. Remove dust and dirt regularly. Cleaning is best done with a rag.
3. Never use caustic agents to clean plastic parts.
CAUTION. Do not use cleaning agents to clean the plastic parts of
the tool. A mild detergent on a damp cloth is recommended. Water
must never come into contact with the tool.
Repairs
1. Only an authorised service centre should replace the cordset or
effect other repairs. If the cordset is damaged or worn, have it
repaired or replaced by an authorised service centre.
2. When the brushes are worn, the tool may not work. Have new
brushes fitted by an authorised service centre.
Please refer to your warranty card, which is separate
to these instructions
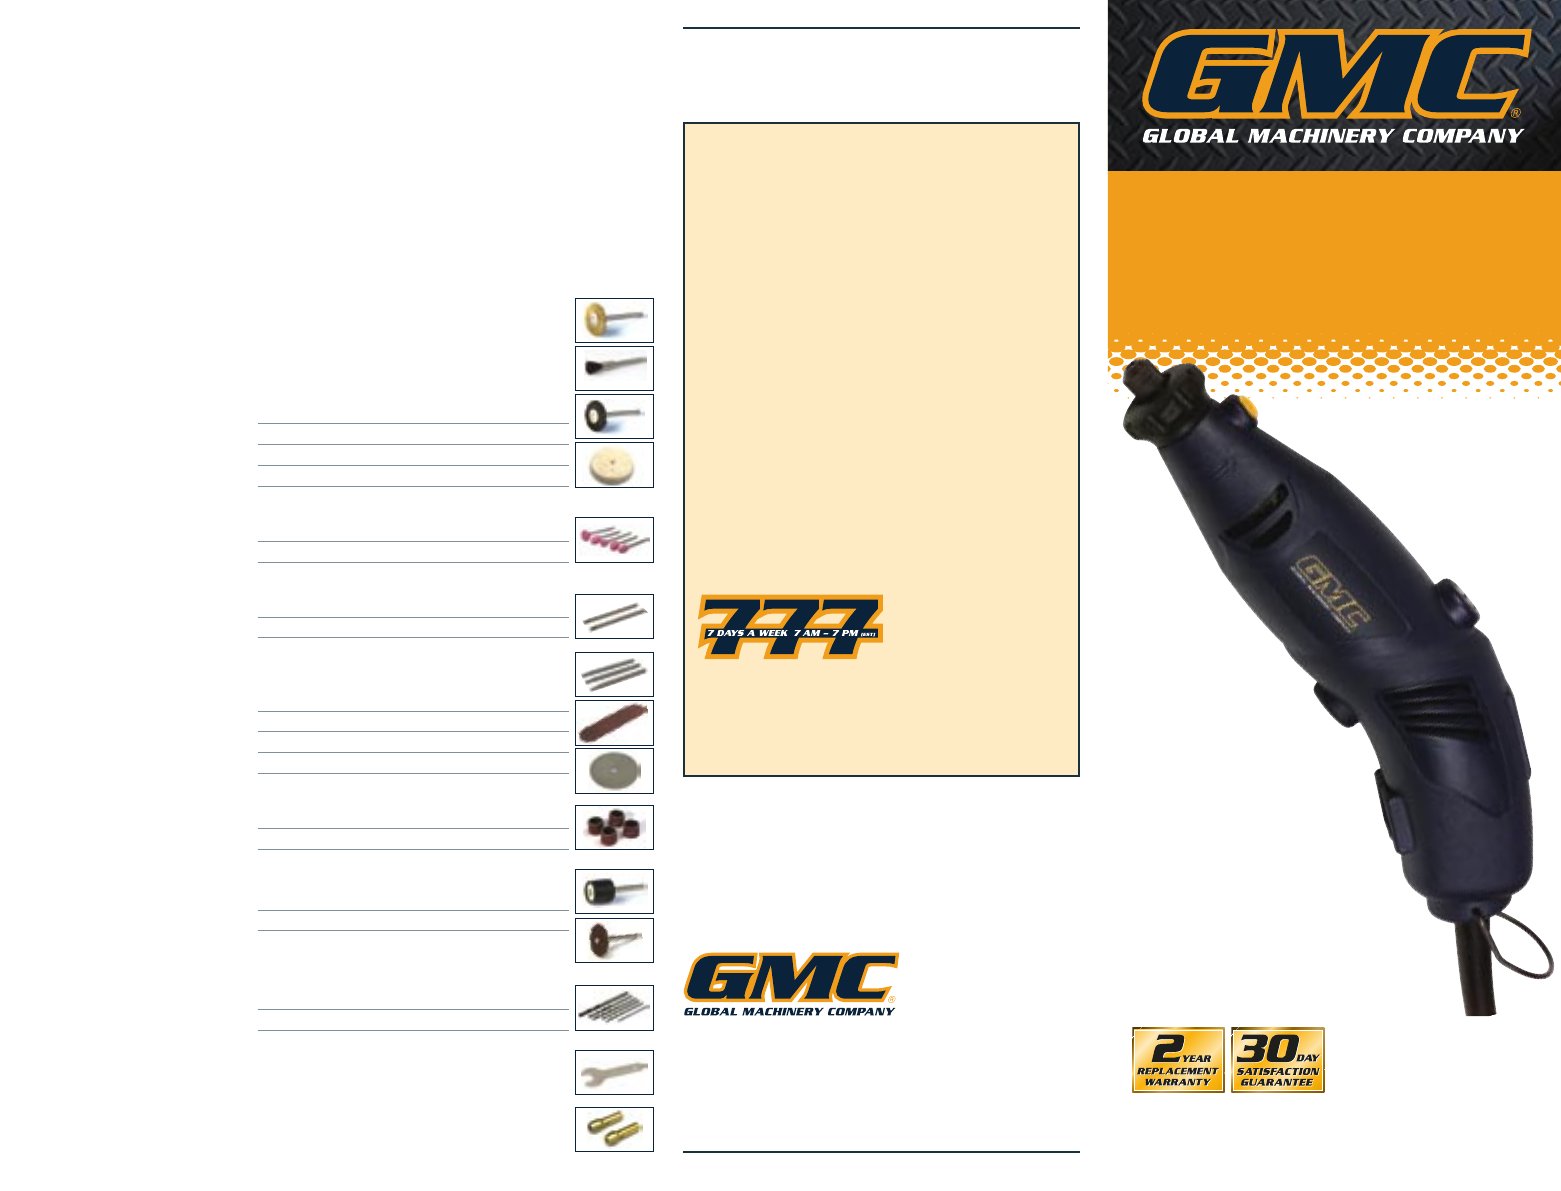
Accessories for MX372 kit
Polishing & Cleaning
Ideal for removing rust, smoothing out imperfections
or cleaning tools.
1 Brush Brass 22mm diameter
1 Brush Nylon bristle 4mm diameter
1 Brush Nylon bristle 22mm diameter
1 Polishing wheel Felt 20mm diameter
Grinding
The perfect way to remove burs and sharpen tools.
5 Grinding bits Various shapes 2.35mm shaft
Engraving
The ergonomic design makes it ideal for engraving.
2 Diamond Gringing Various shapes 2.35mm shaft
Cutting
Various cutting wheels let you cut, trim and shape
metal, glass and ceramics.
3 High speed cutter 2.35mm shaft
10 Cut-off wheel 24mm diameter
1 Cutting Wheel Stainless Steel
Sanding
Sanding drums are perfect for detailed sanding jobs.
4 Sanding drum 12.5mm, 150 grit
Mandrels
1 Mandrel for sanding drum
1 Mandrel for cut-off wheel
Drilling
An extremely convenient way to drill holes with more
detail and precision.
6 High speed drill bits
1 2 in 1 Wrench
3 Collets 1.5, 2.35, 3.2mm
6 7
MX372
031120 MX372 ED12
INSTRUCTION MANUAL
• Melbourne • Perth • Auckland • Hong Kong • Shanghai
• Taipei • New York • Verona • London • Paris
Multifunction
Rotary Tool
Carefully read the entire Instruction Manual
before using this product.
Before returning this product for a
Warranty Claim or any other reason
Please Call 1300 880 001 (Australia)
or 0800 445 721 (New Zealand)
When you make your call, please have the
following information at hand:
• GMC Product Type • GMC Product Code
A GMC Service Engineer will take your call and, in
most cases, will be able to solve your problem over
the phone.
You are welcome to use this phone-in service to make
suggestions or give comments about any GMC product.
With continuing product development changes may
have occurred which render the product received
slightly different to that shown in this instruction
manual. The manufacturer reserves the right to change
specifications without notice. Note: Specifications may
differ from country to country.
The GMC 777 Helpline operates from 7am to 7pm,
7 days a week (EST). This allows you to contact
GMC directly with any queries and technical
questions you have regarding our products.
45-55 South Centre Road,
Melbourne Airport, Victoria,
Australia 3061
Tel: (03) 8346 1100
Fax: (03) 8346 1299
Save this Manual for future reference.