


3. Determine the optimum speed by making a trial cut in
a scrap piece of material.
NOTE. Using the correct speed for the job increases the
life of the bit.
Making a cut
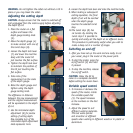
1. Place the base plate on the
workpiece ensuring that the
bit is not in contact with
the material to be cut.
2. Switch on the router and
allow the bit to reach
maximum speed.
3. Lower the bit into the
workpiece surface, keeping the base plate flush and
advancing smoothly until cutting is complete.
4. When edge cutting, the
workpiece surface should be
on the left side of the bit in
the feed direction.
5. Keep the cutting pressure
constant, taking care not
to crowd the router so that
the motor speed slows
excessively.
6. On exceptionally hard woods or problem materials it
may be necessary to make more than one pass at
various settings to achieve the desired depth of cut.
7. To avoid “bit chatter” cuts need to be made in an anti-
clockwise direction for external cuts and in a clockwise
direction for internal cuts.
CAUTION. Moving the machine too fast may cause a
poor quality of cut and can damage the bit or the motor.
Moving the machine too slowly may burn or mar the cut.
The proper feed rate will depend on the bit size, the type
of material being cut and the depth of the cut. Practice
first on a scrap piece of material to gauge the correct feed
rate and the cut dimensions.
CAUTION. Always use two hands to hold the router.
CAUTION. Where possible, clamp the workpiece to the
bench.
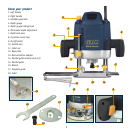
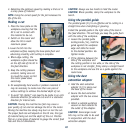
Using the parallel guide
The parallel guide (15) is an effective aid to cutting in a
straight line when chamfering or grooving.
Install the parallel guide in the right side of the tool in
the feed direction. This will help you keep the guide flush
with the side of the workpiece.
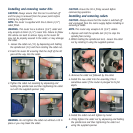
1. Loosen the parallel guide
locking knobs (14), hold the
guide against the workpiece
edge and slide the router
to the desired position. Re-
tighten knobs.
2. If the distance between the
side of the workpiece and
the cutting position is too wide, or the side of the
workpiece is not straight, firmly clamp a straight board
to the workpiece and use this as a guide against the
router base.
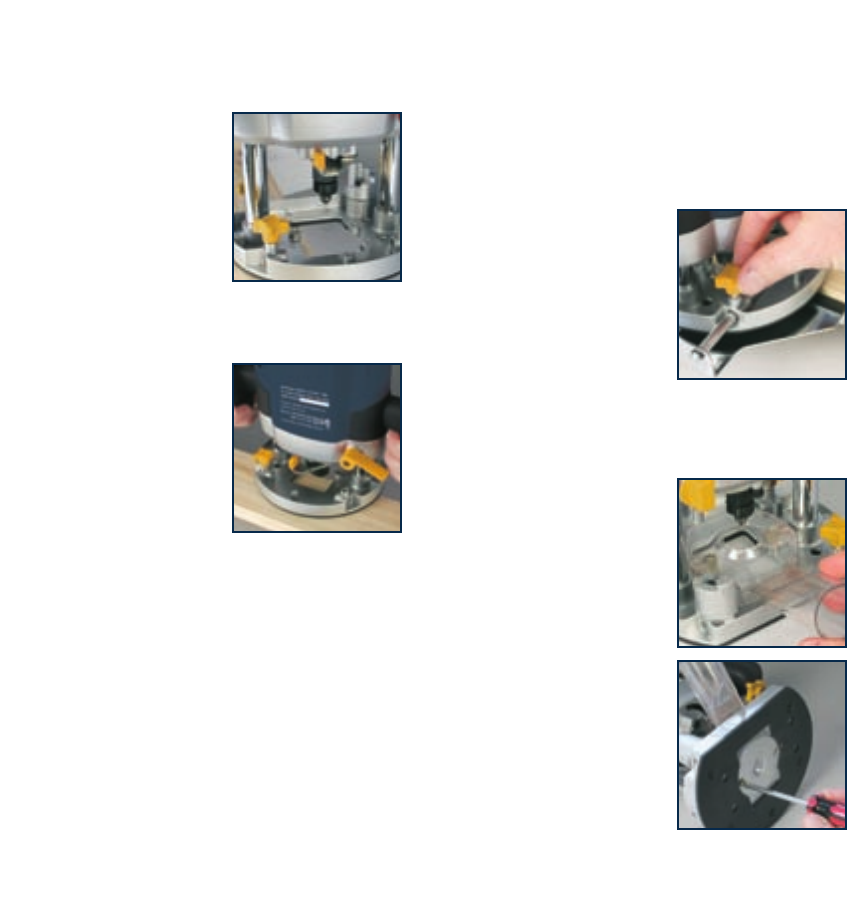
Using the dust
extraction adaptor
1. Hold the dust extraction
adaptor (13) in place over
the base of the router.
2. Secure the dust extraction
adaptor with the two screws
provided.
3. Attach a suitable workshop
vacuum or dust collector to
the outlet of the adaptor.
CAUTION. Some larger router
bits may not be able to be used
in conjunction with the dust
extraction adaptor.
10