8
Unpacking
Due to modern mass production techniques, it is unlikely
that your GMC Power Tool is faulty or that a part is
missing. If you find anything wrong, do not operate the
tool until the parts have been replaced or the fault has
been rectified. Failure to do so could result in serious
personal injury.
Switching on and off
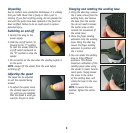
1. Connect the plug to the
power supply.
2. Slide the on/off switch (3)
forward to the “I” position
to start the sander. Slide the
on/off switch backwards to
the “O” position to stop the
sander.
3. Do not switch on the tool when the sanding surface is
on the work.
NOTE. Always lift the sander from the work before
switching off.
Adjusting the speed
The speed can be adjusted
to suit the material being
sanded.
1. To adjust the speed, move
the variable speed control
(5) until you are satisfied
that the speed is what you
need for the job in hand.
Changing and rotating the sanding base
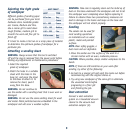
1. Using the allen key, remove
the 3 outer screws from the
existing base, and remove
the base from the sander.
You do not need to loosen
the centre screw as this
controls the movement of
the whole base.
2. Place the finger sanding
extension onto the sanding
base. Using the allen key,
secure the finger sanding
extension in position with
the 3 screws.
3. You can rotate the sanding
base in three different
positions. This assures
maximum utilization of the
sanding paper when using
the sander in small, hard-to-
reach spots. Simply loosen
the screw in the centre
of the sanding base, and
rotate the base to the new
position.
NOTE. To secure the new
position, tighten the centre
screw.


