


For complete warranty information contact your local Graco distributor, call Graco customer service:
1-800-690-2894 or visit our website: www.graco.com.
All written and visual data contained in this document reflects the latest product information available at the time of publication.
Graco reserves the right to make changes at any time without notice.
For patent information, see www.graco.com/patents.
This manual contains English. MM 312830
Graco Headquarters: Minneapolis
International Offices: Belgium, China, Japan, Korea
GRACO INC. AND SUBSIDIARIES • P.O. BOX 1441 • MINNEAPOLIS MN 55440-1441 • USA
Copyright 2008, Graco Inc. All Graco manufacturing locations are registered to ISO 9001.
www.graco.com
Revised July 2014
Maintenance
Before performing any maintenance on gun, read all warnings on front
cover of this manual and relieve pressure.
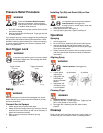
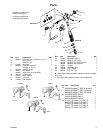
Cleaning/Replacing Filter (6)
1.
Relieve pressure. Set trigger lock
2. Disconnect fluid hose from gun at swivel (5).
3. Disconnect trigger guard (4) from guard retainer (22).
4. Unscrew handle (23) from gun (1).
5. Remove filter (6) through top of handle (23).
6. Clean filter (6). Use a soft brush to loosen and remove excess
debris.
7. Insert clean filter (6) into handle (23).
8. Reattach handle (23) to gun (1). Tighten securely.
9. Reconnect trigger guard (4) to guard retainer (22).
Translated Manuals
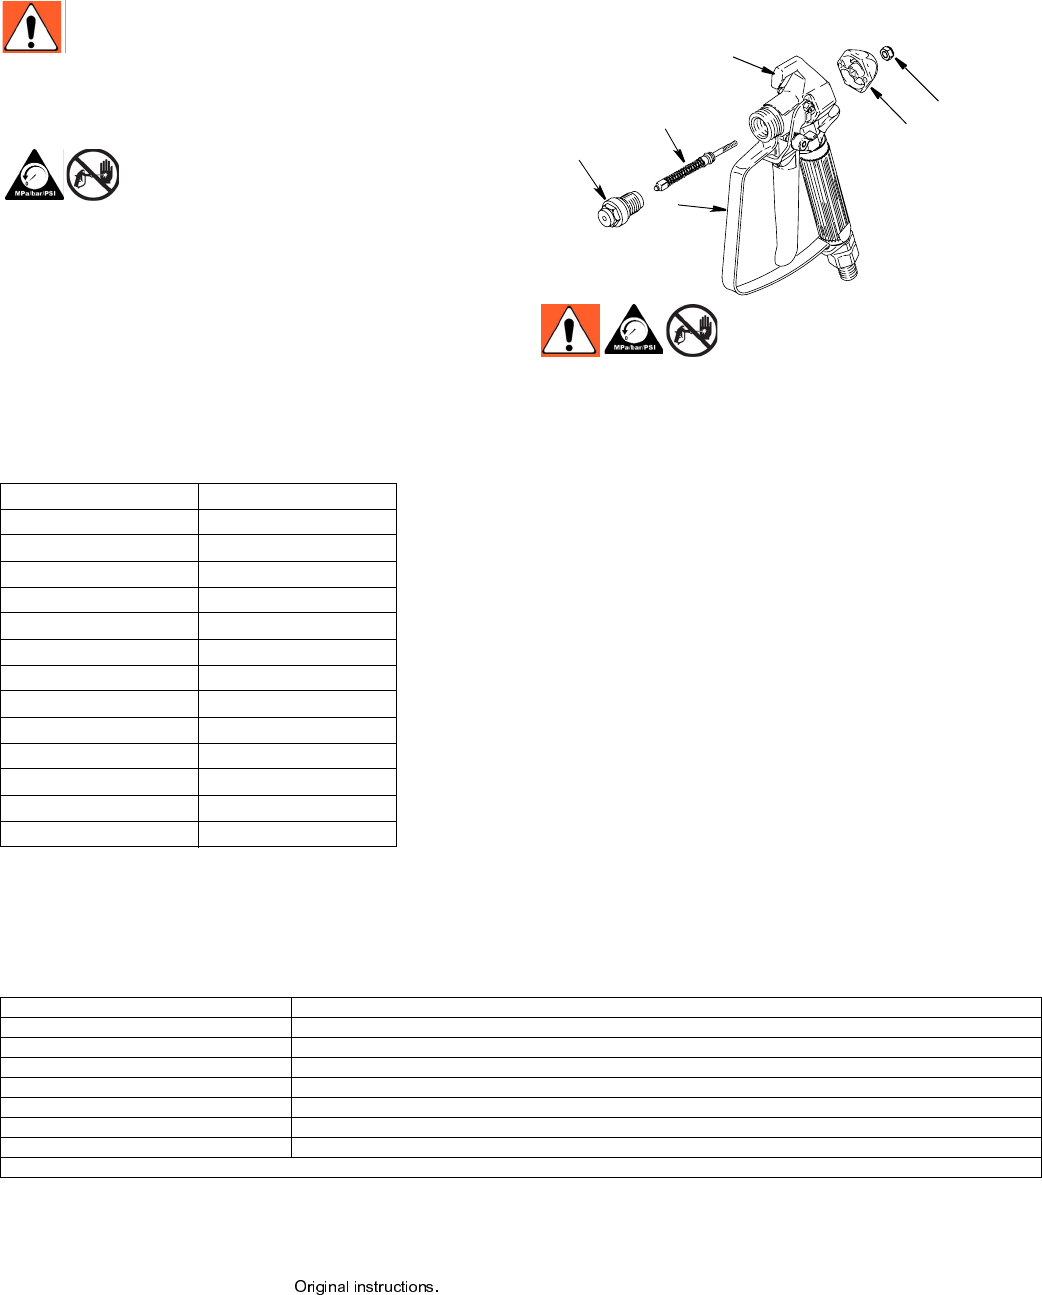
Repair
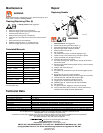
Replacing Needle
1. Relieve pressure. Set trigger lock.
2. Remove tip (26) and guard (25) from gun (1).
3. Disconnect fluid hose from gun at swivel (5).
4. Squeeze trigger while unscrewing diffuser.
5. Remove locknut and end cap.
6. Tap out needle.
7. Use a soft brush to clean out internal passages of gun.
8. Grease o-rings of new needle using a non-silicon grease.
9. Guide new needle (15b) through front of gun .
10. Install end cap and locknut, loosely.
11. For needle housing (15a), apply medium strength (blue) thread
sealant to threads.
12. Squeeze trigger while installing needle housing. Torque to 26-32
ft-lb (35-43 N•m).
13. Hold gun with nozzle facing up.
14. Set trigger lock.
15. Turn locknut (a) clockwise until you see and feel trigger (3) raise
slightly.
16. Turn locknut (a) 3/4 turn counter-clockwise.
NOTE: When needle is properly adjusted, trigger will move freely.
17. Connect fluid hose. Install tip (26) and guard (25).
18. Prime sprayer. See sprayer instruction manual.
19. Trigger gun into bucket until fluid flows from gun.
20. Release trigger (3). Fluid flow should stop immediately.
21. Set trigger lock.
22. Aim gun into bucket. Trigger gun. No fluid should flow.
23. If the gun fails tests, steps 19 and/or 21, relieve pressure and
disconnect hose. Readjust needle. Repeat tests.
Technical Data
WARNING
French - 312831 Estonian - 312845
Spanish - 312832 Latvian - 312846
Dutch - 312833 Lithuanian - 312847
German - 312834 Polish - 312848
Italian - 312835 Hungarian - 312849
Turkish - 312836 Czech - 312850
Greek - 312837 Slovakian - 312851
Croatian - 312838 Slovenian - 312852
Portuguese - 312839 Romanian - 312853
Danish - 312840 Bulgarian - 312854
Finnish - 312841 Chinese - 312855
Swedish - 312842 Japanese - 312856
Norwegian - 312843 Korean - 312857
Russian - 312844
WARNING
16
17
a
ti11311b
15b
1
15a
Maximum working pressure 3600 psi (248 bar, 24.8 MPa)
Fluid orifice size 0.125 in. (3.18 mm)
Weight (with tip and guard) 22 oz. (630 g)
Inlet
Maximum material temperature 120 F (49 C)
Wetted Parts Stainless steel, polyurethane, nylon, aluminum, tungsten carbide, brass
*Noise Level: Sound power 87 dBa
Sound pressure 78 dBa
*Measured at 3.1 ft (1m) while spraying water-based paint, specific gravity 1.36, through a 517 tip at 3000 psi (207 bar, 20.7 MPa) per ISO 3744
Translated manuals can be requested through a distributor
or at www.graco.com.