Operation
313347E 3
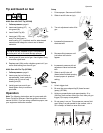
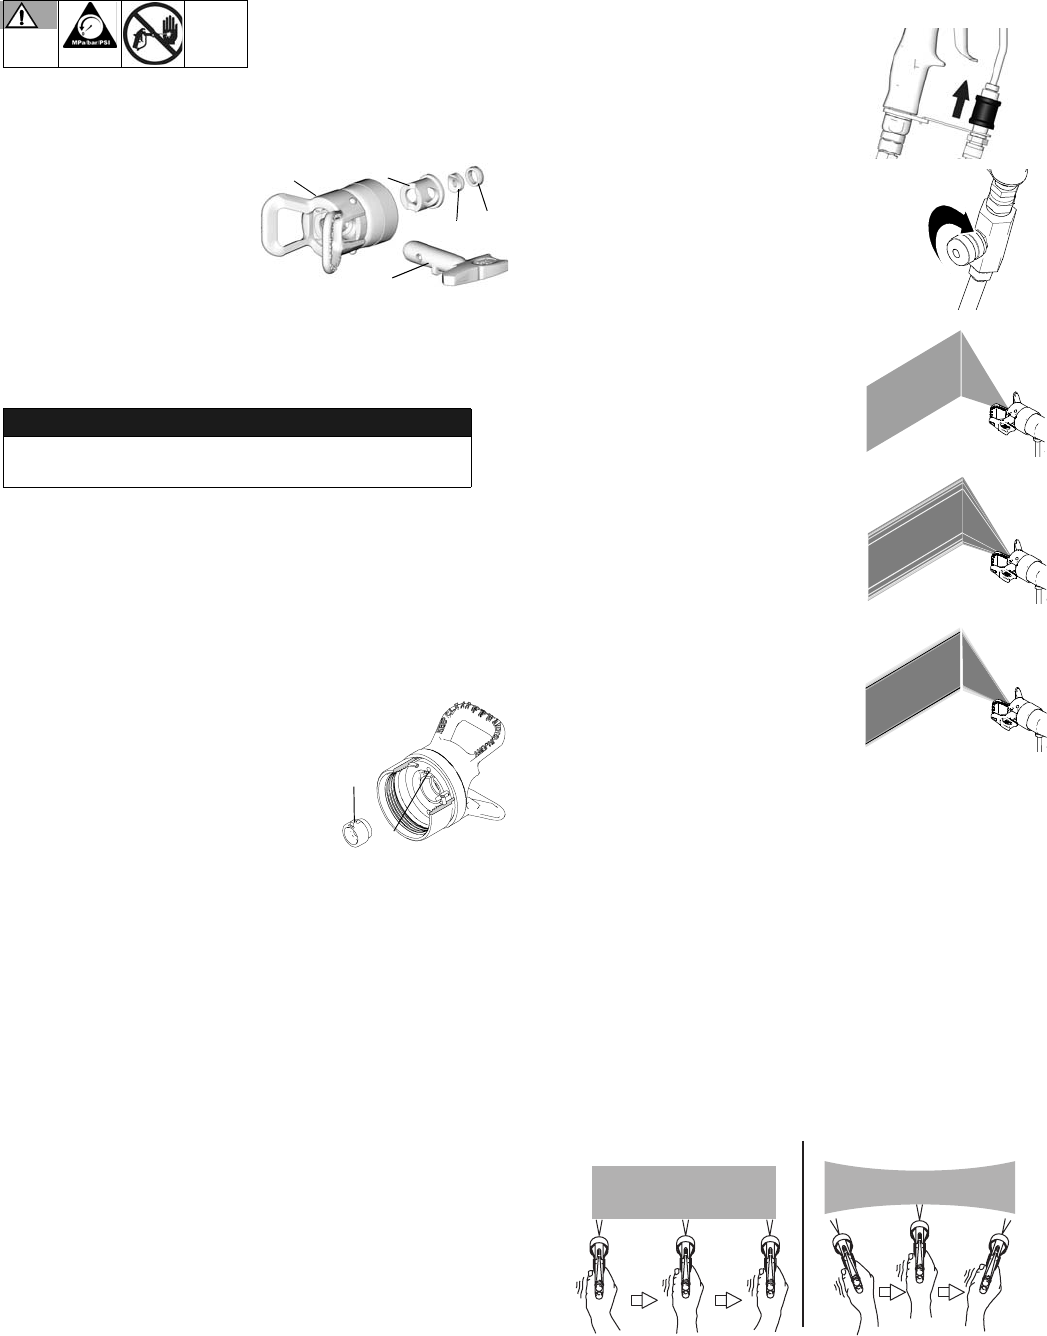
Tip and Guard on Gun
AA30 Gun with RAC Tip (257096)
1. R
elieve pressure
, page 2.
2. Insert seat housing (27)
into guard (29).
3. Insert SwitchTip (28).
4. Insert seal (27b) over
seat (27a) and insert in
seat housing (27). Use black seal for water-based
materials and orange for solvent and oil-based
materials.
5. Install guard (6) over end of gun. Hand tighten firmly
to ensure a good seal.
6. Replace seat (33a) and/or retighten guard nut if you
notice fluid leaking from front of gun.
AA30 Gun with Flat Tip (257380)
1. R
elieve pressure
, page 2.
2. Insert spray tip into flat tip air
cap assembly. Insert spray tip
locating tab (A) into air cap
locating slot (B).
3. Install guard over end of gun.
Hand tighten firmly to ensure a
good seal.
Operation
Note
: The following instructions are for guns used with
Graco FinishPro Sprayers. See the sprayer instruction
manual 313316. If you are using a different sprayer, see
your equipment instruction manual.
Setup
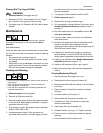
1. Prime sprayer. See manual 313316.
2. Slide air on/off valve on (up).
3. Turn air adjustment valve off at
gun.
4. Increase fluid pressure to
eliminate tails.
5. Decrease fluid pressure until
just before tails start to
appear.
6. Increase air pressure with air
adjustment valve to eliminate
tails.
7. Slide air on/off valve off
(down) when finished spraying
to save proper air pressure
setting.
Spray
1. Unlock trigger lock.
2. Be sure the arrow shaped tip (B) faces forward
(spray) (257096).
3. Hold gun perpendicular and approximately 12 in.
(304 mm) from surface. Move gun first, then pull gun
trigger (D) to spray a test pattern.
4. Do not spray in an arc. This causes an uneven fluid
coat. Spray in a path parallel to the surface, with a
50% overlap, to obtain an even fluid coat.
NOTICE
If air cap is not fully installed on gun, fluid pressure
can force paint into air line and damage sprayer.
27a
29
28
27
27b
ti8249a
A
B
ti13263a
ti12855a
ti13321a
ti13279a
ti13280a
ti13281a
WRONG
RIGHT


