


Repair
24 312394V
Repair
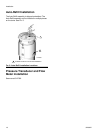
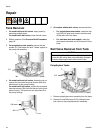
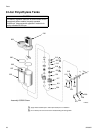
Tank Removal
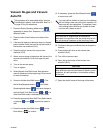
1. On models without ball valves, empty tanks by
executing multiple shots.
On models with ball valves, close the ball valves.
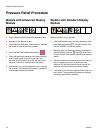
2. Relieve pressure. See Pressure Relief Procedure,
page 18.
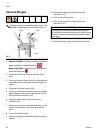
3. For polyethylene tank models, remove the two
screws (211) that attach the tank T-beam support to
the pump sub-assembly.
4. On models without ball valves, loosen but do not
remove the six socket head cap screws (204) that
hold the tank to the pump housing.
On models with ball valves, remove the six socket
head cap screws (204) that hold the ball valve to the
pump housing. The tanks can now be pulled off of
the pump housing.
5. On models without ball valves, remove the tanks.
• For polyethylene tank models, rotate the lock
ring (218) for each tank counter clockwise and
lift the tanks off of the base.
• For stainless steel tank models, rotate the
tank counter clockwise and lift the tank off of the
base.
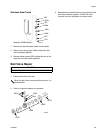
Ball Valve Removal from Tank
Polyethylene Tanks
1. Remove polyethylene tank assembly from the base.
2. Remove the six M5 screws (215) holding the two
ball valves to the polyethylene tank assembly.
211
ti12566a
204
218
ti12567a
CAUTION
Disassembly of the ball valve is not recommended.
Ensure the ball valve does not accidentally disassem-
ble when detaching the ball valve from the tank.
215
ti12566a