Repair
14 312579K
Repair
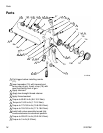
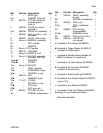
See Parts, page 16, for callout references.
Disassembly
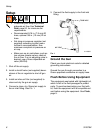
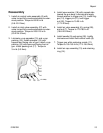
1. Unscrew retaining ring (14) to remove air
cap (13b). Check o-rings (13a and 13c)
and replace if necessary.
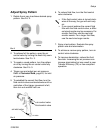
2. Trigger gun while unscrewing nozzle (11) to
prevent needle damage.
3. Check o-ring (19) and replace if necessary.
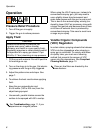
4. Remove fluid control valve (8), spring (26),
needle (9), and nut (7). Inspect. Replace
tip (9c), needle (9), and u-cup seal (20) as
necessary. If replacing needle tip, use low
strength thread adhesive on needle tip
threads.
5. Remove spring (28) and push the air valve
assembly (6) out the back of the gun.
Inspect. Replace air valve assembly (6)
and u-cup seal (20) as necessary. Use tool
(33) to install u-cup seal.
6. Remove trigger nut (22), trigger pin (21),
wave washer (18), and trigger (10).
7. Unscrew needle packing nut (17) and
remove u-cup packing (16) and
spreader (15).
8. Remove air control valve assembly (5).
Inspect and replace as necessary.
9. Remove air inlet valve assembly (27).
Inspect and replace as necessary.
Fluid Inlet Fitting Replacement
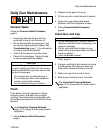
1. Remove fluid inlet fitting (4).
2. Remove fluid inlet gasket (3) from gun body
and discard.
3. Apply thread sealant to replacement fluid
inlet fitting (4) threads.
4. Snap the fluid inlet gasket (3) securely onto
the fluid inlet fitting (4).
5. Screw in fluid inlet fitting (4) and torque to
155-165 in.-lb (17.5-18.6 N•m).
6. Replace washer (28) as required.
Follow Pressure Relief Procedure, page 8.
PRESSURIZED EQUIPMENT HAZARD
• Fluid inlet gasket (3) must be replaced if
fluid inlet fitting (4) is removed from spray
gun.
• Failure to replace gasket (3) may result in
air leakage into the fluid section causing a
non-vented gravity cup to become
pressurized.


