6 309942
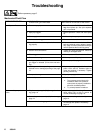
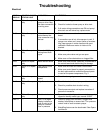
Troubleshooting
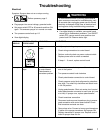
Relieve pressure; page 5.
Mechanical/Fluid Flow
TYPE OF PROBLEM
WHAT TO CHECK
If check is OK, go to next check
WHAT TO DO
When check is not OK refer to this column
Low Output or Pressure 1. For worn spray tip. 1. Follow Pressure Relief Procedure Warn-
ing, then replace tip. See your separate
gun or tip manual.
2. Spray tip clogged. 2. Relieve pressure. Check and clean spray
tip.
3. Paint supply. 3. Refill and reprime pump.
4. Intake strainer clogged. 4. Remove and clean, then reinstall.
5. To see if intake valve ball and piston ball are seat-
ing properly.
5. Remove intake valve and clean. Check
balls and seats for nicks; replace if neces-
sary, page 16. Strain paint before using to
remove particles that could clog pump.
6. Suction hose connections. 6. Tighten any loose connections. Check for
missing or damaged seals.
7. Filter clogged. 7. Relieve pressure. Check and clean filter.
8. Prime valve leaking. 8. Relieve pressure. Repair prime valve.
9. Verify pump does not continue to stroke when
gun trigger is released. (Prime valve not leak-
ing.)
9. Service pump. See page 16.
10. Leaking around throat packing nut which may
indicate worn or damaged packings. See page
16.
10.Replace packings, page 16. Also check
piston valve seat for hardened paint or
nicks and replace if necessary. Tighten
packing nut/wet-cup.
11. Pump rod damage. 11.Repair pump, page 16.
12.Low stall pressure. 12. Do either or both:
a. Turn pressure control knob fully
clockwise. Make sure pressure
control knob is properly installed to
allow full clockwise position.
b. Try a new pressure transducer.
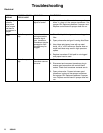
Motor runs but pump does not
stroke
1. Displacement pump pin (32) (damaged or miss-
ing), page 16.
1. Replace pump pin if missing. Be sure re-
tainer spring (31) is fully in groove all
around connecting rod, page 16.
2. Connecting rod assembly (43) for damage,
page 12.
2. Replace connecting rod assembly,
page 12.
3. Gears or drive housing, page 12. 3. Inspect drive housing assembly and gears
for damage and replace if necessary,
page 12.


