22 307912
Service
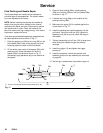
Prepare the Gun for Service
WARNING
ELECTRIC SHOCK HAZARD
Installing and servicing this equipment
requires access to parts which may
cause an electric shock or other serious
injury if the work is not performed properly. Do not
install or service this equipment unless you are
trained and qualified.
WARNING
PRESSURIZED EQUIPMENT HAZARD
To reduce the risk of injury, follow the Pressure
Relief Procedure on page 11 before checking or
servicing any part of the system and whenever you
are instructed to relieve the pressure.
NOTE:
D Check all possible remedies in Troubleshooting
before disassembling the gun.
D If the plastic parts of the gun must be held securely,
always clamp them in padded vice jaws to prevent
damage to the parts.
D Lightly lubricate o-rings and seals with petroleum
jelly. Do not over-lubricate.
D Only use genuine Graco parts. Do not mix or use
parts from other PRO Gun models. See page 35.
1. Flush the gun as instructed in Flush the Spray
Gun, page 15.
2. Relieve the pressure.
3. Disconnect the air and fluid lines from the gun.
4. Remove the spray gun from the worksite for
service or repair. Service or repair area must be
clean.
Air Cap/Nozzle/Resistor Stud
Replacement
CAUTION
Hold the front end of the gun up, and trigger the gun
while removing the nozzle and resistor stud to help
drain the gun and prevent any fluid left in the gun
from entering the air passages.
1. Prepare the gun for service as instructed at left.
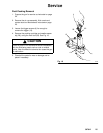
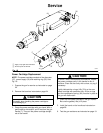
2. Remove the air cap assembly. Point the front end
of the gun up and squeeze the trigger while remov-
ing the fluid nozzle/resistor stud (21, 22) assembly
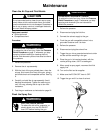
with the multi-tool (62). See Fig. 11, page 23.
NOTE: If the resistor stud remains in the gun when the
fluid nozzle is removed, start the nozzle thread onto
the stud and pull the stud out.
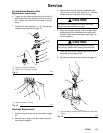
3. Unscrew and remove the resistor stud (22) with
the multi-tool (62). See Fig. 12.
WARNING
FIRE, EXPLOSION, AND
ELECTRIC SHOCK HAZARD
The resistor stud contact ring (D) is a
conductive contact ring, not a sealing
o-ring. See Fig. 11. To reduce the risk of
sparking or electric shock, do not
remove the resistor stud contact ring (D)
except to replace it and never operate
the gun without the contact ring in place.
Do not replace the contact ring with
anything but a genuine Graco part.
To install the resistor stud:
4. Lightly lubricate the o-ring (25) with petroleum jelly
and install it on the resistor stud (22).
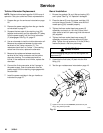
5. Using the multi-tool (62), install the resistor stud
(22) in the fluid nozzle (21). Tighten to 10 in-lb
(1.12 NSm).
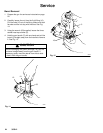
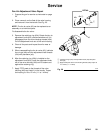
NOTE: Make sure the electrode (20) is tightened
properly, as shown in Fig. 13.
Continued on the next page.


