


308131 23
Service
Air Cap/Nozzle/Resistor Stud Replacement
(continued)
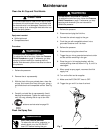
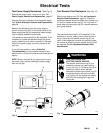
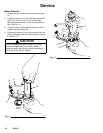
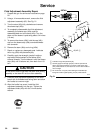
6. Trigger the gun while installing the fluid nozzle (21)
and resistor stud (22) assembly with the multi-tool
(62). Tighten until the fluid nozzle seats in the gun
barrel (1/8 to 1/4 turn past hand tight).
7. Install air cap assembly (1, 8, 49) and retaining
ring (2). Test gun resistance as instructed on page
20.
05154A
Fig. 11
20
1, 8, 49
21
22
2
25
62
D
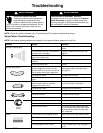
Apply a very light coat of
lubricant
Tighten 1/8 to 1/4 turn
past hand tight
0444A
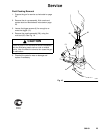
21
22
62
Fig. 12
Torque to 10 in-lbs (1.12 NSm)
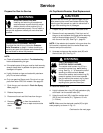
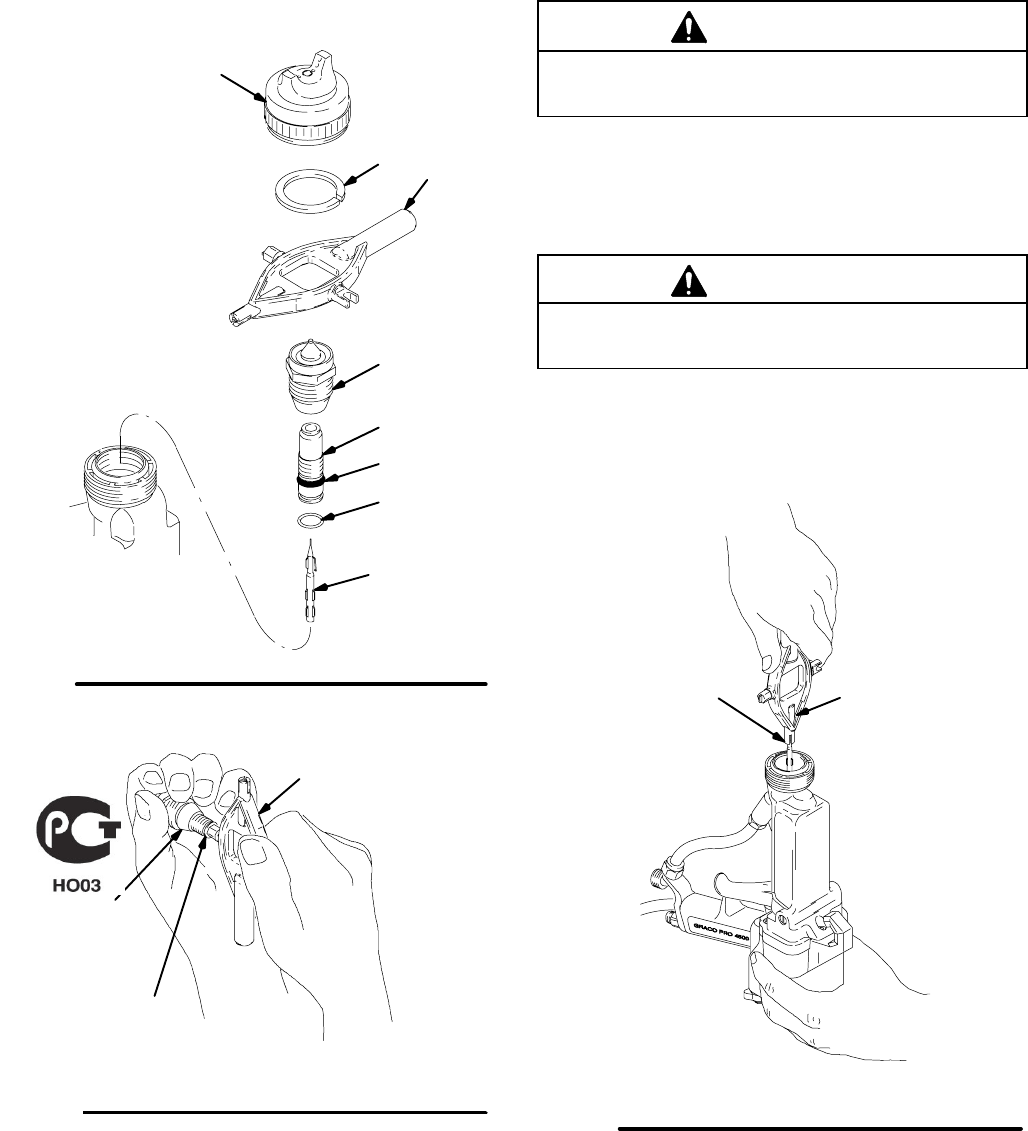
Electrode Needle Replacement
1. Prepare the gun for service as instructed on page
22.
2. Remove the air cap, nozzle and resistor stud as
instructed on page 22.
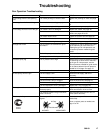
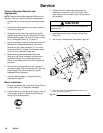
3. Unscrew and remove the electrode needle (20)
with the multi-tool (62). Hold the fluid rod end to
prevent it from turning. See Fig. 13.
CAUTION
Be careful not to damage the contact wire when
removing the electrode from the gun.
4. Apply low-strength (purple) Loctiter or equivalent
thread sealant to the electrode needle and fluid rod
threads. Install the electrode needle finger-tight.
Do not over-tighten it.
CAUTION
To avoid damaging the plastic threads or contact
wire, be very careful when installing the electrode.
5. Install the fluid nozzle, resistor stud, and air cap
assembly as instructed at left.
6. Test the gun resistance as instructed on page 20.
0378A
Fig. 13
62
20
Apply low-strength (purple) Loctite or equivalent to fluid rod
threads