


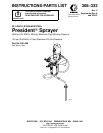
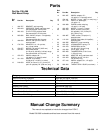
7308–333
Operation
Pressure Relief Procedure
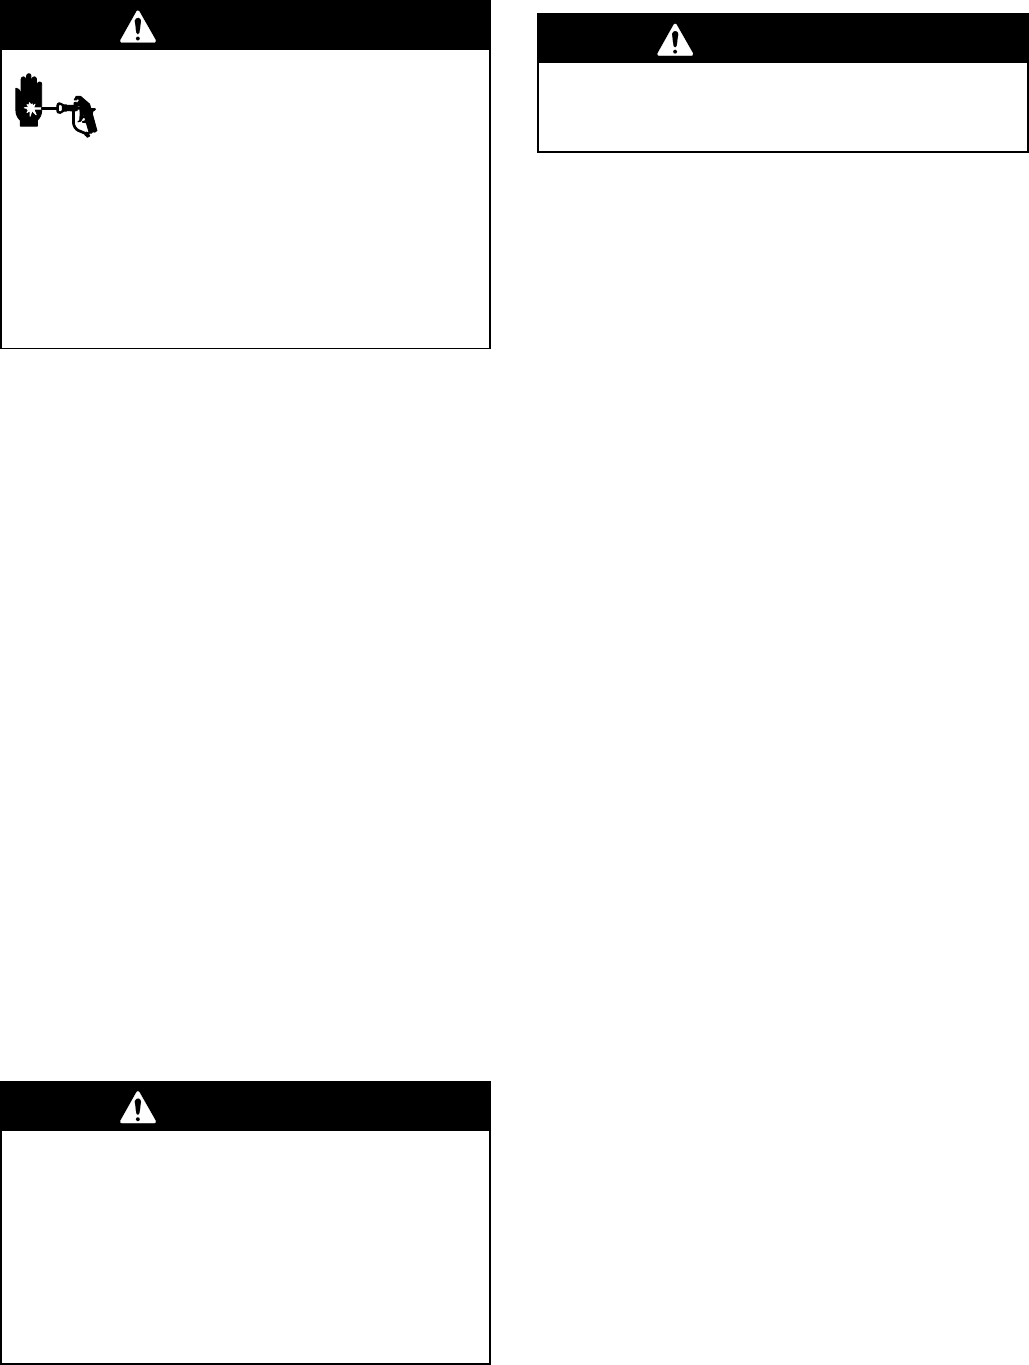
WARNING
INJECTION
HAZARD
Fluid under high pressure can be in
-
jected through the skin and cause
serious injury
. T
o reduce the risk of an
injury from injection, splashing fluid, or moving
parts, follow the
Pressure Relief Procedure
whenever you:
D
are instructed to relieve the pressure,
D
stop spraying,
D
check or service any of the system equipment,
D
or install or clean any part of the system.
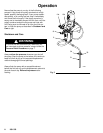
1.
Lock the spray gun safety latch.
2.
Close the bleed-type master air valve (supplied in
your system).
3.
Shut of
f the air regulators.
4.
Unlock the spray gun safety latch.
5.
Hold a metal part of the gun firmly to the side of a
grounded metal pail, and trigger the gun to relieve
pressure.
6.
Lock the spray gun safety latch.
7.
Open the drain valve (supplied in your system),
having a container ready to catch the drainage.
8.
Leave the drain valve open until you area ready to
spray again.
If you suspect that the spray tip or hose is completely
clogged or that pressure has not been fully relieved,
very slowly loosen the tip retaining nut or hose end
coupling and relieve pressure gradually
. Clean the tip
or hose obstruction.
Flush the Pump Before Using
Pumps
are tested in lightweight oil which is left in to
protect the pump parts. T
o prevent contamination of
the fluid, flush the pump with a compatible solvent
before using it.
WARNING
Before flushing, be sure the entire system and
flushing pails are properly grounded. Refer to
Grounding
on page 4. Follow the
Pressure
Relief Procedure
above and remove the spray tip
from the gun. Always use the lowest possible fluid
pressure, and maintain firm metal-to-metal contact
between the gun and the pail during flushing to
reduce the risk of fluid injection, static sparking,
and splashing in the eyes or on the skin.
Starting and Adjusting the Pump
WARNING
To
reduce the risk of serious injury whenever you
are instructed to relieve pressure, always follow the
Pressure Relief Procedure
on page 7.
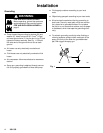
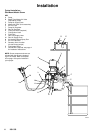
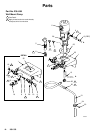
See Fig. 3. Be sure the air regulators (10a and 10b)
and bleed-type master air valve (16) are closed. Do
not install the spray tip yet.
Screw the bung adapter (34) into the container
’
s bung
hole, slide the suction tube through the adapter into
the container
, and tighten the thumbscrew (33) to
secure. Position the tube so its end is about 1/2 in. (13
mm) of
f the bottom of the container
.
Open the drain valve (6) to prime the pump. Open the
bleed-type master air valve (16). Open the gun air
regulator (10a). Hold a metal part of the spray gun
firmly to the side of a grounded metal pail and trigger
the gun.
Slowly open the pump air regulator (10b) until the
pump starts. Run the pump slowly until fluid comes
from the drain valve (6).
Close the drain valve and continue to run the pump
until all the air is pushed out of the fluid lines. Release
the gun trigger and lock the safety latch; the pump will
stall against the pressure.
With the pump and lines primed, and with adequate air
pressure and volume supplied, the pump will start and
stop as the spray gun is triggered and released.
Relieve the pressure
, then install the spray tip in the
gun.
Use the pump air regulator (10b) to control the pump
speed and fluid pressure. Always use the lowest
pressure necessary to achieve the desired results.
Higher pressures waste fluid and cause premature
wear of the pump packings and spray tip.
Keep the packing nut/wet-cup filled with Graco Throat
Seal Liquid (TSL) to help prolong the packing life.
Check the tightness of the packing nut weekly
. The
packing nut should be tight enough to prevent leakage
– no tighter
. Always
relieve the pressure
before
adjusting the packing nut.