


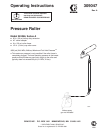
309047 3
Flushing
This is the procedure for flushing the pressure roller.
The pump and gun you are using may have additional
flushing steps, such as cleaning filters and screens.
See the pump and gun flushing instructions.
NOTE: Leave the pressure roller attached to the gun
for this procedure.
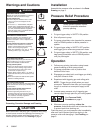
See Pressure Relief
Procedure on page 2.
1. Relieve the pressure.
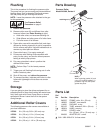
2. Remove roller cover (6) and diffuser from roller
frame as follows (see Parts Drawing at right):
a. Hold roller cover, and unscrew retaining nut.
b. Slide diffuser and roller cover off of roller fame.
c. Pull roller cover off of diffuser.
3. Clean roller cover with compatible fluid, and clean
diffuser by shaking vigorously in pail of compatible
fluid to remove wet paint. Use soft bristled brush to
remove any dried paint on diffuser.
4. Place roller frame (1) in empty waste pail.
5. Prime pump with flushing fluid compatible with
paint you are using, and use the lowest pressure
setting at which pump primes.
6. Put pump prime/drain valve in position that
delivers fluid to hose.
NOTE: Perform Step 7 at the lowest pressure
possible.
7. Trigger gun until flushing fluid coming out of roller
frame is relatively clear.
8. Shut off the pump, and relieve the pressure.
9. To prevent corrosion, lubricate paint holes in roller
frame with lightweight oil that does not contain
silicone.
Storage
If you are going to store the airless equipment for an
extended period of time after flushing with water-base
fluid, flush again with Graco Pump Armor or mineral
spirits/paint thinner. Leave the fluid in the system
during storage.
Additional Roller Covers
The following pressure roller covers are available at
your local distributor:
107589 9 in. (23 cm); 3/8 in. (9.5 mm) nap
107590 9 in. (23 cm); 1/2 in. (13 mm) nap
107591 9 in. (23 cm); 3/4 in. (19 mm) nap
107592 9 in. (23 cm); 1-1/4 in. (32 mm) nap
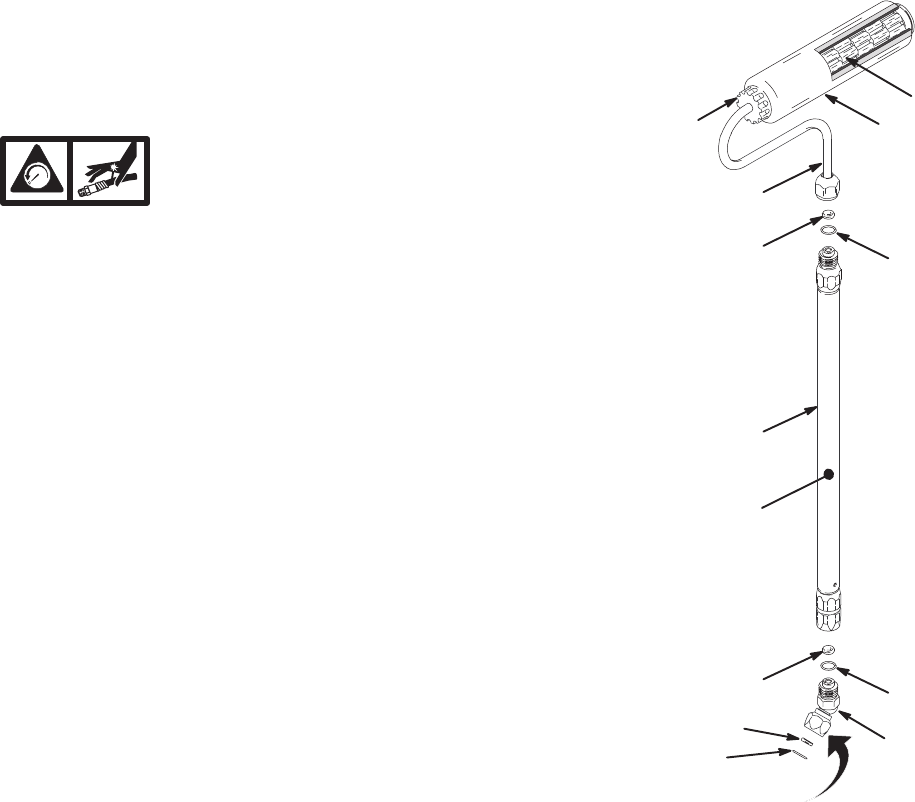
Parts Drawing
2
2*
4
5
6
7
diffuser
retaining nut
9593A
1
3
2
3
3*
HINT:
When replacing gasket (2*) and
o-ring (3*) in swivel adapter (7),
position o-ring first, then press
gasket into place.
Pressure Roller,
Model 243066, Series A
Parts List
Ref.
No. Part No. Description Qty.
1 240005 FRAME, roller; 9 in. (23 cm) 1
2 162863 GASKET, non-metallic 3
3 114049 PACKING, o-ring 3
4 232122 TUBE, extension; 20 in. (50 cm) 1
5Y 195804 LABEL, warning 1
6 107590 COVER, roller;
9 in. (23 cm); 1/2 in. (13 mm) nap 1
7 224399 ADAPTER, 45_ swivel 1
Y Call 1–800–328–0211 for free extras.