Do not remove the pressure switch cover
with the machine plugged in to power.
When the cover is off, the electrical con-
nections are uncovered and can be a
source of electrical shock. Make the adjust-
ments progressively until the desired level
is reached, and disconnect from power
each time you turn the adjusting nut.
Serious personal injury can occur.
-14-
G8297/G8298/G8299 Air Compressors
Pressure Limit
Adjustment
The compressor is delivered with pressure switch
settings which turn the compressor pump off
when it reaches a tank pressure of 135 PSI, and
turn it back on when it reaches 105 PSI. Normally
these settings should not require any adjustment.
In the event it becomes necessary to change, first
make certain the compressor is disconnected
from the power source. Then remove the black
plastic cover below the On/Off switch. This is
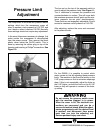
done by removing the rubber plug on top of the
housing and inserting a Phillips
®
screwdriver. See
Figure 10.
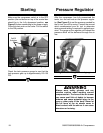
Fig 10. Removing pressure switch cover.
The hex nut on the top of the exposed switch is
used to adjust the pressure limits. See Figure 11.
Turn it clockwise to increase the pressure and
counterclockwise to reduce. This will move both
the maximum pressure shutoff point and the min-
imum pressure turn-on point simultaneously.
These limits are not separately adjustable. Do not
exceed a maximum cutoff pressure of 145 PSI.
After adjusting, replace the cover and reconnect
to the power source.
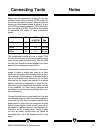
Fig 11. Adjusting nut on pressure switch.
Adjusting Nut
For the G8299, it is possible to control which
motor comes on first by adjusting these pressure
limits. The machine is set from the factory so the
2 HP pump comes on first to minimize amperage
draw. If this is not acceptable, adjust the limits on
the 2 HP higher, and set the limits on the 2.5 HP
lower so they will operate in reverse of the facto-
ry setting.


