


H0601 14.4V Cordless Jig Saw
-7-
OPERATIONS
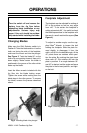
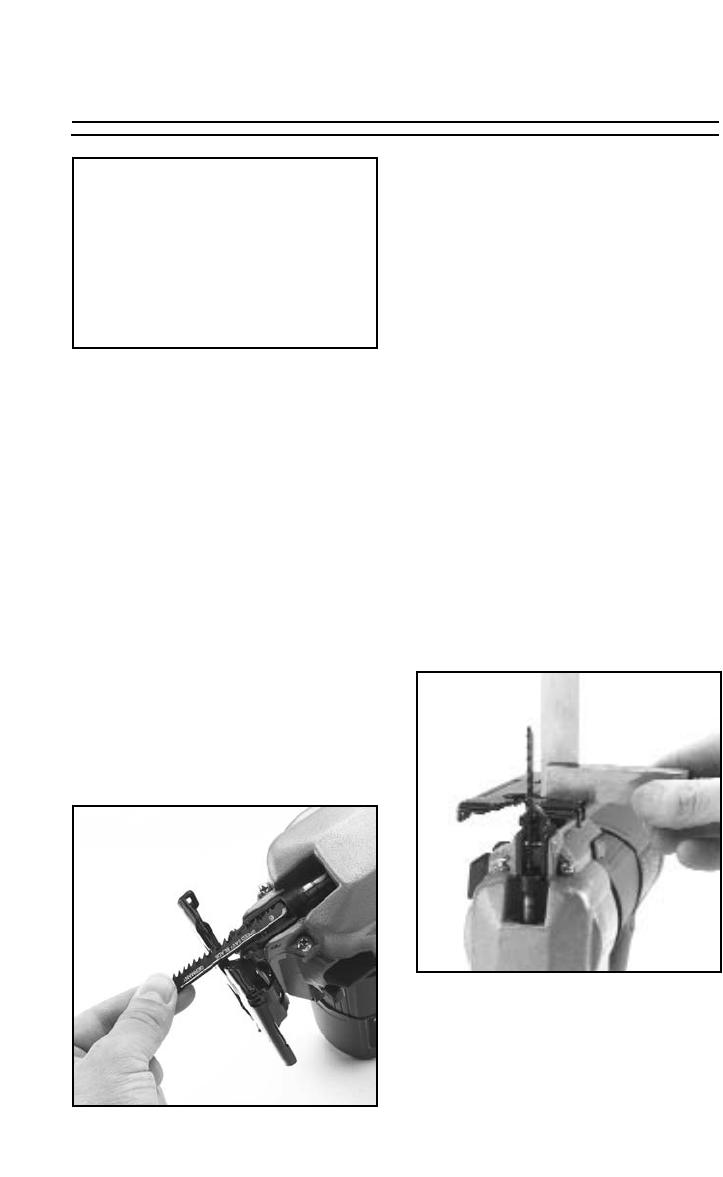
Changing Blades
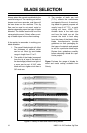
Make sure the Orbit Selector switch is in
Position III. Take the blade and turn it so the
teeth are facing the side of the footplate,
and insert the mount end into the plunger.
See Figure 3. Twist the blade 90˚ so the
teeth are now pointing forward, then pull it
down slightly. Make certain the blade is
positioned in the groove of the roller which
backs up the blade.
Insert the Allen
®
wrench included with this
Jig Saw into the blade locking screw.
Tighten the screw while making sure the
blade stays in the roller groove. To remove
the blade, reverse the process described
above.
Turn the switch off and remove the
battery from the Jig Saw before
attempting blade installation or any
adjustments. Serious injury may
occur if the unit should be acciden-
tally started while installing the blade.
Fig 4. Checking blade squareness.
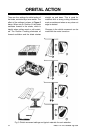
Footplate Adjustment
The footplate can be adjusted for cutting at
90˚ to the surface as well as any angle
from ±45˚. To be certain the footplate is
cutting at precisely 90˚, it is useful to check
the blade squareness to the footplate with
the use of a small machinist’s square (See
Figure 4).
To adjust to another angle, use the sup-
plied Allen
®
Wrench to loosen the bolt
holding the footplate. Slide the plate for-
ward slightly to disengage it from the
notch, and tilt it to the desired angle. At the
45˚ points there are notches which posi-
tion the plate. By pushing the plate back
when near 45˚, the notches will lock the
plate in position. If an angle between 90˚
and 45˚ is desired, set the angle and leave
the plate in the forward position, and tight-
en the bolt.
Fig 3. Inserting blade into plunger.