


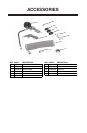

Model H8209 14-Piece Air Tool Kit -5-
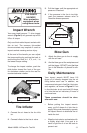
Daily Maintenance
Your impact wrench MUST have 2-6
drops of oil directly dropped into the air
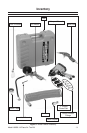
fitting before each use. In addition, we
recommend using an in-line filter, lubricator,
and regulator, as shown in Figure 2. If an
in-line lubricator is not used, add 2-3 drops
of oil into the tool air inlet every 2 hours of
continued use.
These procedures should be done
after each use:
• Before putting the impact wrench
away, put 2-6 drops of oil into the air
supply fitting and momentarily operate
the impact wrench to distribute the oil
inside the tool.
• Wipe the tool exterior and sockets with
a slightly oiled cloth. Your goal is to
leave a light film of oil on the tools to
prevent rust.
Tire Inflator
1. Connect the air hose to the tire infla-
tor.
2. Connect inflator to the tire air valve.
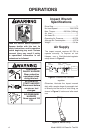
Impact Wrench
Your new single hammer
1
⁄2" drive impact
wrench (Figure 2) will generate up to 230
ft/lbs. of torque.
Only use thick-walled impact sockets with
this air tool. The common thin-walled
chrome sockets may explode if used as
impact sockets causing serious injury.
At the end of the handle you can adjust
the torque setting by pushing the knob in
and turning the knob to 1, 2, 3, or 4; 1 is
the lowest torque setting.
To change the impact rotation, push the
slide button toward the front of the gun
for clockwise rotation and to the rear for
counterclockwise rotation.
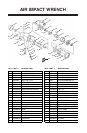
Figure 4. Impact wrench locations.
Torque Setting
Rotation Button
Figure 5. Tire inflator locations.
Pressure Gauge
Release Valve
Inflator
Blow Gun
1. Attach the blow gun to the air supply
with the air hose.
2. Aim the blow gun at the workpiece and
pull the trigger. DO NOT point the blow
gun in the direction of yourself or oth
-
ers.
3. Pull the trigger until the appropriate air
pressure is reached.
4. If the pressure in the tire is too high,
push the pressure release valve to
bleed the excess pressure.
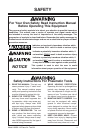
EYE INJURY
HAZARD!
Wear protective
equipment when
using these tools.