


Page 4SKU 40209
Unpacking
When unpacking, check to make sure that all the parts are included. If any parts are
missing or broken, please call Harbor Freight Tools at the number on the cover of this
manual as soon as possible.
Battery Precautions
1. Read all instructions and warnings on the battery before charging the battery.
2. To avoid accidents, charge the supplied battery only. Do not use
a different charger with this battery.
3. Do not expose the battery to rain or wet conditions.
4. To avoid damage of cable and plug, never pull the cable to
disconnect the charger.
5. Do not use the charger if the cable or plug are damaged.
6. Repairs should be carried out by a qualified technician only.
7. Do not touch the battery poles with any conductive source.
8. Do not store the battery in a box with other metal objects.
9. Do not throw the battery in a fire. Ni-Cd Battery must be recycled or disposed of properly.
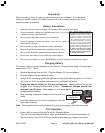
Charging Battery
The battery does not come charged from the factory. Charge before using. Charging room
temperature: 50
0
F - 104
0
F.
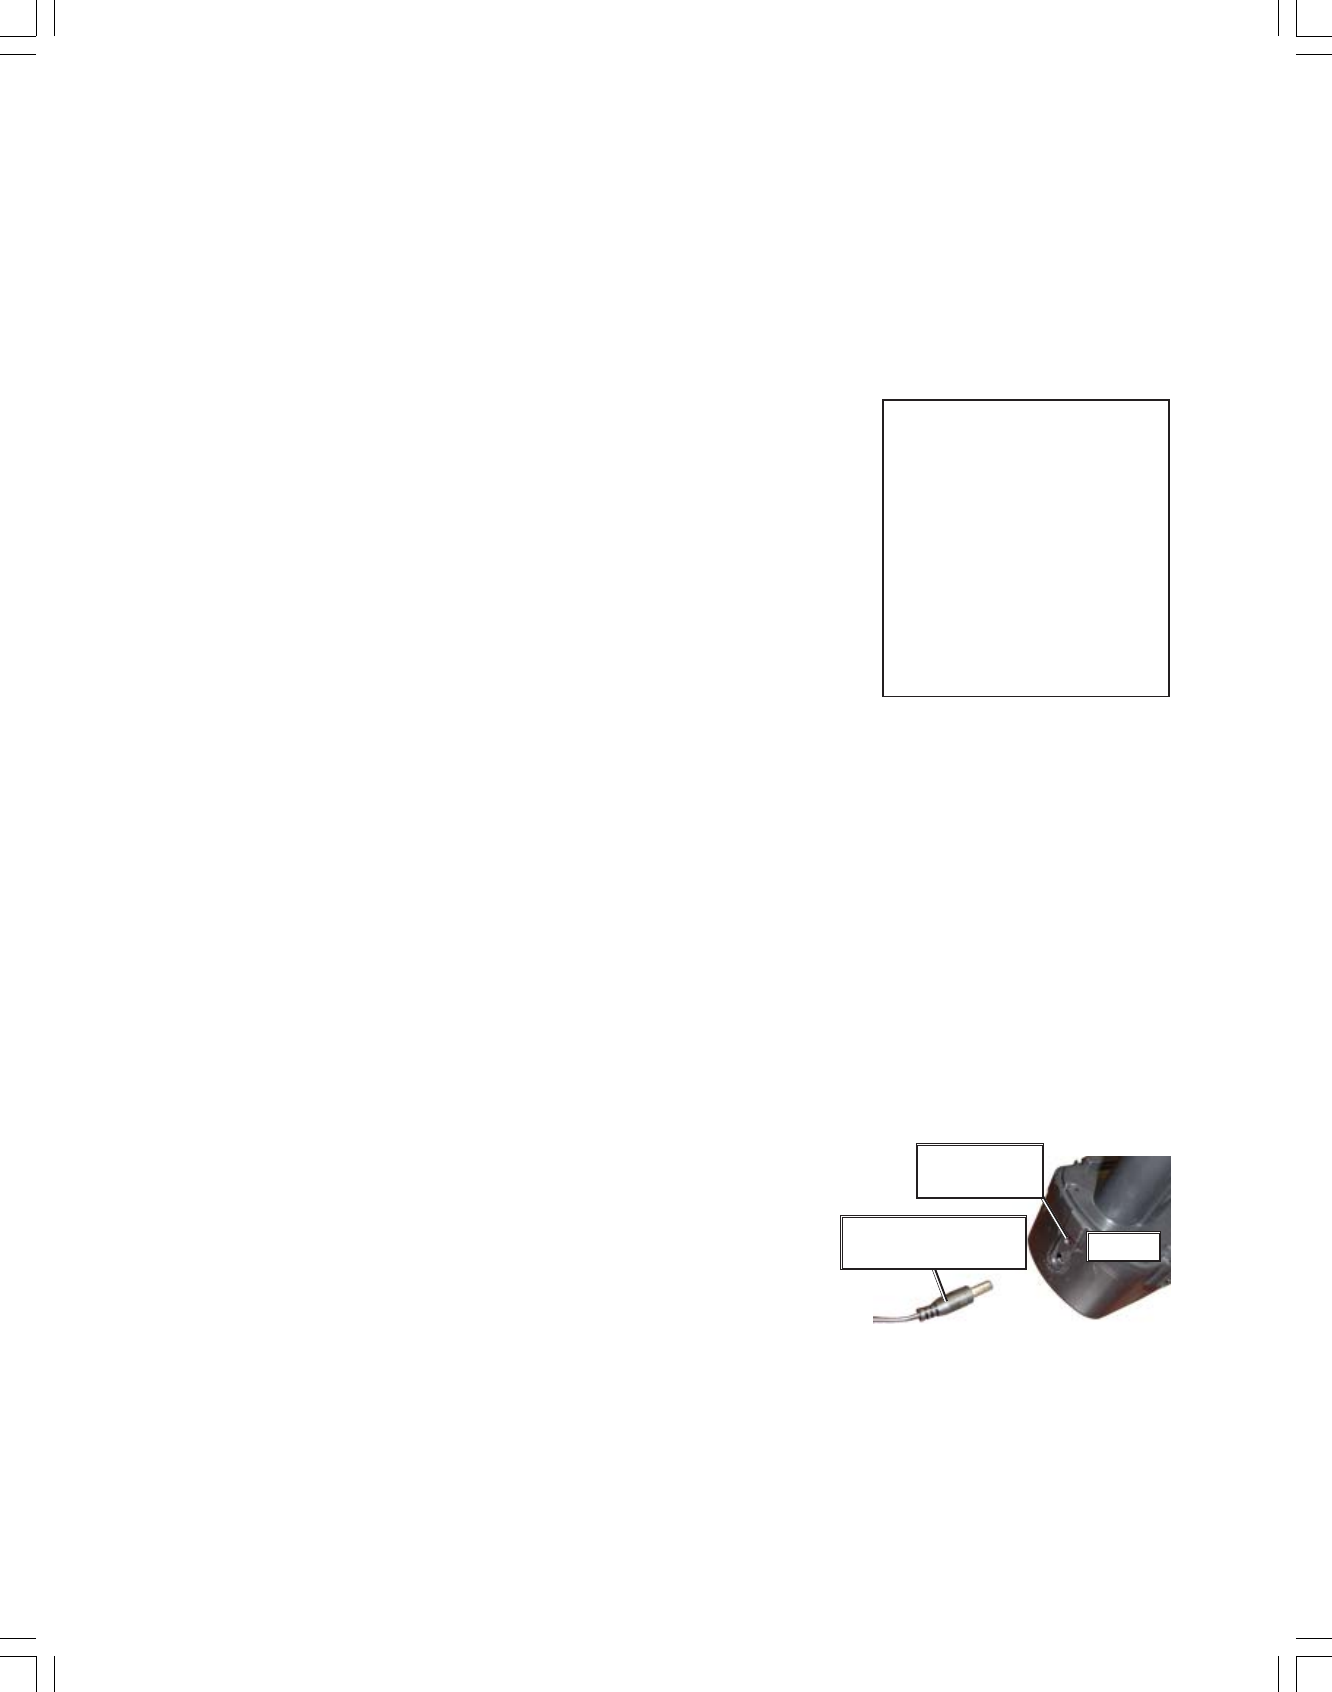
1. Remove the battery from the Drill. Plug the Adaptor (21) into the battery.
2. Plug the Adaptor into an electrical outlet.
3. Verify that the red charging indicator light on the back of the battery comes on. If it does
not come on, check the power connection or try a different wall outlet.
4. Charge the battery initially for 5 hours continuously. Adaptors should not be left
plugged in or charging for more than 5 hours. Subsequent charges should take
between 3 and 5 hours. Allow adaptor to cool down before
charging another battery.
5. After charging, unplug the Adaptor from the electrical
outlet.
6. Insert the battery into the tool by pressing on the two side
tabs while inserting.
Note: The operation time of a new battery will ramp up as properly used and recharged.
Drill Operation
1. Insert a drill or screw bit into the Chuck (8). Securely tighten.
Turn the chuck counterclockwise to open, and clockwise to close while holding on to
the chuck sleeve. Use 3/8 inch bits or smaller to avoid damage to gears and motor.
Note: Always switch to a fresh bat-
tery when tool performance begins
to diminish. Severe heat is most de-
structive to a battery; the more heat
generated, the faster the battery loses
power. A battery that gets too hot can
be permanently damaged. Never over-
discharge a battery by using the tool
even after tool performance is decreas-
ing. Never attempt to discharge a tool’s
battery by continuing to pull the tool trig-
ger. When tool performance begins
to diminish, stop the tool, re-charge
the battery and use the fresh battery
for optimal performance.
REV 05/02; REV 10/03; REV01/04; REV10/05
plug from
Adaptor (21)
Battery
charging
indicator light