


Page 7For technical questions, please call 1-800-444-3353.SKU’s 40072,
40073, & 97521
SPECIFICATIONS
Operating
Pressure
60-100 PSI
Staple Capacity 80
Staple Length /
Type
3
/
4
” to 1-
1
/
2
”,
1
/
4
” Crown,
.039-.042” Shank (18 Gauge)
Air Inlet
1
/
4
” NPT (18 TPI - male/female
adapter included)
Note: SKU’s 40072 and 97521 contain the
Stapler by itself.
SKU 40073 contains the Stapler,
pneumatic tool oil, 2 hex wrenches, and
a blowmold carrying case.
UNPACKING
When unpacking, make sure the item
is intact and undamaged. If any parts are
missing or broken, call Harbor Freight Tools at
1-800-444-3353 as soon as possible.
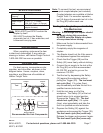
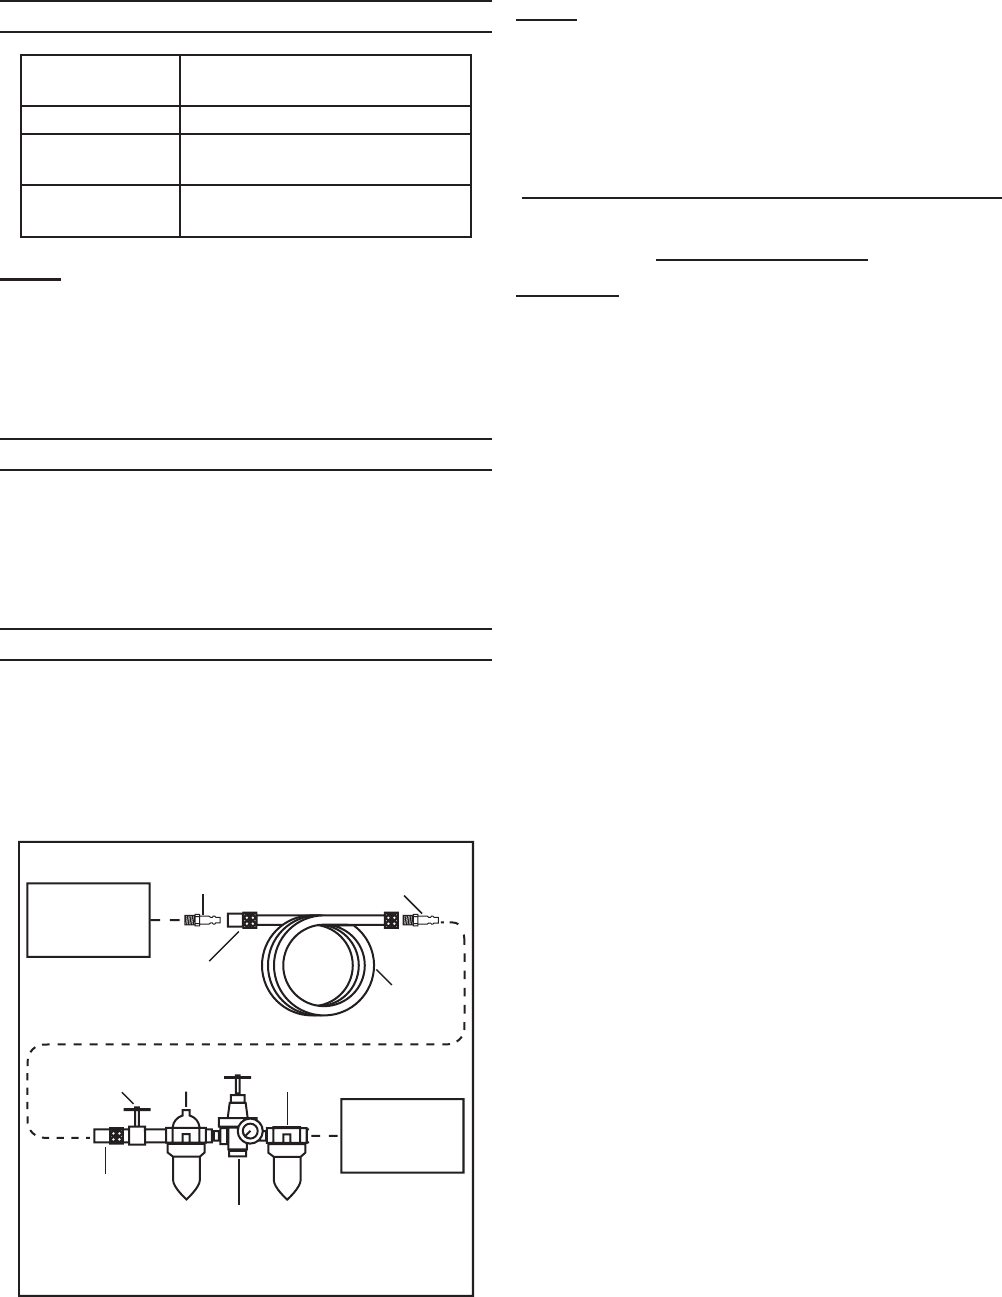
OPERATION
For best service, incorporate an oiler,
regulator, and inline lter, as shown in the
diagram below. Hoses, couplers, oilers,
regulators, and lters are all available at
Harbor Freight Tools.
Quick
Coupler
Recommended Air Line Components
Regulator with
Pressure Gauge
Quick
Coupler
Air Hose
on Reel
Valve FilterOiler
Coupler
Plug
Tool
Air
Compressor
Coupler
Plug
Note: To connect this tool, we recommend
a quick coupler/adapter (not included).
Coupler/adapters are available at Harbor
Freight Tools. For smoother operation,
put 3-5 drops of pneumatic tool oil in the
Air Plug (82) before each use.
Testing the Single Sequential Safety
Trip Mechanism
Warning: Even though the Stapler should
be empty during this procedure,
ALWAYS point the Stapler at a piece
of scrap wood when testing.
Make sure the tool is disconnected from 1.
the power supply.
Completely empty the magazine of 2.
staples.
The Stapler should not re if the nose is 3.
not depressed against the workpiece.
Check that the Trigger (39) and the 4.
Safety (52) move freely, without sticking.
Connect the air supply to the tool at the 5.
Air Plug (82) set at the recommended
60-100 PSI, and not to go over the
maximum 100 PSI.
Test the tool by depressing the Safety 6.
(52) against the workpiece without
pulling the Trigger (39). The tool must
not cycle (re). If it cycles (res),
stop immediately and take the tool to a
qualied service technician.
Hold the tool away or off of the 7.
workpiece. The Safety (52) of the tool
should return to its original position.
Squeeze the Trigger (39). The tool
should not cycle (re). If it cycles
(res), stop immediately and take the
tool to a qualied service technician.
Depress the Safety (52) against the 8.
workpiece and squeeze the Trigger (39).
The tool must cycle (re) once only.
Release the trigger and squeeze it again.
The tool must cycle (re) once only.
REV 10a