


SKU 40115 Page 5For technical questions, please call 1-800-444-3353.
Unpacking
When unpacking, check to make sure the parts listed on page 9 are included. If any parts
are missing or broken, please call Harbor Freight Tools at the number on the cover of this
manual as soon as possible.
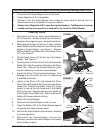
Testing The Single Sequential Safety Trip Mechanism
Warning: Even though the nailer should be empty during this procedure, ALWAYS point
the nailer/Stapler at a piece of scrap wood when testing.
1. The Nailer/Stapler should not fire if the nose is not depressed against the workpiece.
This tool has a contact safety tip mechanism, which is designed to prevent inadvertent
firing. The tool will only fire if the Safety (42) is resting on the workpiece prior to pulling
the Trigger (38).
2. Make sure the tool is disconnected from the air supply.
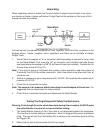
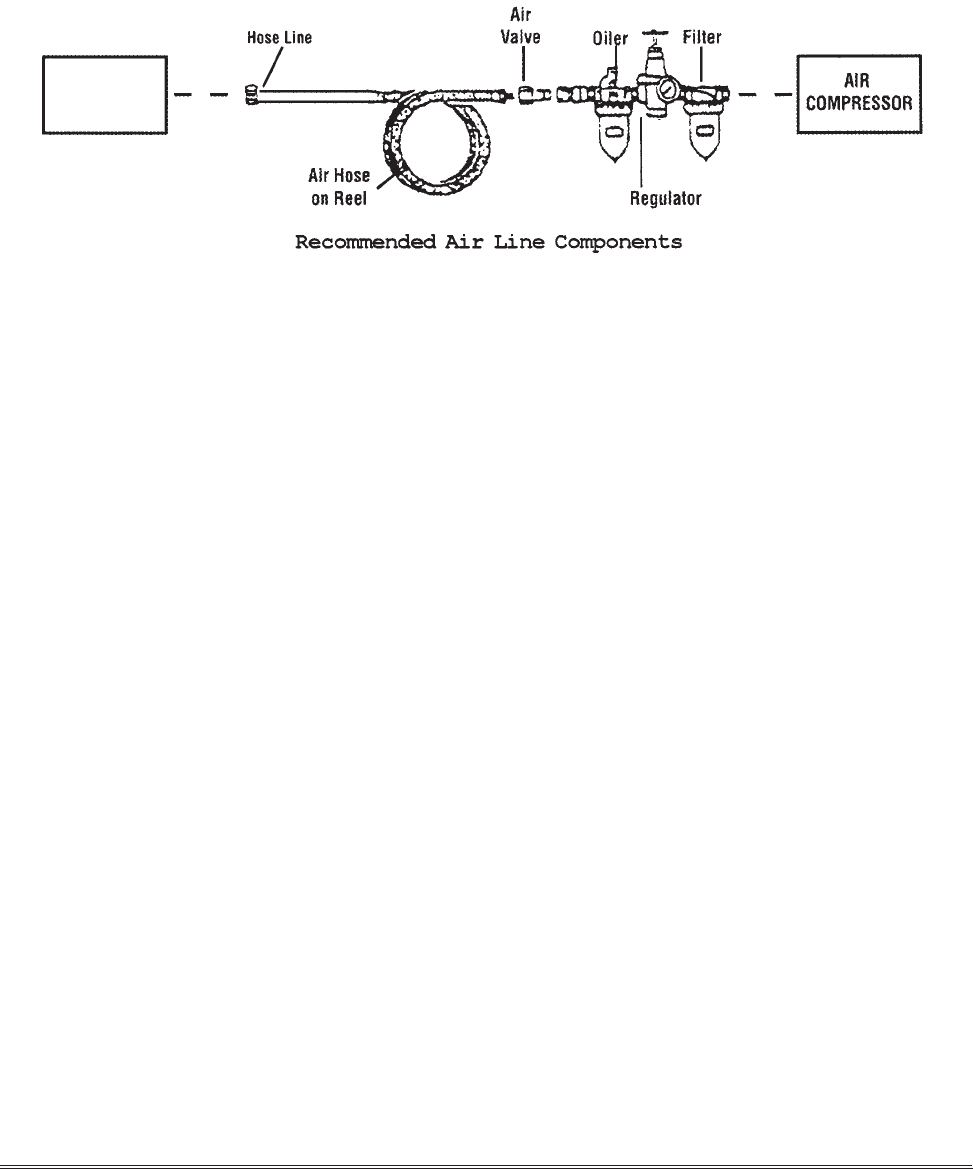
Operation
For best service you should incorporate an oiler, regulator, and inline filter, as shown in the
diagram above. Hoses, couplers, oilers, regulators, and filters are all available at Harbor
Freight Tools.
1. You will need to prepare a 1/4” air connector (sold separately) to connect to the air inlet
on the Nailer/Stapler First, wrap the 1/4” air connector (not included) with pipe thread
seal tape before connecting to a 3/8” ID Air Source Hose (not included). Connect the Air
Source Hose to the Air Plug (77).
Note: If you are not using an automatic oiler system, before operation, add a few drops of
Pneumatic Tool Oil to the airline connection. Add a few drops more after each hour of
continual use.
2. Set the air pressure on your compressor to 60-100 PSI. Do not exceed the maximum air
pressure of 100 PSI.
3. Check the air connection for leaks.
Note: The amount of air pressure effects how deep the nails/staples will be driven. It is
suggested that you experiment on scrap material.
4. Check the air connection for leaks and disconnect the Nailer/Stapler.
Nailer/
Stapler
1/4”-18 NPT