


Page 9SKU 41983
For technical questions, please call 1-800-444-3353.
SETUP AND SETTINGS
The 1” Rotary hammer is designed to be used in the following applications:
For drilling stone, concrete, and other hard and brittle materials.
For chiseling.
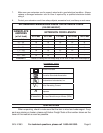
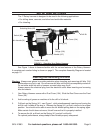
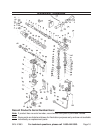
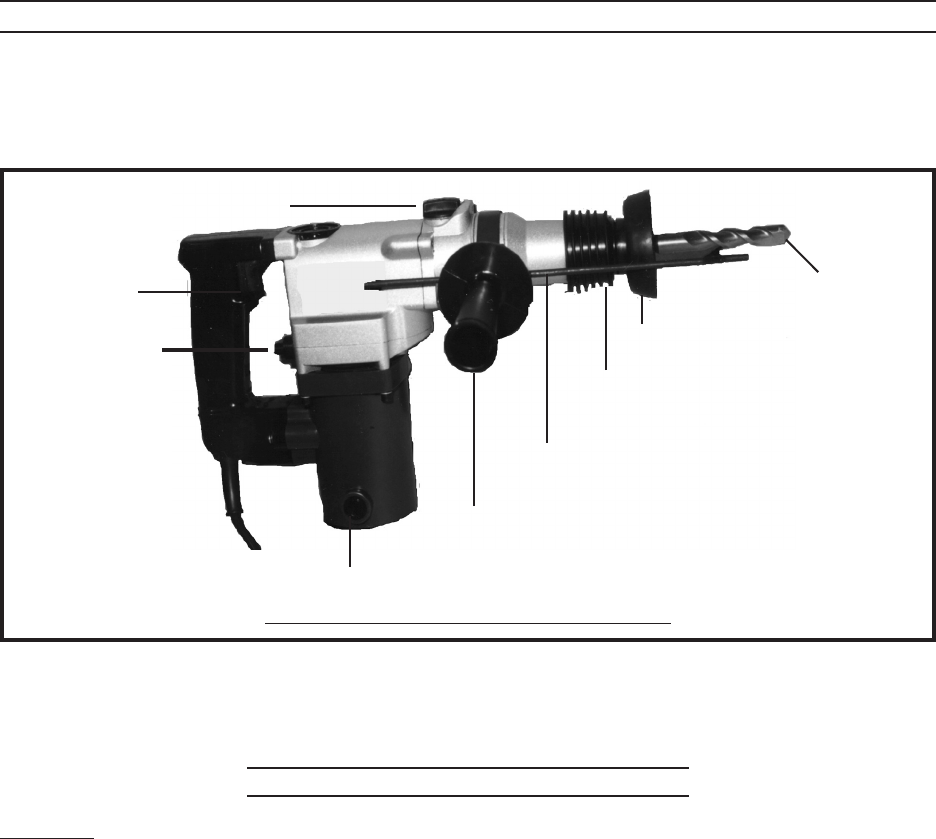
Main Handle (91)
Carbon Brush (82)
Switching Knob (22)
Auxiliary Handle (107)
Depth
Gauge (106)
Spring (41)
Dust Cover (104)
Drill Bit
FIGURE 1 - Operating Your Rotary Hammer
Switch (96)
See Figure 1 above to become familiar with the various features of the Rotary Hammer.
A complete part number listing is shown on page 9. The complete Assembly Diagram is located
on page 10.
Inserting and Removing Drill Bits
Warning: Always wear gloves to provide protection when inserting and removing drill bits. Drill
bits become very hot in use. Do not remove drill bits until the bit has completely cooled off.
Do not strike stuck bits with a hammer as metal chips may fly off.
Always remove the electrical plug from the electrical outlet when inserting and removing
bits and chisels.
Your Rotary Hammer comes with a Dust Cover (104). Slide the Dust Cover over the Front
Cover (39).
Add a coating of grease or machine oil to the drill or bit shank.
Pull back on the Spring (41) - see Figure 1, while simultaneously inserting and turning the
drill bit until it slides all the way in. Release the Spring (41) so that it returns to its original
position. You should not be able to move the bit without pulling back on the spring again.
Make certain the bit does not move, this will ensure that it is properly installed.
To remove the bit, pull back on the Spring (41) and pull out the bit.
For optimal performance, always keep bit and chisels properly sharpened.
•
•
1.
2.
3.
4.