


Page 5SKU 46719
Assembly
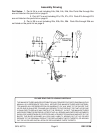
Refer to Assembly Drawing on page 9.
1. To attach the Cup (#13), screw it onto the Material Sleeve (#10).
2. Screw the Regulator (#30) onto the Air Connector (#28).
Operation
Warning! Never allow the Spray Gun and Cup (#13) to lay on it’s side when the Cup (#13)
is full of paint.
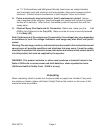
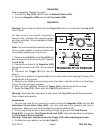
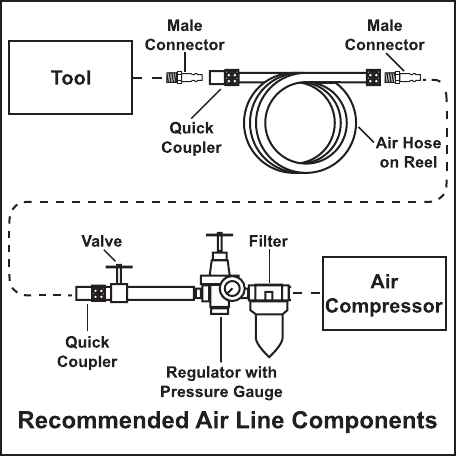
For best service, you should incorporate a
shut-off valve, regulator with pressure gauge,
and filter, as shown. All are available at Harbor
Freight Tools.
Note: It is recommended that you test the Spray
Gun on scrap material, to become familiar with
the available adjustments, prior to use.
1. Remove the Lid (#14) on the Cup (#13) and
add no more than 5.3 ounces of paint. Replace
the Lid (#14).
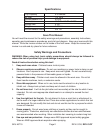
2. Connect the air hose to the Regulator (#30)
and set the pressure to 43 PSI. Do not exceed
43 PSI.
3. Squeeze the Trigger (#15) to test the
pattern.
4. Spray from a distance of approximately four to eight inches while keeping the Spray Gun
perpendicular to the ground.
5. Maintain your distance as you evenly move from side to side. Do not fan or arc the Spray
Gun or the paint will apply unevenly.
6. When you finish spraying, release the Trigger (#15), and disconnect the air hose.
7. Empty the Cup (#13). Never store the Cup (#13) with paint in it.
Warning! Even after the compressor is shut down, the Cup (#13) may still be pressurized.
Open it slowly and carefully.
Adjustments
1. You can fine tune the air pressure by slowly turning the Regulator (#30) and the Air
Adjustment Screw Valve Assy. (#29). You may also adjust the pressure with the air
compressor. Make sure you do not exceed the recommended 43 PSI.
2. You can adjust the amount of fluid coming through the gun with the Fluid Control
Knob (#19). Loosen the Fluid Contol Knob Lock (#20), make the adjustment, and tighten
the Fluid Contol Knob Lock (#20).
Warning! Keep your hand away from the Trigger (#15) while adjusting jet shape..
3. To adjust the spray pattern, turn the Air Cap (#1).
REV 03e, 09g