Page 13
SKU 93012 For technical questions, please call 1-800-444-3353
1. Loosen the Blade Tension Knob (21) by turning counterclockwise about two full turns.
Refer to the photo at the bottom of page 9.
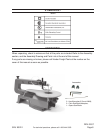
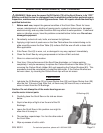
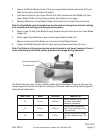
2. Push down slightly on the Upper Rocker Arm (29) and remove Saw Blade (45) from
Upper Blade Holder (37) by pulling forward. See photo on next page.
3. Remove Blade from Lower Blade Holder (40) and pull up through the access hole.
Note: The Saw Blade must be installed so that its teeth are facing forward (front cutting),
or to the side (side cutting), and always pointing down.
4. Attach a new (5 inch) Saw Blade through access hole and hook pins into Lower Blade
Holder (40).
5. Attach upper Saw Blade hook pins into the Upper Blade Holder (37).
Make sure the pins of the Blade are in the slots of the Blade Holders.
6. Tighten the Blade Tension Knob (21) by turning clockwise about two full turns.
Note: The Blade is at the proper tension when the slack is just barely removed. Over or
under tensioning of the blade causes premature breakage during operation.
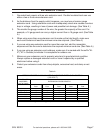
The Scroll Saw can use a variety of blade widths and thicknesses, as long as they are five
inches long and have the cross pin for mounting. These are used for cutting various types of
materials as listed below:
hcnI/hteeThtdiWssenkcihTtuClairetaM
01.ni11.0.ni020.0
4/3-1ot4/1nosnrutmuideM
,slatemtfos,doowhcni
.draobdrah,
draobllaw
51.ni11.0.ni020.0
roftpecxeevobasaemaS
ot8/1morfdoowstuC.doow
.kcihthcni2/1-1
81.ni590.0.ni01.0
sdoow
tfosnostucnihtartxE
4/1otpuslairetamrehtodna
.hcni
Upper Blade Holder (37)
Saw Blade (45)
REV 02/07


