16 306531
Displacement Pump Service
Before you start:
1. Have all necessary parts on hand. Whenever you
replace the packings, also replace the glands and
bearing. If you are using a repair kit, use all the
parts for the best results. See the parts pages to
order the kits.
2. Displacement Pump Repair Kit 206925 includes
repair parts for the pump throat and piston. Parts
included in the kit are marked with one asterisk, for
example (6*), in the text and drawings.
3. To replace the throat packings, which are included
in Repair Kit 206728, refer to the Air
Motor and Throat Disassembly on page 13.
Displacement Pump Disassembly
WARNING
To reduce the risk of serious injury whenever you
are instructed to relieve pressure, always follow the
Pressure Relief Procedure on page 8.
1. Flush the pump.
2. Relieve the Pressure
3. Disconnect the hoses, remove the pump from its
mounting, and clamp the air motor base in a vise.
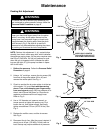
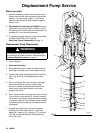
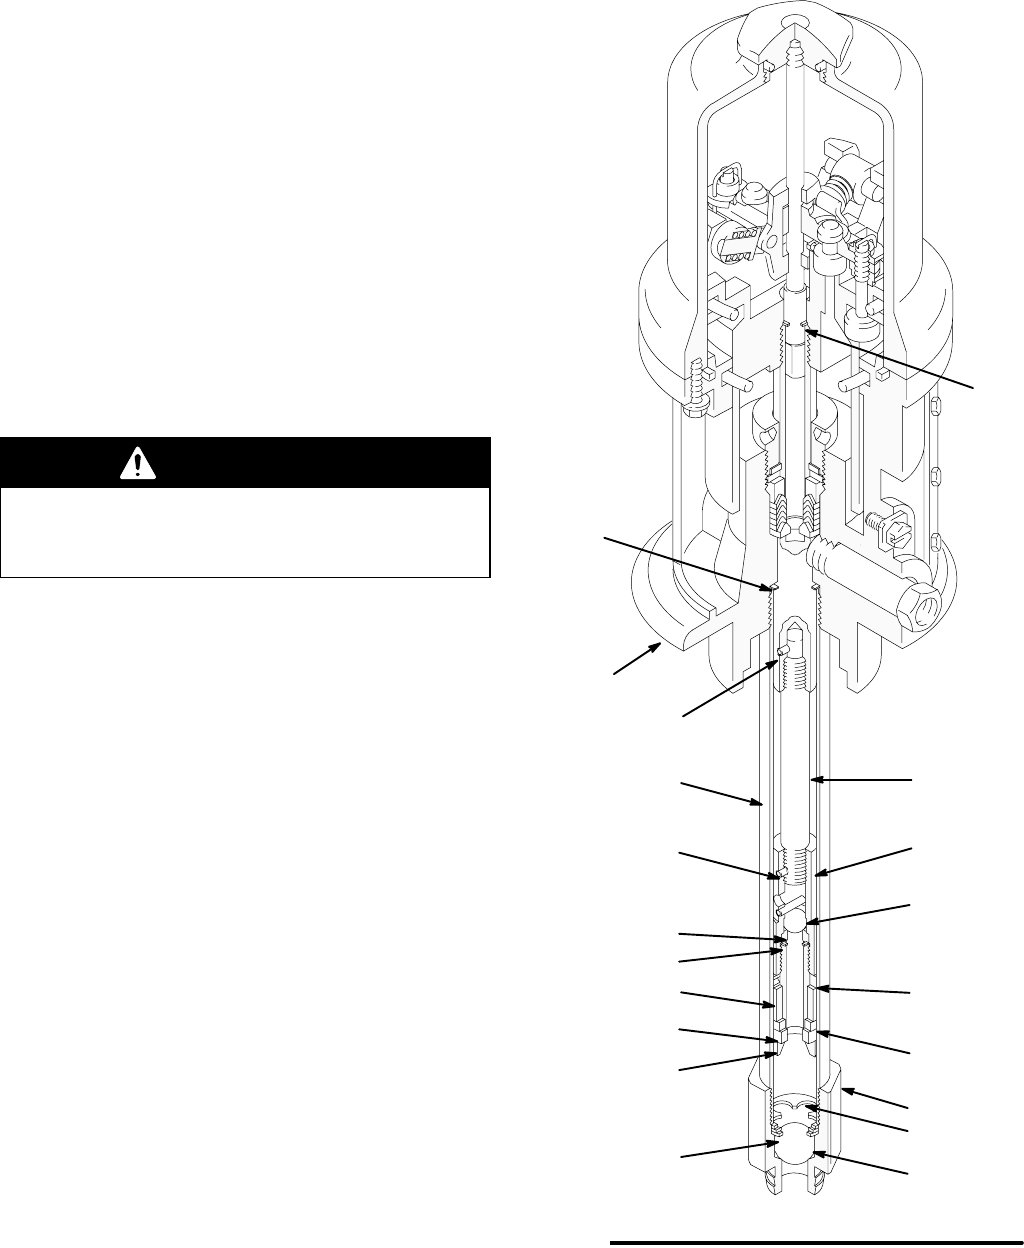
4. Unscrew the intake valve body (22) from the riser
tube (12). See Fig. 9. Disassemble the intake
valve.
5. Clean and inspect the parts for wear or damage,
and replace parts as needed. Unless further
service is needed, reassemble and reinstall the
intake valve, using liquid sealant on the male
threads. See Fig. 9.
6. Use a strap wrench on the riser tube (12) to screw
it out of the air motor base (55). Carefully inspect
the smooth inner surface of the cylinder for scoring
or irregular surfaces. Such damage causes prema-
ture packing wear and leaking, so replace the part
if damaged.
7. Unscrew the piston body (13) from the piston
coupling (14). Remove the ball (2*), seat (19*),
gasket (6*), bearing (18*), packing (17*), and seal
(16). Do not remove the press-fit brass bearing
(15*). See Fig. 9.
04212B
Fig. 9
*17
†7
3*
21
22
12
13
16*
18*
*6
2*
*19
*4
14
10
46
55
*15
*4
7


