Repair
6 311845C
Reassembly
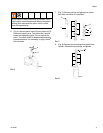
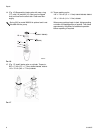
Note: For steps 1-4 refer to Fig. 9.
1. Stack male gland (7) on piston rod (5).
2. Alternately stack blue UHMWPE (8) and brown
UHMWPH (9) (288466, 288467, 2884680) or
leather (288819) packings on piston rod.
Note orientation.
3. Install female gland (10).
4. Install backup washer (13) and piston wiper (12) on
piston valve (6). Note orientation.
The special sealing patch on piston valve threads is
good for 4 repackings. Use Loctite
®
on piston valve
threads after 4 repackings.
F
IG. 9
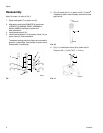
5. (Fig 10) Install ball (11) in piston rod (5). If Loctite
®
is applied to piston valve threads, ensure that none
gets on ball.
F
IG. 10
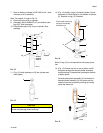
6. (Fig. 11) Install piston valve (6) to piston rod (5).
Torque to 55 +/- 3 ft-lb (74.57 +/- 4 N•
m).
FIG. 11
ti8854a
13
12
10
7
8
9
5
6
ti8855a
11
5
ti8856a
6
5


