


5
(c) Release the button to lock the selector lever.
NOTE:
Turn the selector lever (do not push the button) to
check if it is completely locked and make sure that
it does not turn.
4. When chipping and chiseling at “hammering”:
CAUTION:
⅜ If the selector lever is switched during motor rotation,
the tool can start to rotate abruptly, resulting in
unexpected accidents. Make sure to switch the
selector lever when the motor is at a complete stop.
⅜ If the bull point or cold chisel is used at the position
of ”rotation + hammering”, the tool can start to
rotate, resulting in unexpected accidents. Make
sure that they are used at the position of
”hammering”.
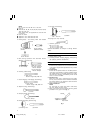
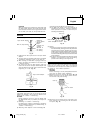
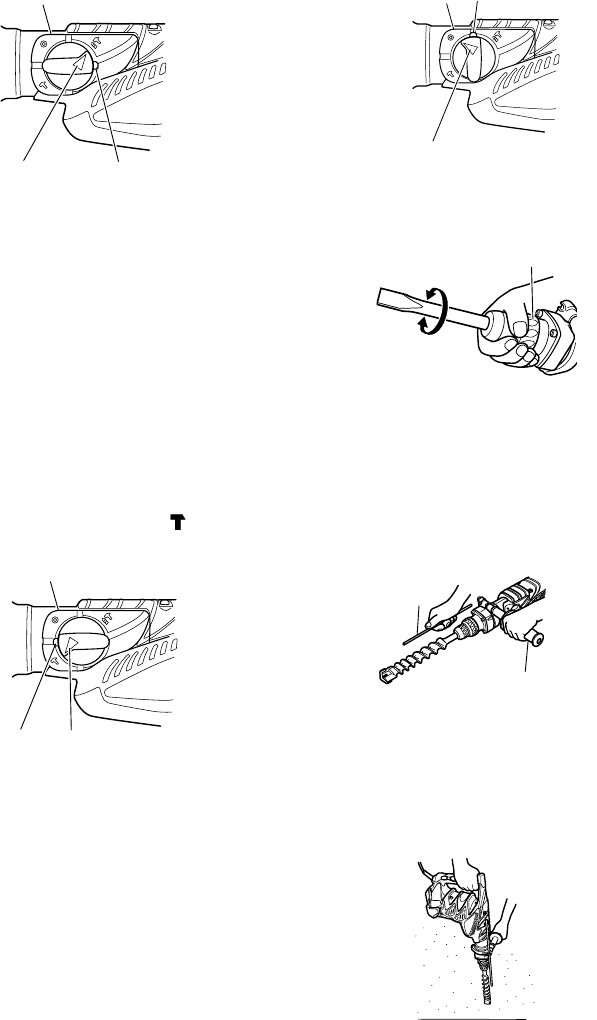
(1) Switching to ”hammering”
(a) Push the button, release lock and turn the selector
lever counterclockwise.
(b) Align ▲ of the selector lever and
of the lever
holder as illustrated in Fig. 7.
(c) Release the button to lock the selector lever.
NOTE:
Turn the selector lever (do not push the button) to
check if it is completely locked and make sure that
it does not turn.
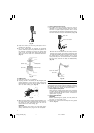
(2) When fixing working positions of tools such as cold
chisel, etc.,
(a) Push the button, release lock and turn the selector
lever.
Align ▲ of the selector lever and
of the lever
holder as illustrated in Fig. 8.
(b) Release the button to lock the selector lever.
(c) Turn the grip as illustrated in Fig. 9 and fix the
tool to the desired working direction.
(d) Switch the selector lever to “hammering”
according to the procedures mentioned in the
above item (1) and secure the position of the tool.
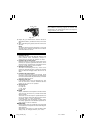
5. Install the stopper (Fig. 10)
(1) Loosen the side handle and insert the straight portion
of the stopper into the handle bolt hole.
(2) Move the stopper to the specified position and
rotate the grip of the side handle clockwise to fix
the stopper.
6. Warming up (Fig. 11)
The grease lubrication system in this unit may
require warming up in cold regions.
Position the end of the bit so makes contact with
the concrete, turn on the switch and perform the
warming up operation. Make sure that a hitting
sound is produced and then use the unit.
Fig. 9
Grip
Fig. 11
Fig. 7
Lever holder
Button
Selector lever
Fig. 8
Lever holder
Button
Selector lever
Side handle
Stopper
Fig. 10
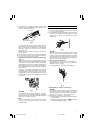
Button
Selector lever
Lever holder
Fig. 6
01Eng_DH45MR_Eng 1/7/11, 4:58 PM5