


8
Fig. 15
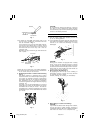
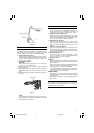
(2) Mount the core bit shank on the main body in the
same manner as in mounting the drill bit and the
bull point. (Fig. 16)
Fig. 16
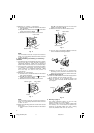
(3) Insert the center pin into the guide plate until it
reaches the extremity.
(4) Fit in the guide plate by aligning its concaved
portion with the core bit tip. When the position of
the concave is shifted by turning the guide plate
right or left, the guide plate never slips off even
when the drill is used in a downward direction.
(Fig. 17)
Fig. 17
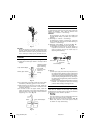
2. Drilling holes
(1) Insert the plug into a receptacle.
(2) A spring is built in the center pin. By straightly and
gently pressing it to the wall or floor surface, the
entire surface of the core bit tip attains contact to
start the hole drilling job. (Fig. 18)
Fig. 18
(3) When the hole depth reaches approximately 5 mm,
the hole position can be determined. Then remove
the center pin and guide plate from the core bit
and continue the hole drilling job.
CAUTION:
When removing the center pin and guide plate,
always disconnect the plug from the receptacle.
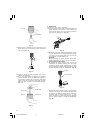
3. How to dismount the core bit
⅜ By holding the rotary hammer (with the core bit
inserted) in an upward position, drive the rotary
hammer to repeat impact operation two or three
times, whereby the screw is loosened and the rotary
hammer becomes ready for disassembly. (Fig. 19)
Fig. 19
⅜ Remove the core bit shank from the rotary hammer,
hold the core bit with one hand, and strongly strike
the head of the SDS max shank portion of the core
bit shank with a manual hammer two or three
times, whereby the round head screw is loosened
and the rotary hammer is ready for disassembly.
(Fig. 20)
Core bit shank
Core bit
Core bit
Center pin
Guide plate
Core bit tip
Core bit
Core bit shank
01Eng_DH50MRY_ENG 07/8/8, 19:078