


English
15
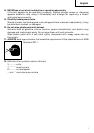
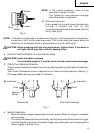
<UC12SD>
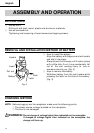
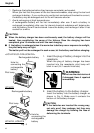
1. Insert the battery into the battery charger.
Insert the battery into the battery charger as
shown in Fig. 4. Make sure it contacts the
bottom of the battery charger.
2. Insert the plug of battery charger into the
receptacle.
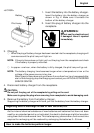
WARNING:
Do not use the electrical cord
if damaged. Have it repaired
immediately.
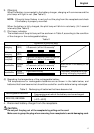
3. Charging
⅜ When the plug of battery charger has been inserted into the receptacle, charging will
commence and the pilot lamp will light on.
NOTE: If the pilot lamp does not light, pull out the plug from the receptacle and check
if the battery is properly mounted.
⅜ In approx. one hour, when the battery is fully charged, the pilot lamp will go out.
NOTE: The battery charging time becomes longer when a temperature is low or the
voltage of the power source is too low.
When the pilot lamp does not go off even if more than four hour has passed after
start of the charging, stop the charging and contact your HITACHI AUTHORIZED
SERVICE CENTER.
4. Disconnect battery charger from the receptacle.
CAUTION:
Do not pull the plug out of the receptacle by pulling on the cord.
Make sure to grasp the plug when removing from receptacle to avoid damaging cord.
5. Remove the battery from the battery charger.
Supporting the battery charger with hand, pull out the battery from the battery charger.
Regarding electric discharge in case of new batteries, etc.
As the internal chemical substance of new batteries and batteries that have not been
used for an extended period is not activated, the electric discharge might be low when
using them the first and second time. This is a temporary phenomenon, and normal time
required for recharging will be restored by recharging the batteries 2 – 3 times.
How to make the batteries perform longer.
Fig. 4
Battery
Pilot Lamp