


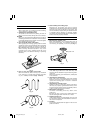


3
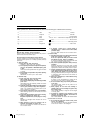
Sanding paper
Pad
Fig. 1
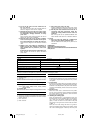
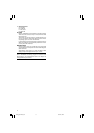
5. Attaching and Removing the Dust Bag
(1) Attaching the Dust Bag
As shown in Fig. 2, hold the dust gate and push it in
the direction of Arrow A to attach it to the dust outlet.
(2) Removing the Dust Bag
As shown in Fig. 2, hold the dust gate and pull it in
the direction of Arrow B to remove it from the dust
outlet.
B
A
Dust gate
Dust bag
Dust outlet
Fig. 2
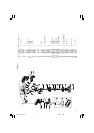
Dial
Fig. 3
CAUTION
Prior to the sanding operation, make sure the material
of surface you are going to sand.
If the surface under sanding operation is expected to
generate harmful / toxic dusts such as lead painted
surface, make sure the dust bag or appropriate dust
extraction system is connected with dust outlet tightly.
Wear the dust mask additionally, if available.
Do not inhale or touch the harmful / toxic dusts
generated in sanding operation, the dust can
endanger the health of yourself and bystanders.
6. Adjustment of speed (SV13YA only)
The SV13YA is equipped with the electric control
circuit which enables non-step speed control. To
adjust the speed, turn the dial shown in Fig. 3.
When the dial is set to “1”, the sander operates
at the minimum speed (7000 min
–1
). When the dial
set to “6”, the sander operates at the maximum
speed (12000 min
–1
). Adjust the speed according to
the material to be cut and working efficiency.
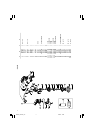
By adjusting the dial, match the speed to the material and type of work.
Material
Grain
Dial scale
Rough grinding Fine grinding
Paintwork:
Sanding 180 400 3 – 6
Repairs
(scratches, rust spots) 120 240 2 – 4
Stripping 40 80 2 – 4
Wood:
Softwood 60 – 80 240 3 – 6
Hardwood 60 180 3 – 5
Veneers 240 320 2 – 4
Metals:
Aluminium 80 240 2 – 4
Steel 60 240 3 – 6
Stainless steel 120 240 3 – 6
Note: Please use this table as a standard.
7. RCD
The use of a residual current device with a rated
residual current of 30 mA or less at all times is
recommended.
01Eng_SV13YA_US 9/17/10, 9:283