


11
English
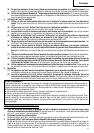
1.3 Replacing the batteries
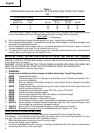
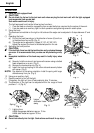
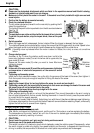
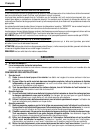
(1) Loosen the hook screw with a Phillips-head screwdriver (No. 1). (Fig. 7)
Remove the hook cover by pushing in the direction of the arrow. (Fig. 8)
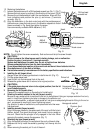
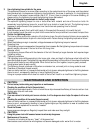
(2) Remove the old batteries and insert the new batteries. Align with the
hook indications and position the plus (+) and minus (–) terminals
correctly. (Fig. 9)
(3) Align the indentation in the hook main body with the protuberance of
the hook cover, press the hook cover in the direction opposite to that of
the arrow shown in Fig. 8 and then tighten the screw.
Use commercially available AAAA batteries (1.5 V).
NOTE:
Do not tighten the screw excessively. Such action could strip the screw threads.
CAUTION:
●
Failure to observe the following can result in battery leakage, rust or malfunction.
Position the plus (+) and minus (–) terminals correctly.
Replace both batteries at the same time. Do not mix old and new batteries.
Remove exhausted batteries from the hook immediately.
●
Do not discard batteries together with normal trash and do not throw batteries into fire.
●
Store batteries out of the reach of children.
●
Use batteries correctly in accordance with the battery specifications and indications.
Fig. 8
Arrow
Fig. 9
,
.
,.
Hook
Indentation
Hook cover
Protuberance
Protuberance
AAAA
batteries
Indentation
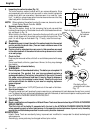
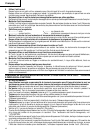
2. Installing the bit (Impact driver)
Always follow the following procedure to install driver bit. (Fig. 10)
(1) Pull the guide sleeve back.
(2) Insert the bit into the hexagonal hole in the anvil.
(3) Release the guide sleeve and it returns to its original position.
CAUTION:
●
If the guide sleeve does not return to its original position, then the bit
is not installed properly.
3. Removing the bit (Impact driver)
Please do the opposite point on the method of installing bit.
4. Selecting the socket matched to the bolt (Impact wrench)
Be sure to use a socket which is matched to the bolt to be tightened. Using an improper socket will not only
result in insufficient tightening but also in damage to the socket or nut.
A worn or deformed hex. or square-holed socket will not give an adequate tightness for fitting to the nut or
anvil, consequently resulting in loss of tightening torque.
Pay attention to wear of socket hole, and replace before further wear
has developed.
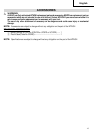
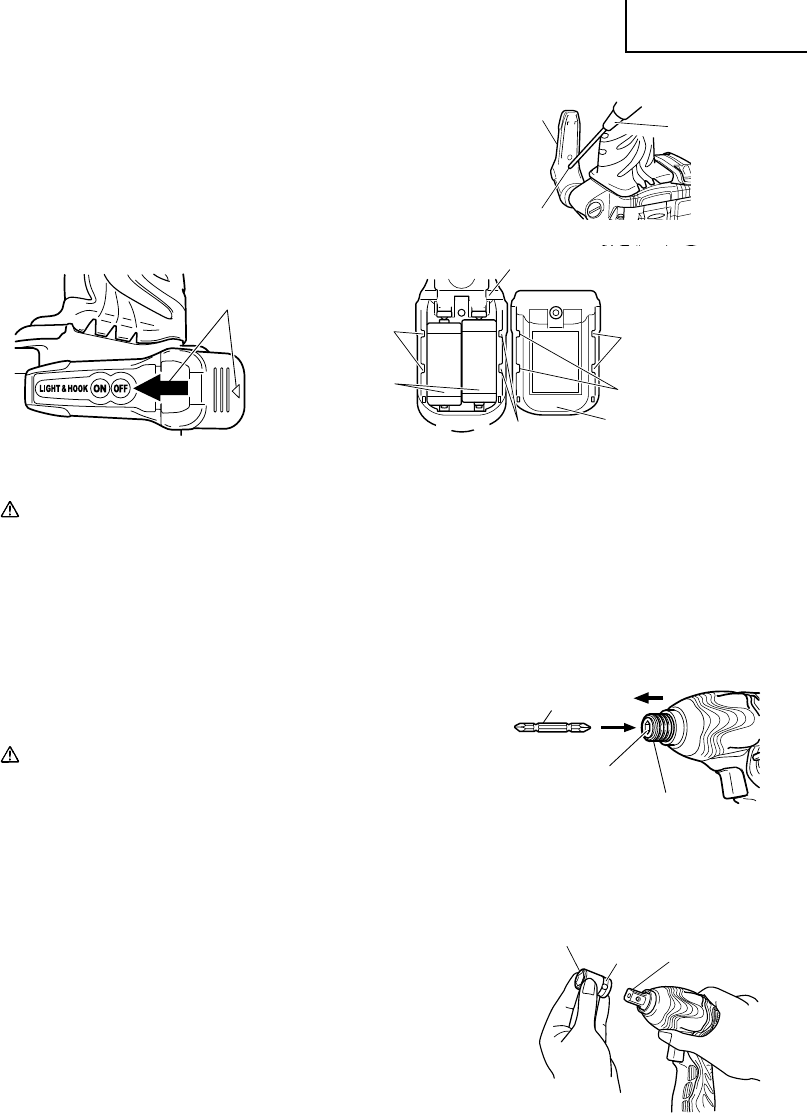
5. Installing a socket (Impact wrench)
Align the plunger located in the square part of the anvil with the hole in
the hex. socket. Then push the plunger, and mount the hex. socket on
the anvil. Check that the plunger is fully engaged in the hole. When
removing the socket, reverse the sequence. (Fig. 11)
6. Retaining ring type (Impact wrench)
(1) Align the square portions of the socket and the anvil with each other.
(2) Make sure to firmly install the socket by pushing it all the way into the
anvil.
(3) When removing the socket, pull it out of the anvil.
Fig. 10
Movement
Driver bit
Hexagonal hole
in the anvil
Guide sleeve
Fig. 7
Hook
Screw
Phillips-head
screwdriver
Hexagonal socket
Groove
Anvil
Fig. 11