


13
English
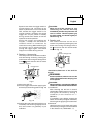
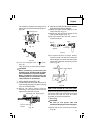
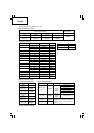
The rotation is released, turn the grip and
adjust the cold chisel to desired position.
(Fig. 15)
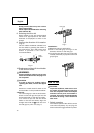
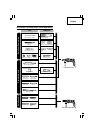
(3) Turn the change lever to
mark.
(Fig. 13)
Then bull point or cold chisel is locked.
CAUTION:
When conducting continuously the
chiselling work, the heat build-up inside
the rotary hammer may cause trouble.
When conducting continuously the
chiselling work for 15 minutes, rest the
rotary hammer for 30 minutes.
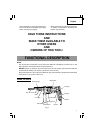
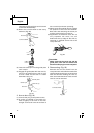
7. Using depth gauge (Fig. 16)
(1) Loosen the knob on the side handle, and
insert the depth gauge into the mounting
hole on the side handle.
(2) Adjust the depth gauge position
according to the depth of the hole and
tighten the knob bolt securely.
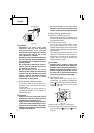
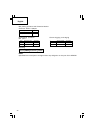
8. How to use the drill bit (taper shank)
and the taper shank adaptor.
(1) Mount the taper shank adaptor to the
rotary hammer. (Fig. 17)
(2) Mount the drill bit (taper shank) to the
taper shank adaptor. (Fig. 17)
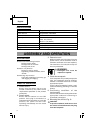
(3) Turn the switch ON, and drill a hole in
prescribed depth.
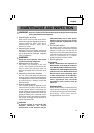
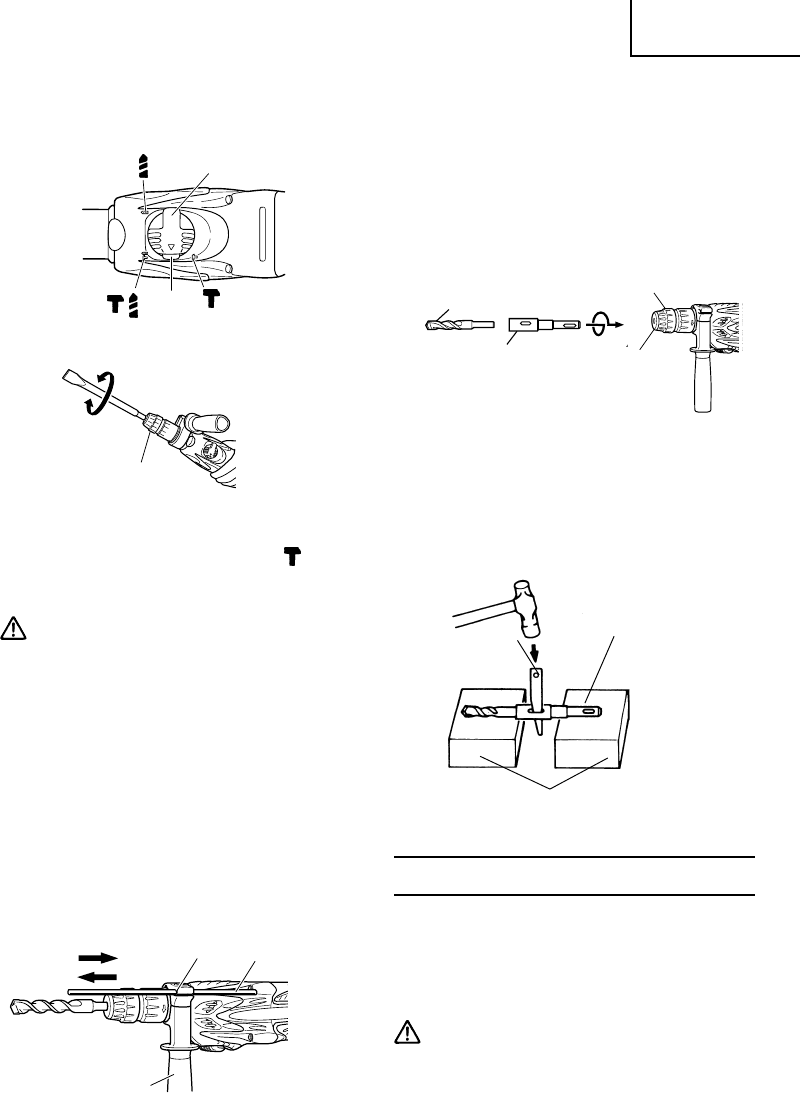
(4) To remove the drill bit (taper shank),
insert the cotter into the slot of the taper
shank adaptor and strike the head of the
cotter with a hammer supporting on the
rests. (Fig. 18)
HOW TO USE THE CORE BIT (FOR LIGHT LOAD)
When boring penetrating large hole use the
core bit (for light load). At that time use with
the center pin and the core bit shank
provided as optional accessories.
1. Mounting
CAUTION:
Be sure to turn power OFF and
disconnect the plug from the receptacle.
(1) Mount the core bit to the core bit shank.
(Fig. 19)
Fig. 14
Change lever
Push
button
Fig. 15
Grip
Mounting hole
Depth gauge
Knob on side
handle
Fig. 16
Front cap
Grip
Taper shank
auaptor
Drill bit
Fig. 17
Cotter
Rests
Taper shank adaptor
Fig. 18