


OM-225 333 Page 4
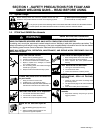
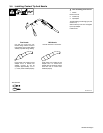
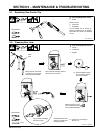
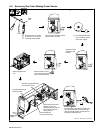
3-3. Installing Gun Into Welding Power Source
803 497-A / Ref. 803 378-A
Open pressure assembly.
Remove screws (3) from
cover, and remove cover
from wire drive assembly.
Insert gun cable through opening in front
panel. Route weld cable, trigger leads, and
gas hose through opening in drive housing.
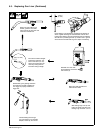
Reinstall cover and
secure with screws (3).
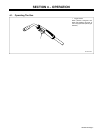
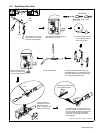
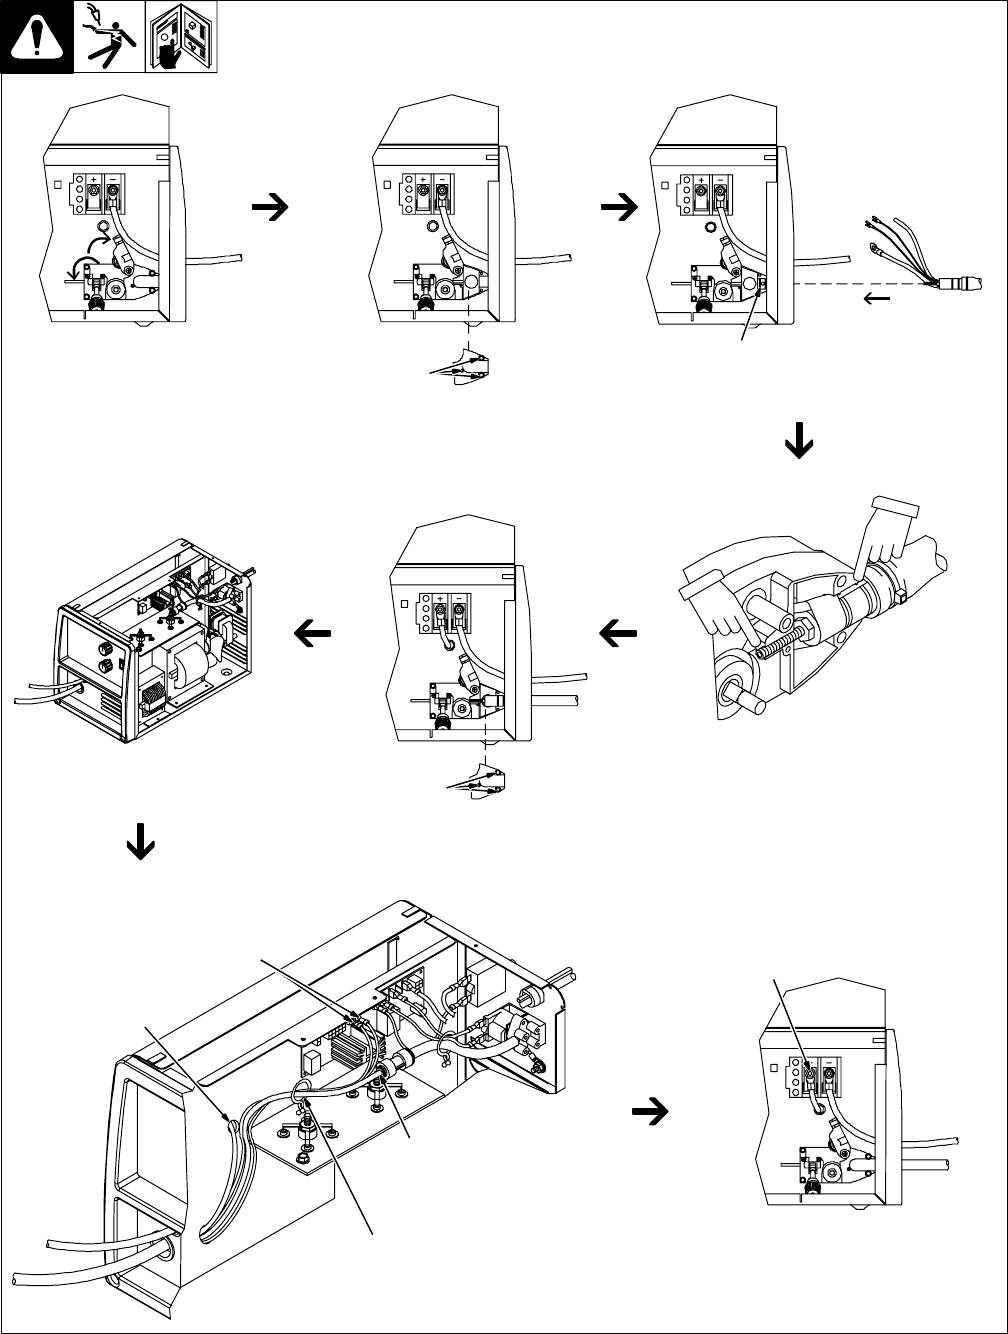
Remove wrapper from
unit.
Connect gas hose to adapter
(if unit is not equipped with
gas solenoid valve, secure
hose to wiring harness).
Connect trigger leads to
RC3 and RC4 on PC1.
Route weld cable through
opening in baffle.
Connect weld cable
to weld terminal.
Reinstall wrapper onto unit.
Secure leads and hose
with cable tie(s).
. Thread wire according to
Section 3-5.
Y Turn off welding power source.
. If existing gun requires removal, see Section 5-5.
. Route wires, cable, and hose to avoid contact
with sharp edges, hot surfaces, or moving parts.
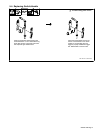
Reinstall cable end into drive housing
with retaining grooves inserted into the
two retaining ribs. Be sure to position
gas hose up and trigger leads down.
Position liner in groove so that end is
flush with back of groove.