


OM-948 Page 10
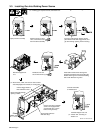
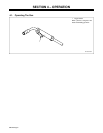
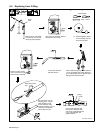
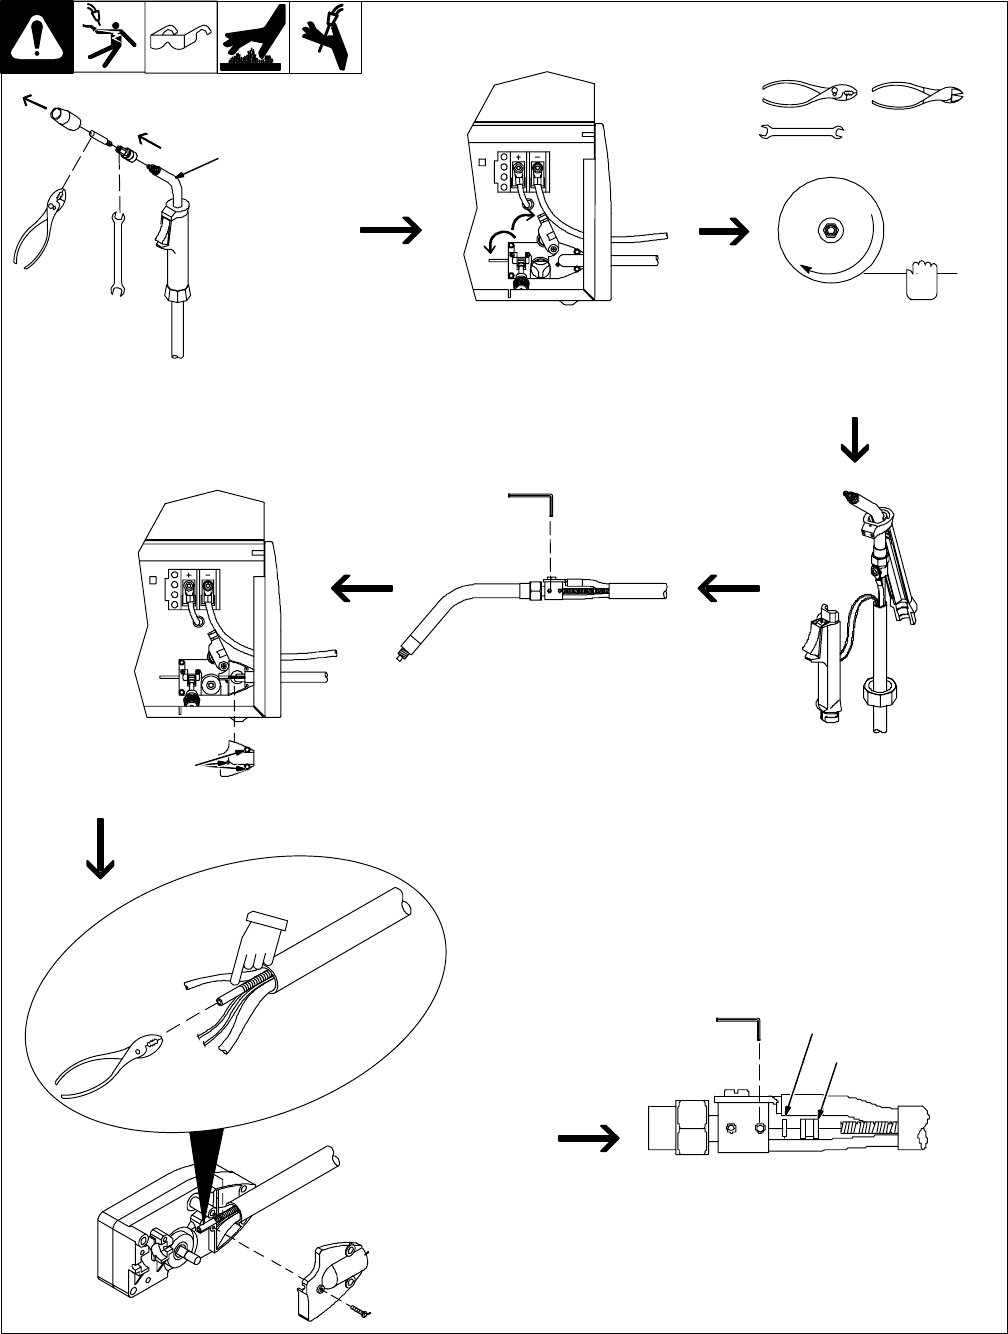
5-4. Replacing Liner O-Ring
803 496-B / 803 497-A
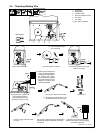
Head
Tube
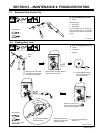
Tools Needed:
8 mm / 10 mm
Remove nozzle. Cut off wire
at contact tip, and remove
contact tip and tip adapter.
8 mm
Open pressure assembly. Retract
wire from liner onto spool.
. Hold wire tightly to keep it
from unraveling. Secure
end of wire at spool.
Remove screws (3) from
cover, and remove cover
from wire drive assembly.
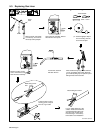
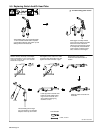
Twist handle locking ring counterclockwise
1/4 turn and slide it down cable. Separate
gun handle by lifting top rear portion up and
sliding forward over head tube.
Loosen liner setscrew
with allen wrench.
Pull end of liner out from
housing groove, Lay gun
cable straight on a flat
surface. Pull liner until it
exits the head tube. It is not
necessary to completely
remove liner from gun.
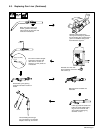
Black tubing end of
liner.
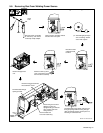
Y Turn off welding power source.
Collar
Loosen collar setscrew with
allen wrench. Remove collar
and O-ring. Install replacement
O-ring, reinstall collar, and
tighten setscrew.
2 mm
2 mm
O-Ring