15
Always pay extreme care and attention to the
preparation of the machine before starting.
Remove all wrenches and tools from the floor
and the machine.
Always keep blade guard and transmission
guard in place.
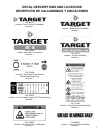
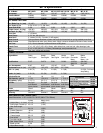
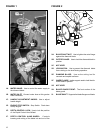
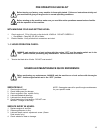
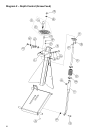
(See Fig. 1 and 2)
Always set the Engine Switch (1D) to the "OFF"
position before mounting the Blade (2E).
• Set the Engine Switch (1D) to the "OFF" position.
• Raise the machine to a high position [by cranking the
Raise/Lower Hand Wheel] or [by loosening and tightening
the E-Z Tilt Handle].
• Raise the front half of the Blade Guard (2H).
• Unscrew the Blade Shaft Nut (2A). Remove Outer
Flange (2B).
• Fit Diamond Blade (2E) on the Blade Shaft Arbor.
• Install Outer Flange (2B) into the Blade Shaft (2I)
making sure that the Locking Pin (2D) passes through the
Diamond Blade (2E) and into the Inner Flange (2F).
Note the direction of rotation of the blade. The
direction of rotation is shown by an arrow on
the Diamond Blade (2E). Make sure that the
contact surfaces on the Diamond Blade (2E),
Inner & Outer Flanges (2B & 2F) and Blade
Arbor are clean.
• Rotate Outer Flange (2B) and the Blade (2E) in the
opposite direction of blade rotation to remove backlash.
• Install and tighten Blade Flange Nut using the Blade Shaft
Wrench [50 lb.-ft. (68 N-m)] while firmly holding the
Diamond Blade (2E).
• Lower front half of Blade Guard (2H).
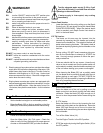
The Blade Shaft Nut (2A) on the Right Hand
side has Left Hand threads.
On Gasoline Engine Models:
1. Refer to the engine operating manual for proper engine
operation.
2. Fill the engine fuel tank and check the engine oil level.
Refer to the engine manual for detailed information.
3. Start the engine. Refer to the engine manual for de-
tailed information.
4. Let the engine warm up at half throttle. All sawing is
done at full throttle. The governor is factory set for the
correct engine speed. Do not change the Governor
setting – it is factory set for the correct speed.
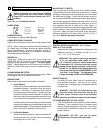
WARNING: To STOP ENGINE, PUSH the Engine
Stop Switch DOWN, located on the handle
support of the saw. [Wait for all engine
movement to stop.]
On Air Models:
1. Connect the saw to an adequate air supply of 175 CFM
@ 100 PSI (120 CFM @ 90 PSI per minute).
2. Check the lubricator (located in the air manifold unit) for
the proper oil level. If you need oil, unscrew the plug and
fill with an SAE #10 Wt. detergent automotive engine oil.
The oil should always be visible in the sight glass. Do not
overfill.
3. Open the air valve located in the air manifold unit. The air
motor should be free wheeling. The lubricator should be
adjusted to feed 4 drops per minute. Monitor the drip rate
through the sight-feed dome. Turn the adjustment screw
counterclockwise to increase the drip rate and clockwise
to decrease it.
On Electric Models:
1. Single phase concrete saws are furnished with the
correct approved NEMA configuration plug on the motor
pigtail. It will be necessary to provide a matching NEMA
configuration receptacle on the extension cord into which
the motor is connected. For example: a 5 HP saw set for
230 volts operation is supplied with a NEMA #L6-30P plug
on the pigtail. The extension cord will require an L6-30R
to make the proper connection.
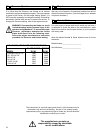
Take into account the working conditions from
the health and safety point of view.
FUEL: Check the engine maintenance manual.
* Gas Models: Unleaded gasoline is recommended.
• Check that the engine oil level is correct. Because the
engine often operates at an angle, check the oil level
(with engine horizontal) frequently to ensure that the
oil level never falls below the lower mark on the
dipstick. 10W30 oil is recommended.
4
Check Before Starting
5 Fitting The Blade
6 Starting The Power Source


