


19
English
SPECIFICATIONS
Voltage (110V, 230V, 240V)
Power Input 1240W*
Full-load Impact Rate 1400/min.
Weight (without cord, side handle) 20 kg
* Be sure to check the nameplate on product as it is subject to change by areas.
STANDARD ACCESSORIES
(1) Case .............................................................................1
(2) Hexagon Bar Wrench (for 8mm bolt) .......................1
(3) Hexagon Bar Wrench (for 4mm bolt) .......................1
Standard accessories are subject to change without
notice.
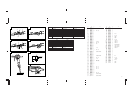
OPTIONAL ACCESSORIES (sold separately)
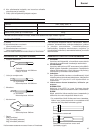
⅜ Asphalt Cutting
⅜ Groove Digging and Edging
⅜ Crushing
⅜ Scooping Work
⅜ Grease
500g (in a can)
70g (in a tube)
30g (in a tube)
Optional accessories are subject to change without notice.
APPLICATIONS
This Demolition Hammer should be applied to
demolishing concrete, chiseling off concrete, grooving,
bar cutting installation of piping and wiring, sanitary
facility installation, machinery installation, water supply
and drainage work, interior jobs, harbor facilities and
other civil engineering works.
PRIOR TO OPERATION
1. Power source
Ensure that the power source to be utilized conforms
to the power requirements specified on the nameplate
of this Demolition Hammer.
2. Power switch
Ensure that the power switch is in the OFF position. If
the plug is connected to a receptacle while the power
switch is in the ON position, this Demolition Hammer
will start operating immediately, which could cause a
serious accident.
3. Extension cord
When the work area is remote from the power source,
use an extension cord of sufficient thickness and rated
capacity. The extension cord should be kept as short
as practicable.
4. Mounting an accessory, such as a bull point, a cutter,
etc.
CAUTION:
Be sure to switch OFF and disconnect the attachment
plug from the receptacle to avoid a serious accident.
NOTE:
For accessories such as a bull point and a cutter, use
only Hitachi genuine parts.
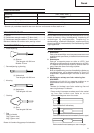
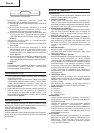
* It is possible to attach an accessory, such as a bull
point, a cutter, etc., with any of the three types of
the accessory shank portion shapes shown below.
Air Tool Shank Bit
Standard Hex. Shank Bit (Combo Type)
Retaining Groove Bit without Collar
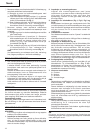
⅜ Mounting air tool shank and standard hexagonal
shank tools.
(1) Clean, then smear the accessory shank portion
with grease or machine oil.
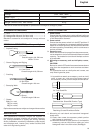
(2) Move the retainer to open position A and seat the
accessory, such as a bull point, a cutter, etc. in the
hexagonal hole in the front cover (See Fig.1).
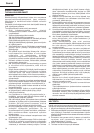
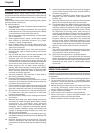
(1) Cutter
Overall Length: 410, 520 mm
Width: 75 mm
(1) Scoop
Overall Length: 546 mm
(1) Bull Point
Overall Length: 410 mm
(1) Cold Chisel
Overall Length: 410, 520 mm