


3
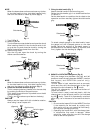
Sleeve
Loosen
Lock collar
Ring
Tighten
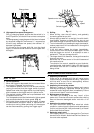
5. Mounting and dismounting of the bit.
For keyed chuck (Fig. 2)
(1) Open the chuck jaws, and insert the bit into the
chuck.
(2) Place the chuck wrench in each of the three holes
in the chuck, and turn it in the clockwise direction
(viewed from the front side). Tighten securely.
(3) To remove the bit, place the chuck wrench into one
of the holes in the chuck and turn it in the
counterclockwise direction.
Fig. 2
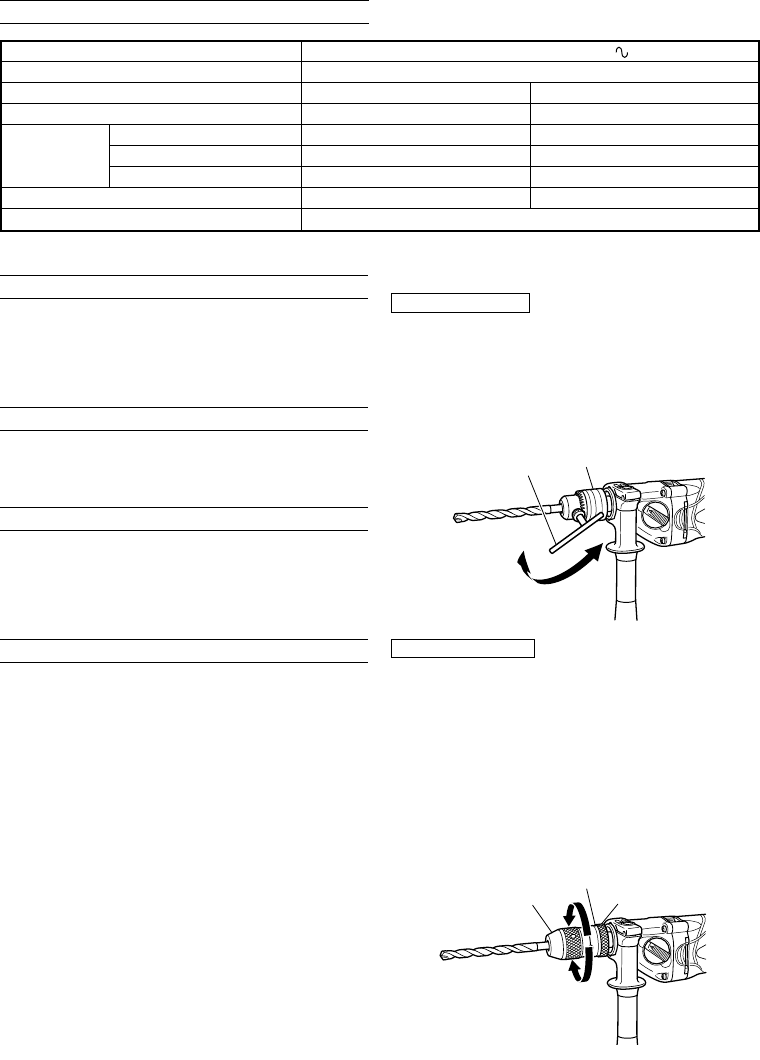
For keyless chuck
The country of use will determine whether Type A or
Type B keyless chuck is required.
⅜ Type A (Fig. 3)
(1) Mounting the bit
Turn the lock collar in the direction “AUF” and open
the chuck. After inserting the drill bit into the chuck
as far it will go, turn the lock collar in the “ZU”
direction. Grip the ring and close the chuck by turning
the sleeve clockwise as viewed from the front.
(2) Dismounting the bit
Turn the lock collar in the direction “AUF” to release
the chucking force. Grip the ring and open the chuck
by turning the sleeve counterclockwise.
Fig. 3
Voltage (by areas)* (110V, 220V, 230V, 240V)
Power input 730 W*
Speed change 1 2
No load speed 0 – 1000 min
–1
0 – 3000 min
–1
Steel 13 mm 8 mm
Capacity Concrete 20 mm 13 mm
Wood 40 mm 25 mm
Full load impact rate 8000 min
–1
26000 min
–1
Weight (without cord) 2.2 kg
STANDARD ACCESSORIES
(1) Chuck Wrench (Spec. only for keyed chuck) ........... 1
(2) Side Handle................................................................ 1
(3) Depth Gauge .............................................................. 1
Standard accessories are subject to change without
notice.
OPTIONAL ACCESSORIES (sold separately)
(1) Impact Drill Bit (for concrete)
3.2 mm – 20 mm dia.
Optional accessories are subject to change without notice.
APPLICATIONS
⅜ By combined actions of ROTATION and IMPACT:
Boring holes in hard materials (concrete, marble,
granite, tiles, etc.)
⅜ By ROTATIONAL action:
Boring holes in metal, wood and plastic.
PRIOR TO OPERATION
1. Power source
Ensure that the power source to be utilized conforms
to the power requirements specified on the product
nameplate.
2. Power switch
Ensure that the power switch is in the OFF position. If
the plug is connected to a receptacle while the power
switch is in the ON position, the power tool will start
operating immediately, inviting serious accident.
3. Extension cord
When the work area is removed from the power
source, use an extension cord of sufficient thickness
and rated capacity. The extension cord should be
kept as short as practicable.
4. Selecting the appropriate drill bit
⅜ When boring concrete or stone
Use the drill bits specified in the Optional Accessories.
⅜ When boring metal or plastic
Use an ordinary metalworking drill bit.
⅜ When boring wood
Use an ordinary woodworking drill bit.
However, when drilling 6.5 mm or smaller holes, use
a metalworking drill bit.
SPECIFICATIONS
*Be sure to check the nameplate on product as it is subject to change by areas.
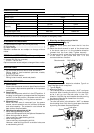
Drill chuck
Chuck wrench
Tighten
Loosen