English
13
WARNING: Be sure to switch power
OFF and disconnect the
plug from the receptacle to
avoid serious trouble.
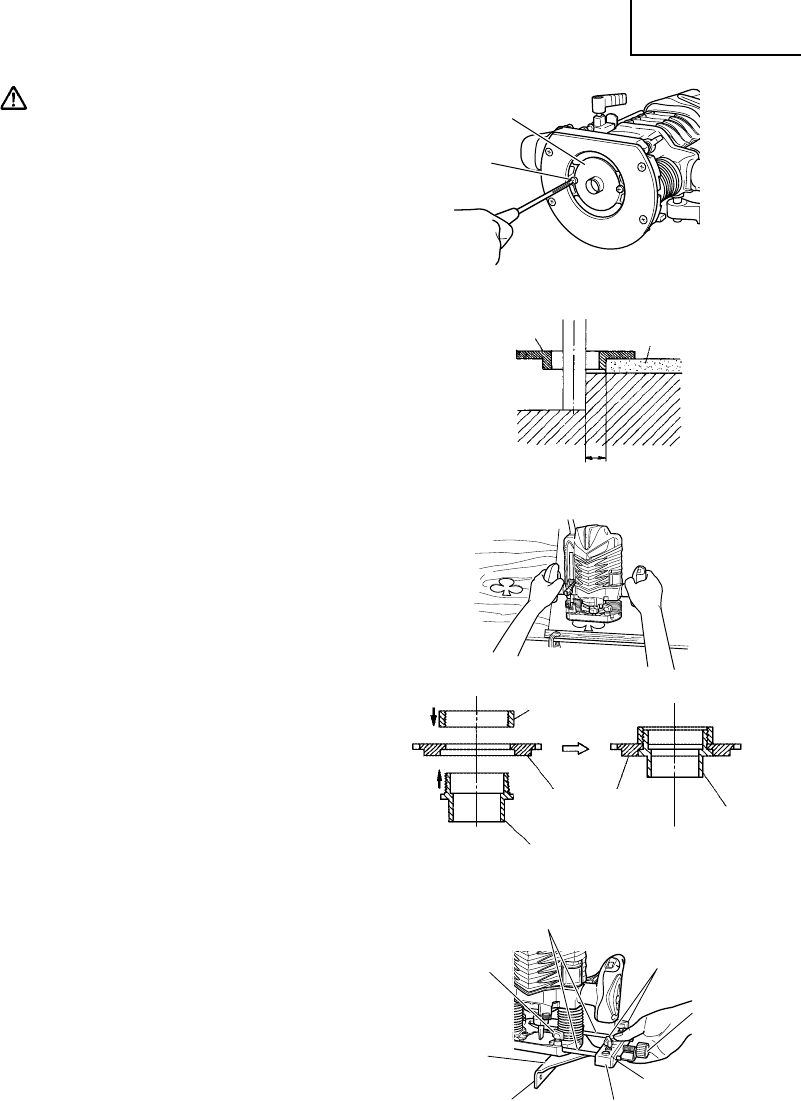
(1) Template Guide:
Use the template guide when employing a
template for producing a large quantity of
identically shaped products.
As shown in Fig. 7, secure the template
guide to the base of the router with two
accessory screws. At this time, ensure that
the projection side of the template guide is
facing the bottom surface of the base of the
router.
A template is a profiling mold made of
plywood or thin lumber. When making a
template, pay particular attention to the
matters cescribed blow and illustrated in
Fig. 8.
When using the router along the interior
plane of the template, the dimensions of the
finished product will be less than the
dimensions of the template by an amount
equal to dimension “A”, the difference
between the radius of the template guide
and the radius of the bit. The reverse is frue
when using the router along the exterior of
the template.
Secure the template to the workpiece. Feed
the router in the manner that the template
guide moves along the template as shown
in Fig. 9.
Template Guide Adaptor: (Fig. 10)
If you are using a template guide adapter, it
is possible to use template guides produced
by other firms. The template guide adaptor,
like the template guide, is attached to the
base with two accessory screws. Attach
template guides made by other firms to the
template guide adaptor.
(2) Straight guide (Fig. 11)
Use straight guide for chamfering and
groove cutting along the materials side.
1 Insert the guide bar into the hole in the bar
holder, then lightly tighten the 2 wing bolts
(B) on top of the bar holder.
Fig. 7
Template
Guide
Screw
Template guide
adaptor
Template guide
Template
guide
Template guide
Fig. 8
Fig. 9
Fig. 10
Fig. 11
Wing bolt (C)
Guide bar
Straight
guide
Feed
screw
Guide plane
Wing bolt (A)
Bar holder
Wing bolt (B)
Bit
Template
Guide
Template
A


