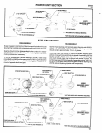
SET-UP PROCEDURE
M104
The following items must be given proper consideration to cor-
rectly apply the ARO Lead Screw Tapper.
1.
Accuracy of positioning the tapdrilled hole with the tapper (X,
Y and Z axis).
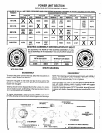
2. Speed at which the material should be tapped (S.F.M., see
page 29)
3. Size and diameter variation of the hole to be tapped (% of ef-
fective thread height).
4. Length - diameter - pitch ratio of thru or blind hole -chip size
- amount of chips -compaction of chips in hole bottom - chip
load on flutes.
5. Coolant or no coolant used -chip flushing and friction of tap
to material (see page 29).
6. Cutting face angle of tap per material (see page 29).
Under favorable conditions, the rated capacity of a given model
tapper may be exceeded.
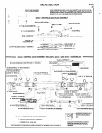
Where the position of the tap drilled hole is held reasonably close
with the tapper (X -Y position), the standard tap chuck is recom-
mended for the application.
Where the X - Y position of the tap drilled hole varies too greatly to
maintain proper cutting conditions, a floating Collet holder is rec-
ommended. The Collet holder has floating capability of .030” T.I.R.
parallel float to compensate for hole shift. This floating holder will
also compensate for about .004” maximum hole angularity. Float-
ing holder and colltets used with holders are listed under “ACCES-
SORIES”, page 22.
It is essential, during the operation of the unit, to have the stroke
adjustment cover door (nameplate) closed to prevent contamina-
tion entry (cutting oil, chips, etc.) into the spindle sleeve area.
Coolant or cutting oil flow should never be directed to the region of
the cover door.
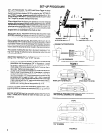
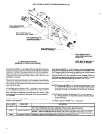
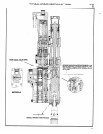
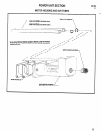
Lead screw and nut may be changed without disturbing any other
section of the tool. Disconnect tool from air supply or shut off air
supply to tool and exhaust (drain) air line to tool of compressed air
before continuing further. Disconnect tubing from sensor valve
ports. Remove three (3) screws (Y154-53) and washers
(Y14-10), housing (45443) spring (49533) and spacer (44848).
Using a wrench on flats at rear of shaft (40516-1), rotate shaft
clockwise, advancing drive spindle approximately 1/4”, or until trip
bracket (41235) is no longer in contact with trip tab (40523-1).
32
CAUTION: If the tool is mounted in a vertical or near vertical posi-
tion, block the chuck end of drive spindle to prevent the spindle
from dropping down when lead screw and nut are removed. Re-
move two (2) set screws (45445) from lead screw (41258-).
NOTE: Small end of tapered hole in shaft (40516-1) is identified
by an “X” stamped on one side of flats at end of shaft. Insert a
punch thru lead screw at side identified with “X” and lightly tap
punch to remove taper pin (45446). After removal of taper pin, pull
on lead screw to remove lead screw and nut assembly (45453-).
REASSEMBLY
Assemble lead screw and nut assembly to shaft (40516-1), align-
ing holes in lead screw with tapered hole in shaft. Assemble taper
pin (45446) - small end first -thru lead screw and shaft from the
side opposite the “X” identification mark on the shaft and as-
semble one set screw (45445) into the same hole in lead screw,
tightening the set screw against taper pin, forcing the pin into lock
position. Torque the set screw to 40 in. Ibs. Assemble the other set
screw (45445) in the opposite side of lead screw and torque to 35
in. Ibs.
Remove block from chuck end of spindle if used, and rotate shaft
(40516-1) if necessary to insure lead screw nut is properly posi-
tioned into housing (40508-2), slot in lead nut aligned with dowel
pin in housing. Insure lead screw and nut area contains proper
amount of grease (see “Air and Lube Requirements”, page 6) as-
semble spacer (44848), spring (49533) and housing assembly
(45452) and adjustment nut (45444) and secure with washers
(Y14-10) and screws (Y154-53).
LEAD NUT TENSION ADJUSTMENT
Remove pipe plug located at the side of lead screw housing
(40508-2). Set trip tabs so the unit will cycle with a minimum of 1”
stroke length. Operate the unit and, using an allen type wrench,
slowly tighten adjustment screw until load is noted on motor (mo-
tor noise decreases slightly).
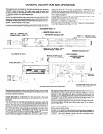
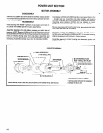
Remote control of start and retract functions is achieved by
introducing air pressure into the proper remote control port (see
pages 2 and 19). The unit is equipped with built-in check valves to
assure free flow to the tool but checks the signal from leaving the
tool thru the remote control line.
5


