10
7.0 Maintenance
7.1 Belt replacement
1. Disconnect the power to the machine to prevent
accidental start-ups. If the machine is plugged
into an outlet, unplug it. If the machine is
hardwired to a branch circuit with a junction box,
remove the fuse or trip the circuit breaker to the
branch.
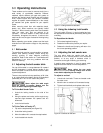
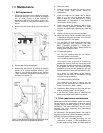
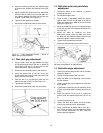
2. Remove the lock knob and top cover (See Figure
6).
Figure 6: Top cover components
3. Remove the side guard and table.
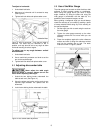
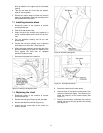
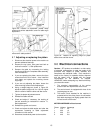
4. Release the belt tension by turning the tension
handle in a counterclockwise direction (See
Figure 7). If the handle is difficult to turn, perform
Track mechanism maintenance according to the
instructions in section 7.2.
Figure 7: Belt adjustment components (Note top cover
removed for removal and replacement of belt.)
5. Remove the belt.
6. Check the drums and platen for scoring or signs
of wear which might require service or
replacement.
7. Check the height of the platen with a straight
edge. If it is not 1/32 inch above the drums,
adjust it according to the instructions in Platen
Replacement or Adjustment in the Machine
Setup section of this manual.
8. Check the drums for looseness which might
cause tracking problems. Correct any loose
condition by tightening or replacing any parts as
required.
9. Slip the new belt onto the drums and platen.
10. Adjust the tension handle clockwise until the belt
is flat against the platen and there is no curling or
buckling of the belt in the middle.
11. Turn the drums by hand to see if the belt tracks
more-or-less true. JUST BECAUSE THE OLD
BELT TRACKED CORRECTLY DOES NOT
MEAN THE NEW BELT WILL. Always check the
tracking when replacing a belt.
12. To adjust the tracking:
12.1. Plug the machine back into the outlet or
reestablish power in the branch.
12.2. Loosen the tracking lock knob.
12.3. Jog the motor on and off as necessary to
observe the tracking, and turn the tracking knob
as necessary to make the belt track in the center
of the platen and drums. Turn the tracking knob
clockwise to move the belt toward the right and
counterclockwise to move the belt toward the left.
12.4. When the belt seems to be tracking
correctly, turn the motor on and leave it running
while fine tuning the tracking.
12.5. Lock the tracking lock knob.
12.6. When the lock knob is secure, turn the
power off and disconnect the machine from the
outlet or branch as in Step 1, above.
13. Replace the table, side guard, top cover and lock
knob by reversing steps 3 and 2, above.
14. If you have not already done so, reconnect the
power to the machine and return it to service.
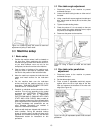
7.2 Track mechanism maintenance
While the use of a dust collection system can extend
service intervals, an accumulation of dust will almost
certainly require periodic cleaning of the tracking
mechanism. The more continuous the use of the
machine, the more frequently this maintenance
should be performed.
As mentioned in the preceding section, the need for
required maintenance is often indicated by difficulty in
adjusting the tension/tracking mechanism.
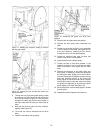
1. With the belt removed according to the
instructions in section 7.1 Belt replacement, pull
out the upper tracking system and clean away all


