11
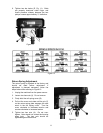
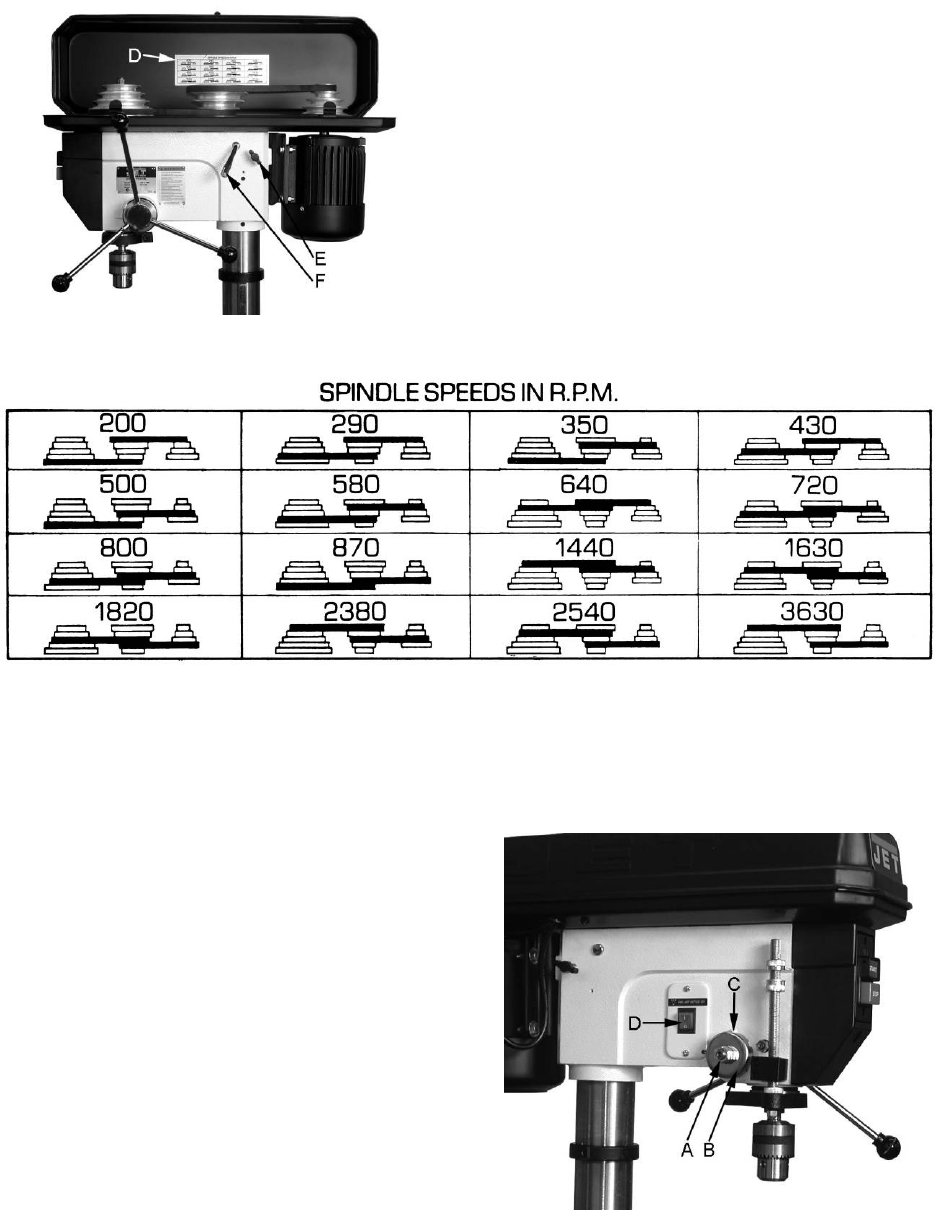
6. Tighten two bar knobs (E, Fig. 11). Belts
are properly tensioned when finger and
thumb pressure midway between the two
pulleys causes approximately ½” deflection.
Figure 11
Figure 12
Return Spring Adjustment
The return spring is adjusted at the factory and
should not need further adjustment. If
adjustment is deemed necessary, follow the
steps below while referring to Figure 13:
1. Unplug the machine from the power source.
2. Loosen two hex nuts (A). Do not remove.
3. Firmly hold the coil spring cover (B).
4. Pull out the cover and rotate until the pin (C)
on the return spring plate engages the next
notch in the coil spring cover. Turn the
cover clockwise to decrease tension and
counter-clockwise to increase tension.
5. Tighten two hex nuts (A). Do not over-
tighten. Nuts should not contact the housing
when tight. The hex nuts should be
tightened against each other.
Figure 13


